In the second video Matt tackles the Heckler & Koch G11 and gives an update on the colouring book and the channel:
Thanks for watching chaps & thanks so much for your support in 2019, we greatly appreciate it. It’s been a busy year and we hope that you’ve all enjoyed our videos!
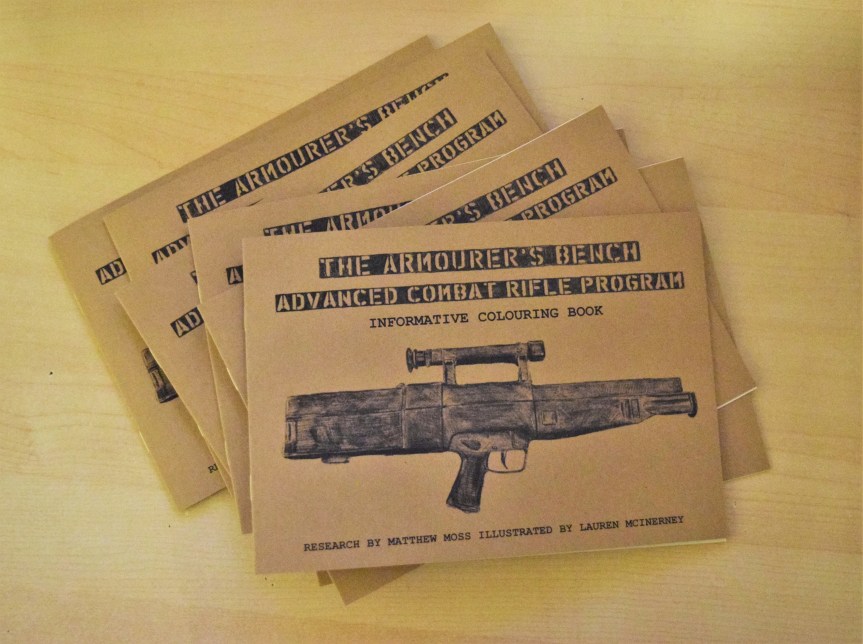
You can still pick up a copy of the ACR colouring book and the G11 sticker at www.armourersbench.com/shop. we’re very much looking forward to seeing your artistic sides when you send us some photos of your colouring to – contact@armourersbench.com.
The Armourer’s Bench are proud to introduce our very first ‘informative colouring (coloring) book’. Not only can you colour in the prototypes from the US Army’s Advanced Combat Rifle trials but you can also learn about the guns, how they worked, performed and the outcome of the trial as you colour!
Why a colouring book? Well, simply put, no one else has done one before! With the help of our brilliant illustrator, Lauren McInnerney, we put the book together to give you guys something a bit different, something fun!
We have a limited run of these little books and we will do our very best to get them our ASAP if you order them for Christmas.
The book includes detailed original illustrations of each of the four ACR guns: the AAI, Colt, Steyr and of course the iconic HK G11. The 8-page booklets are 8×6″ (or A5 sized) and are available now from our website for $6.00, plus shipping.
All the funds raised from the sale of the books will go toward supporting TAB through 2020.
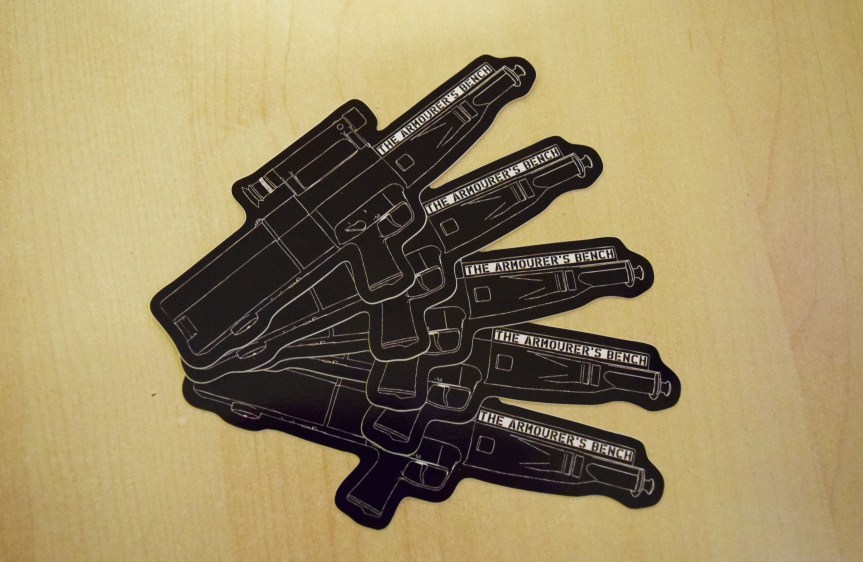
But wait! That’s not all! We also have some extremely cool new stickers available. These 4″ cutout vinyl stickers feature the TAB logo on an illustration of the G11.
And last but not least we also have a small run of TAB logo badges available too!
Our thanks to the collection that holds the G11 for the privileged and nerve-wracking opportunity to field strip it and take a look inside. If you’d like to know more about the history of the G11’s development you can check out our video and full blog on it here. Vic has done a great series of videos looking at the G11 and the other prototype rifles from the US Army’s abortive Advanced Combat Rifle trials – you can find those here.
In this blog we’ll take a closer look at some of the G11’s components, for a demonstration of dissassembly and and explanation of how the rifle works in principal check out the video above.
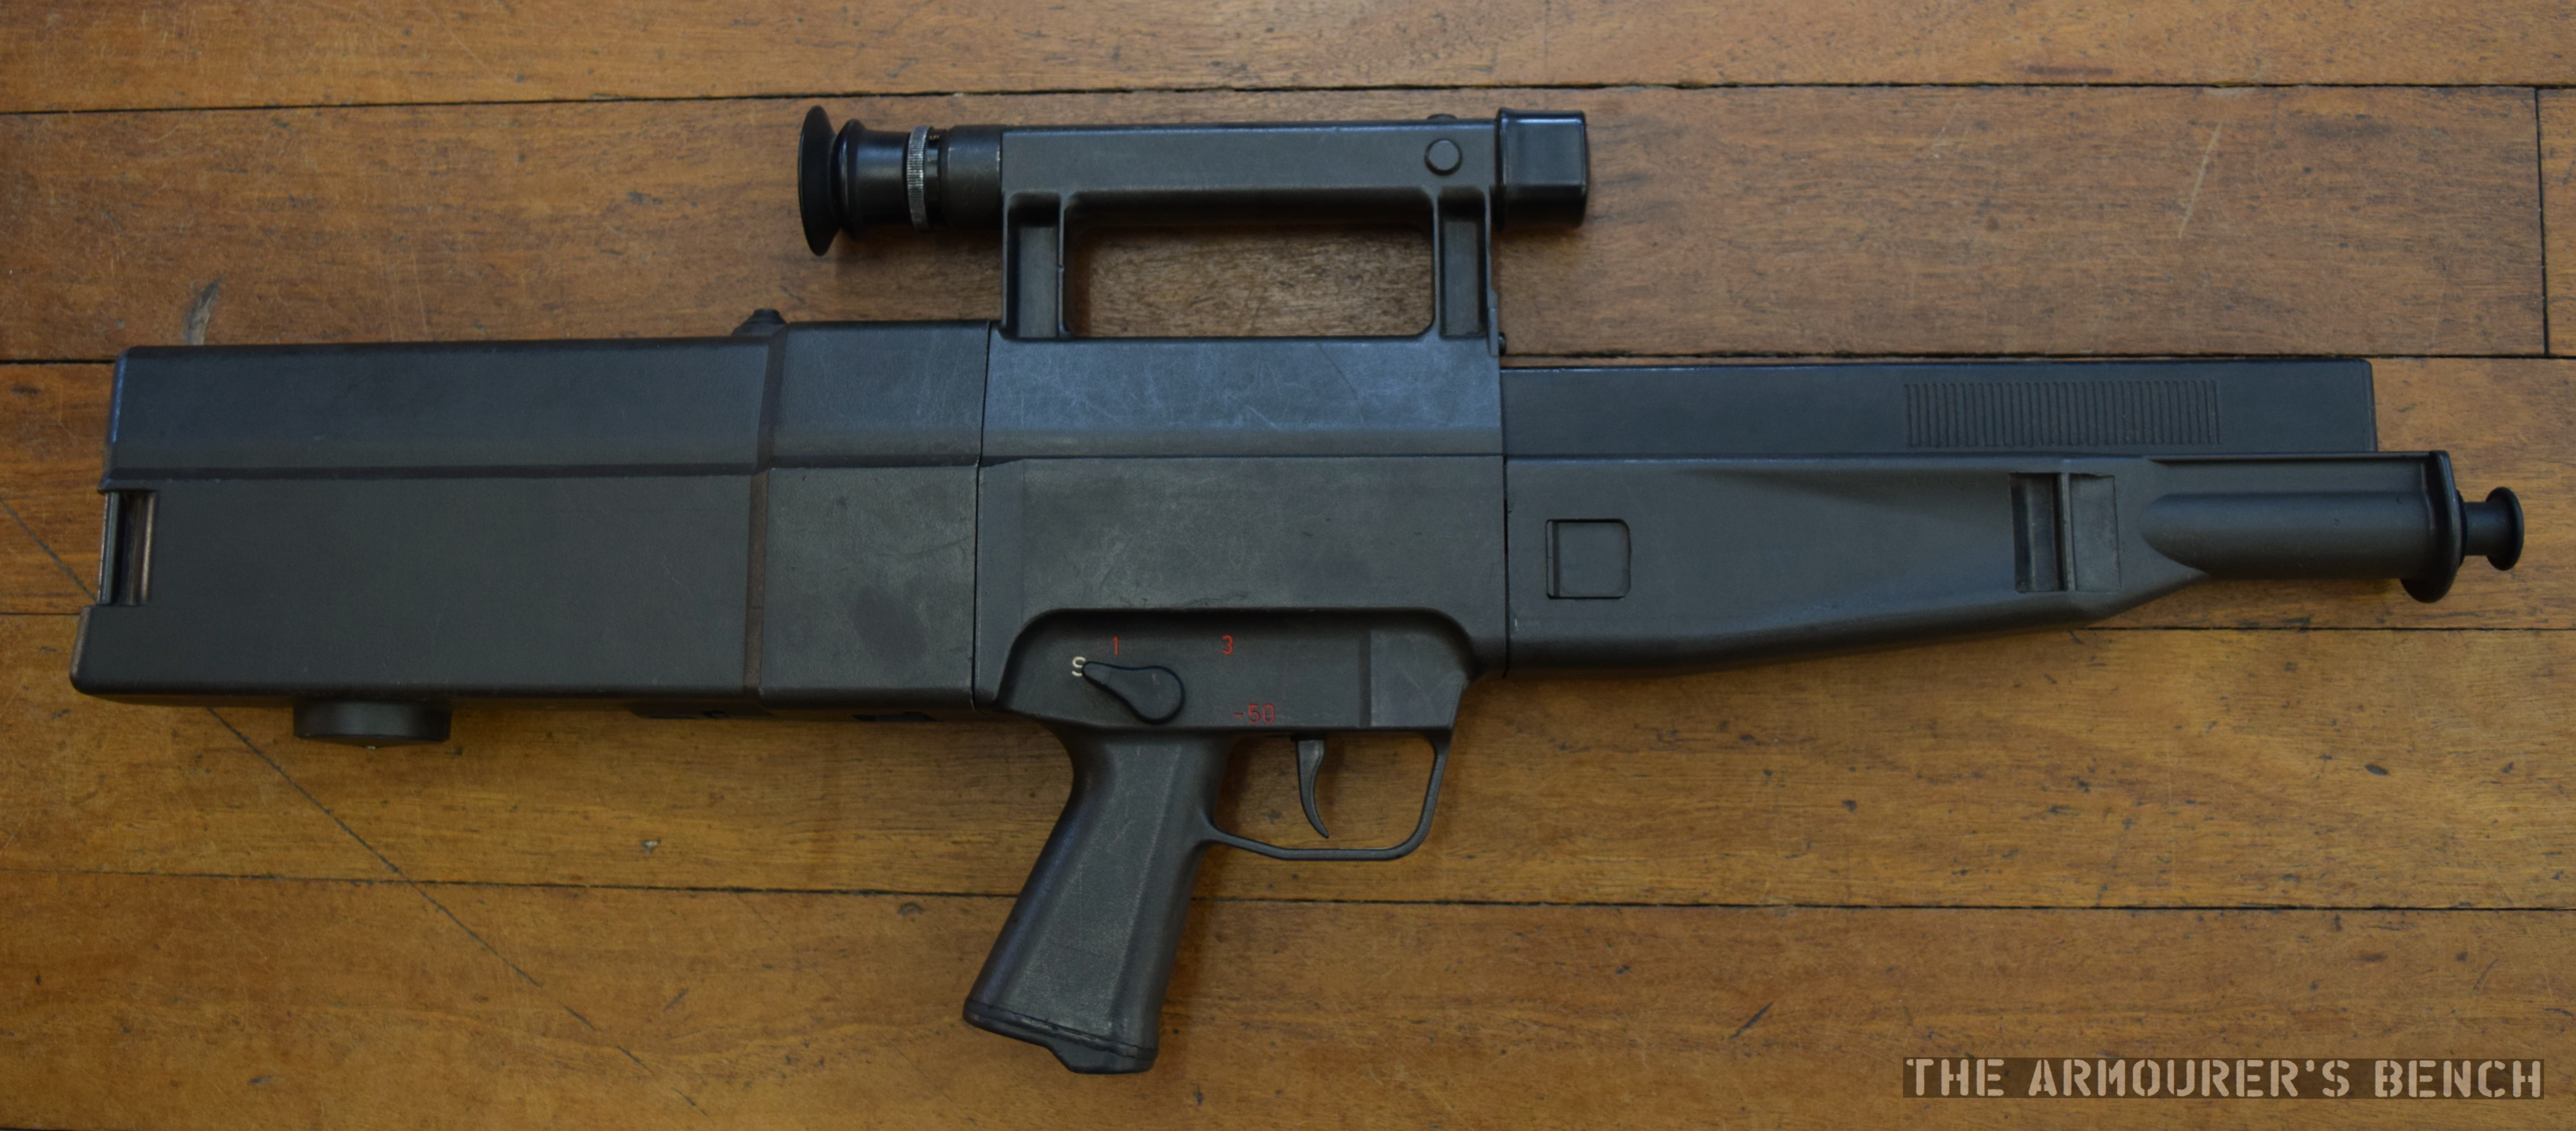
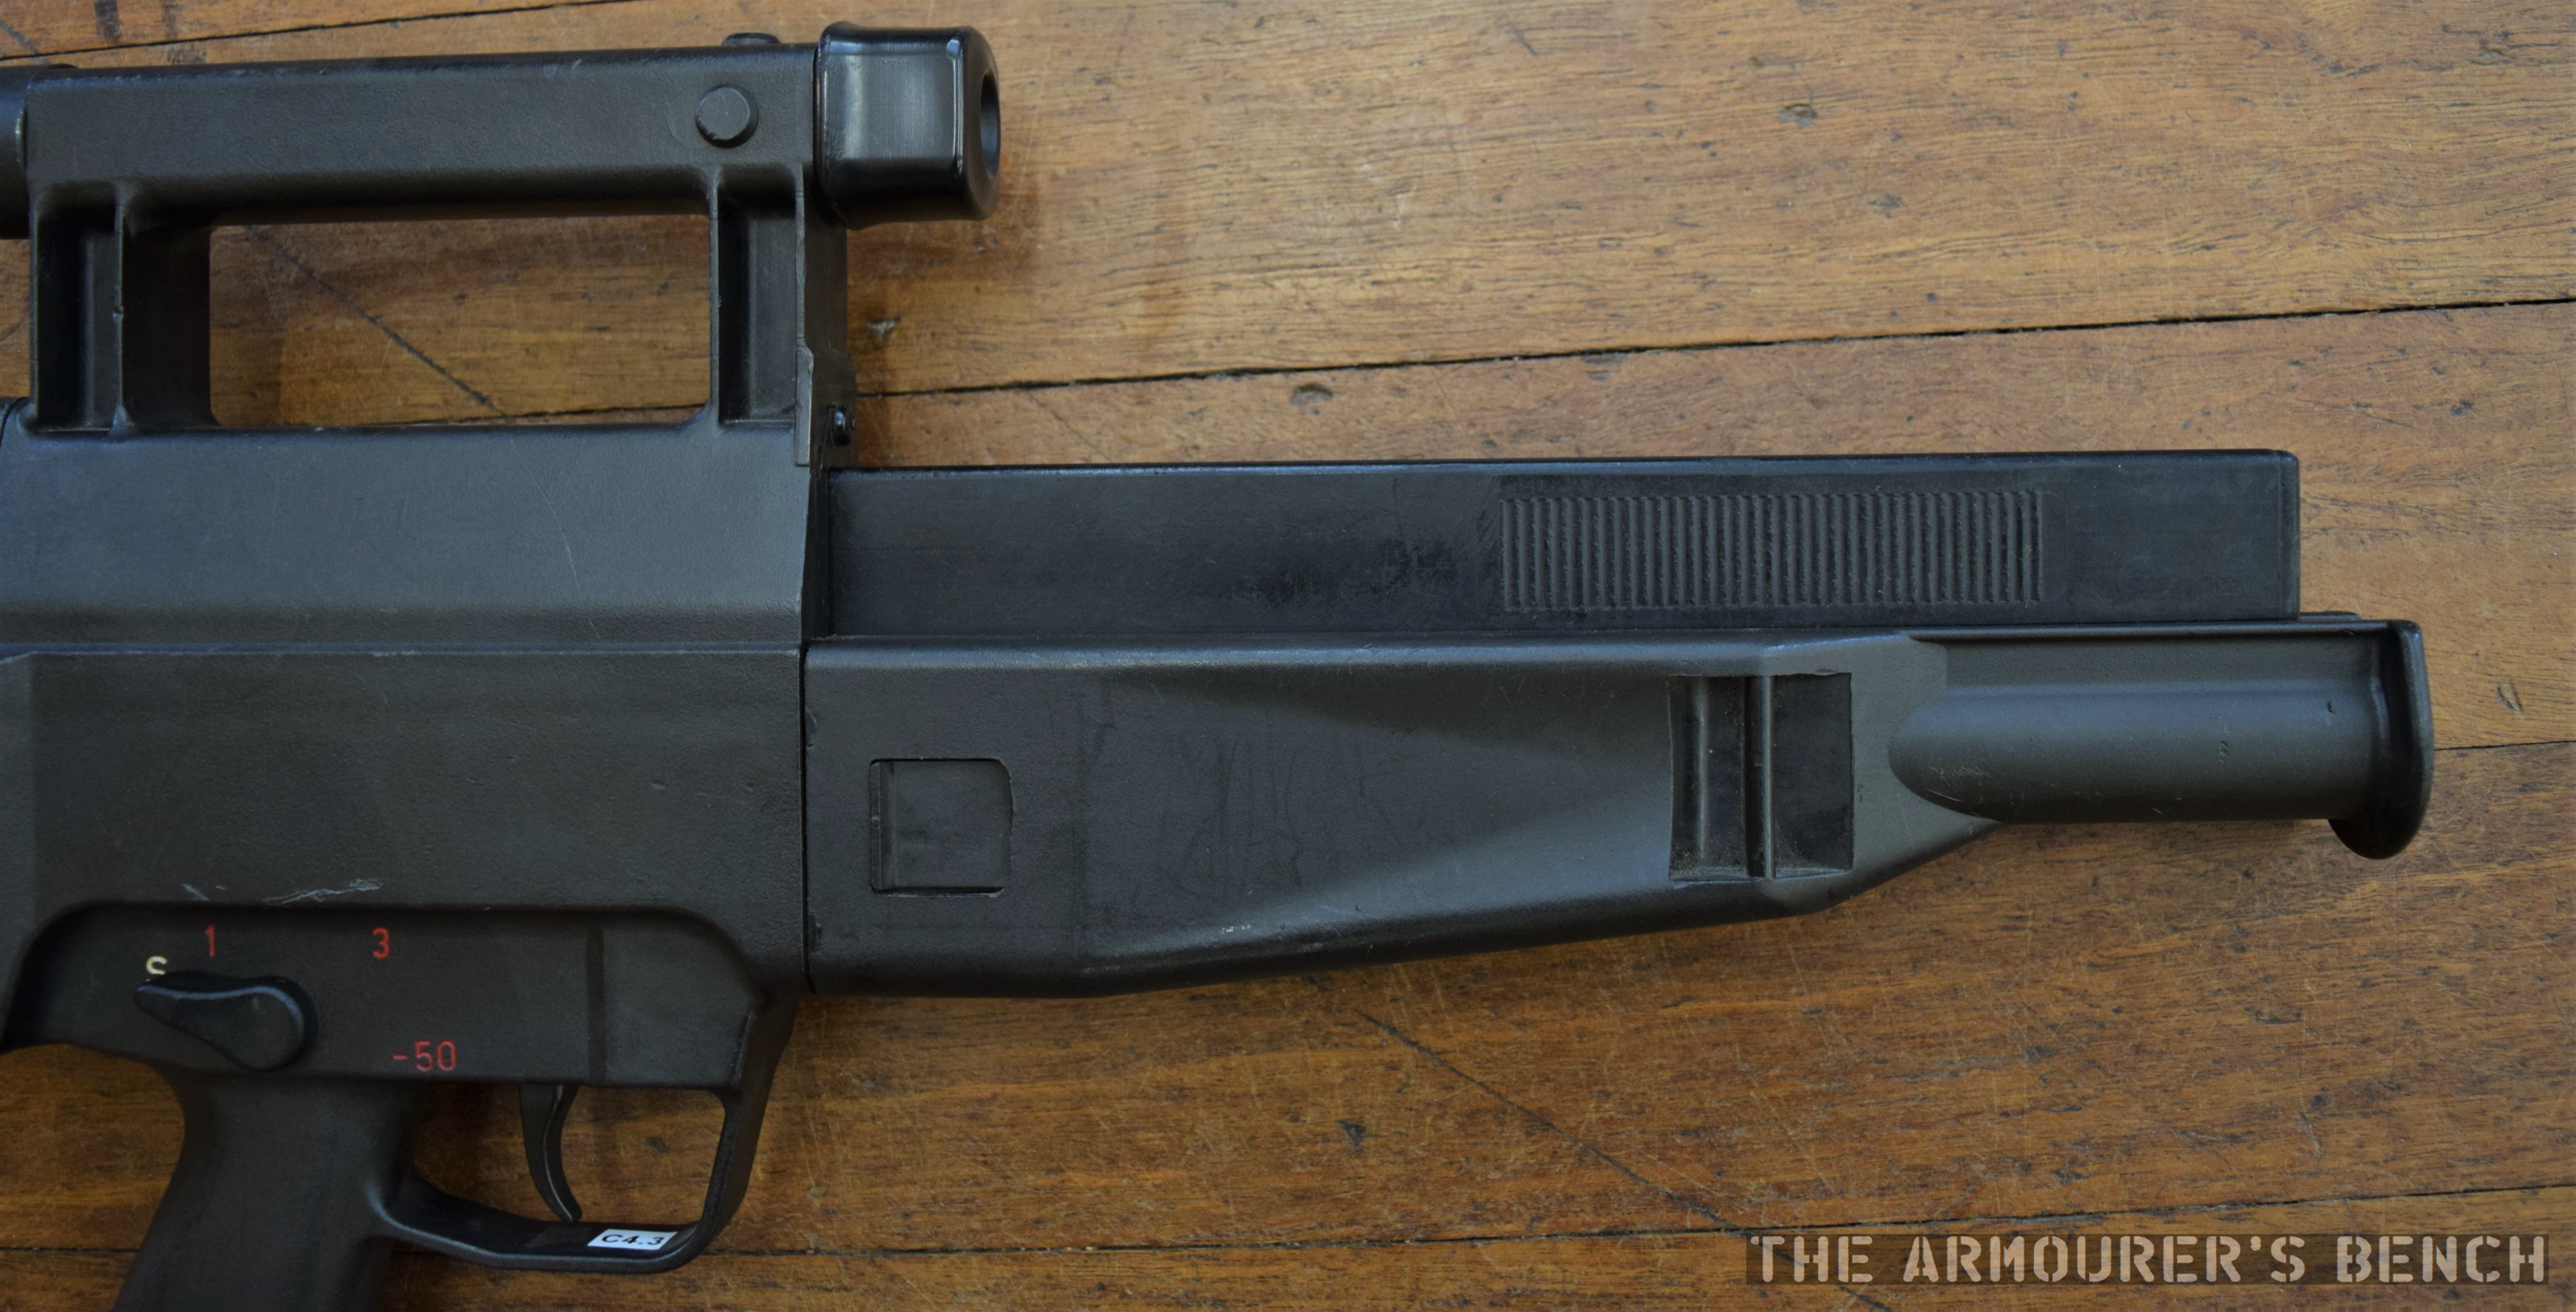
Firstly, lets take a look at the exterior of the rifle. The weapon has a box-like polymer coated outer shell. The shell is made up of three parts, with the butt assembly and forend locking into the centre assembly which includes the pistol grip, trigger mechanism and optical sight. The forend and butt are locked into the centre assembly by plastic locking tabs. While stiff and somewhat difficult to depress the tabs are reportedly prone to breaking.
Left side view of the G11 (Matthew Moss)
Before we look at the G11’s internals lets take a look at the shell components. Here we can see the inside of the forend, we can see a metal (aluminium I believe) barrel tube into which the barrel slides.
Close up of the the inside of the G11’s forend (Matthew Moss)
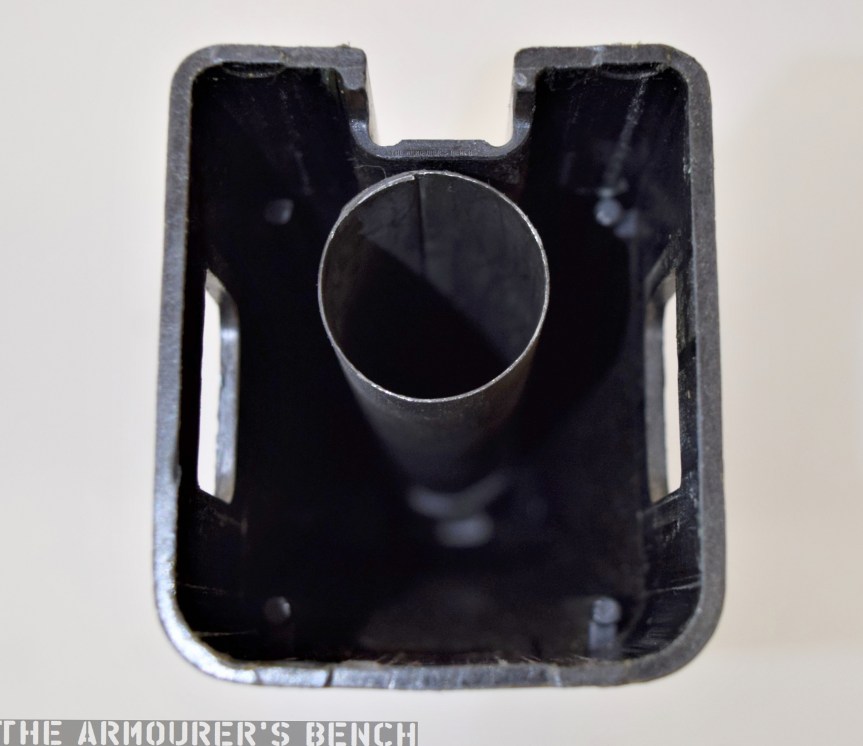
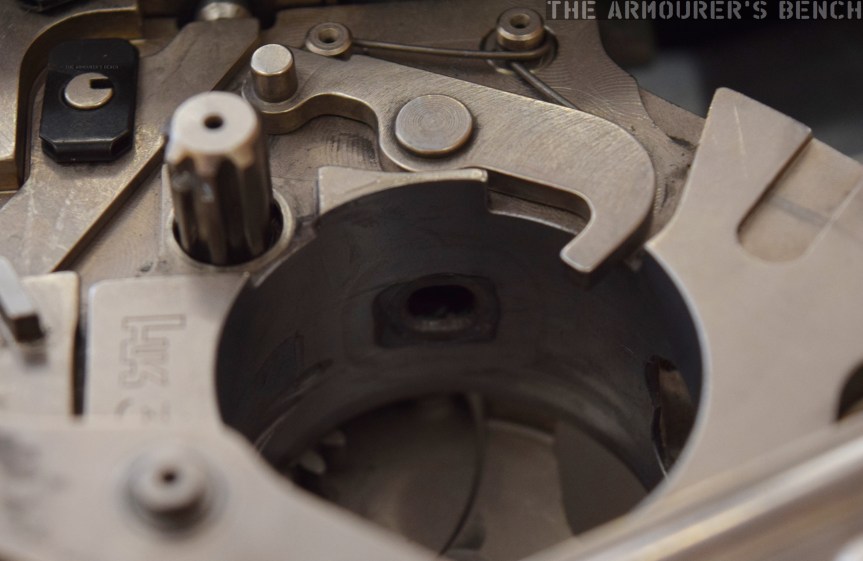
Below is a photograph of the rear of the centre assembly looking forward, the small white circle (sadly slightly out of focus) is the bushing the barrel protrudes through into the forend.
The G11’s centre assembly houses a metal guide rail and magazine guide as well as the trigger mechanism (Matthew Moss)
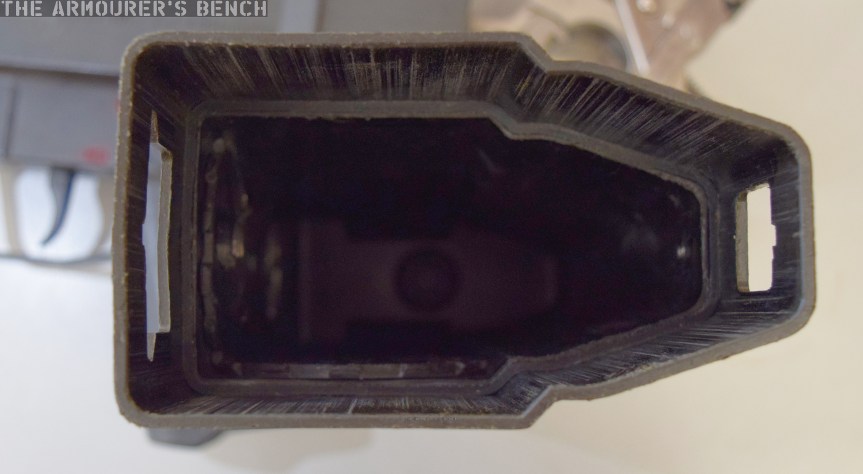
Next we have a view of the inside of the rifle’s butt assembly. Note the scuff marks on the inside where the centre assembly has scrapped the plastic. We can also see the locking tab windows which are on the top and bottom of the butt.
A view inside the G11’s butt stock (Matthew Moss)
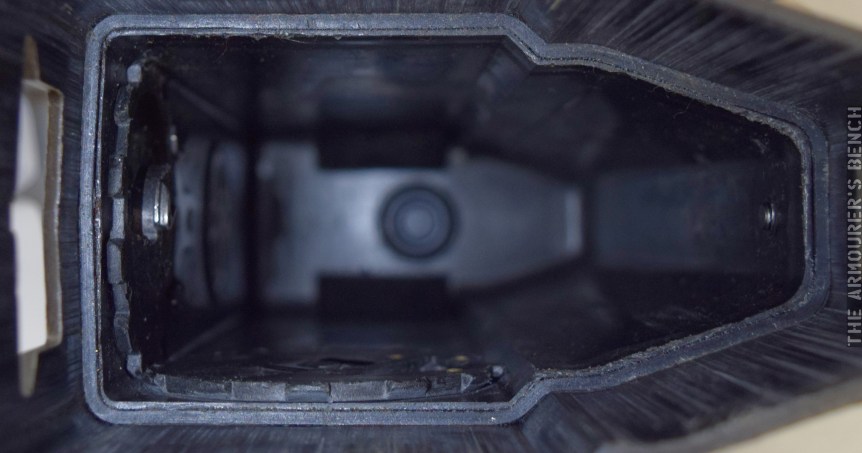
Inside the butt we can see the ‘toothed wheel’ and ‘sealing gear’ which are turned when the cocking piece is rotated. These plastic pieces act directly on the action. Behind that is the gas escape valve, which will tap off excess gas if over pressure problems occur with the rifle.
A close up of the sealing gear and toothed wheel that interface with the cocking handle (Matthew Moss)
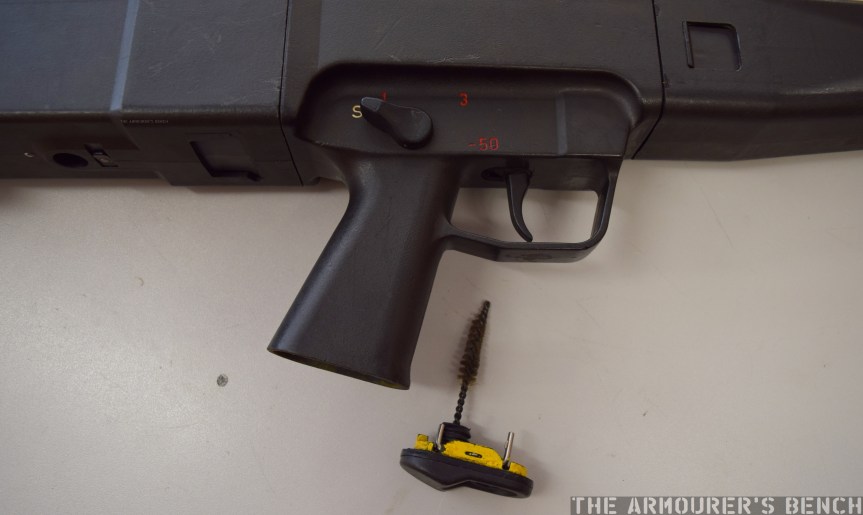
The first step to disassembling the G11 is ensuring the weapon is clear by pushing the cleaning brush up into the breech.
Close up of the G11’s cleaning brush, housed inside the pistol grip (Matthew Moss)
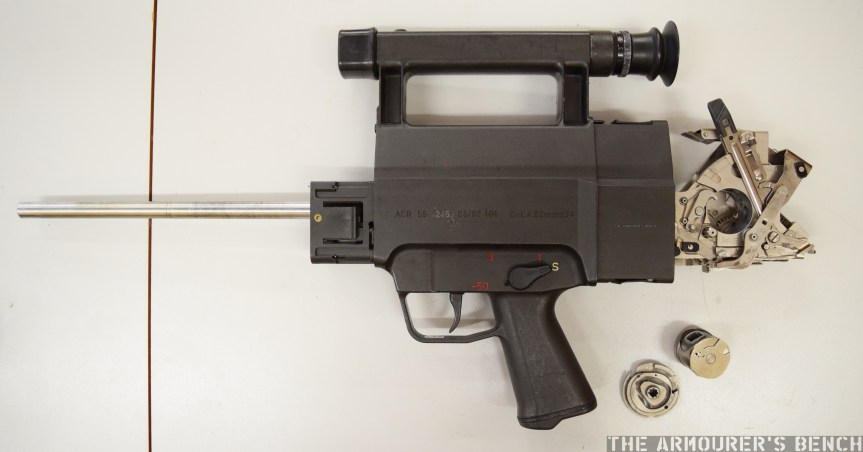
Lets now take a look at the rifle’s action up close, below we can see the G11 with its forend and butt assembly removed. Next to it is the breech cylinder and control disk.
The G11 field stripped (Matthew Moss)
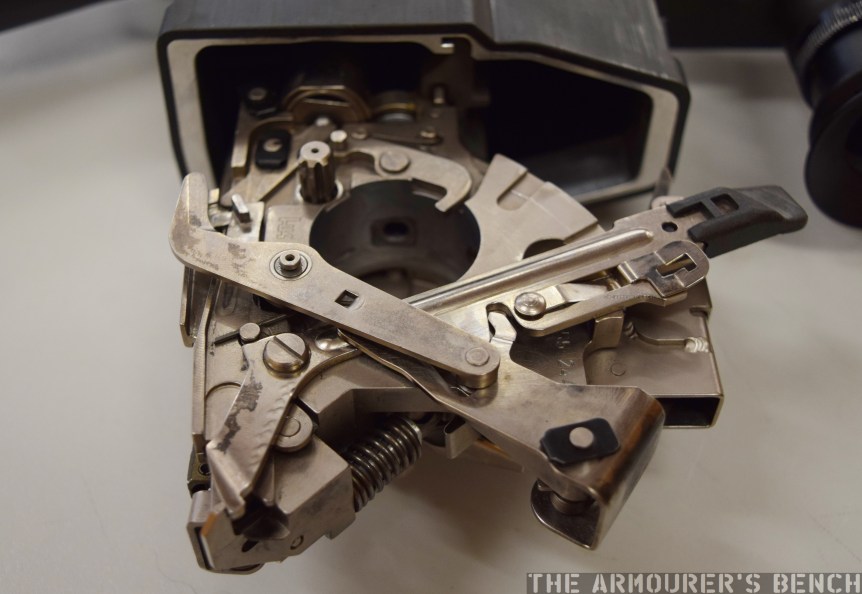
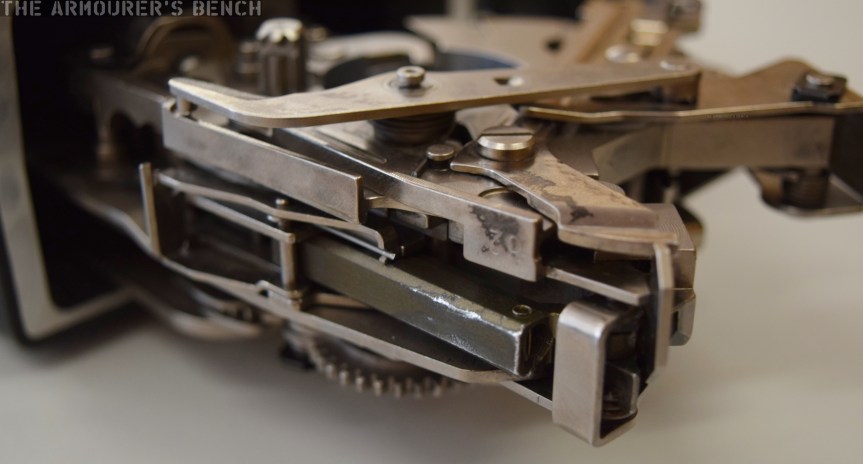
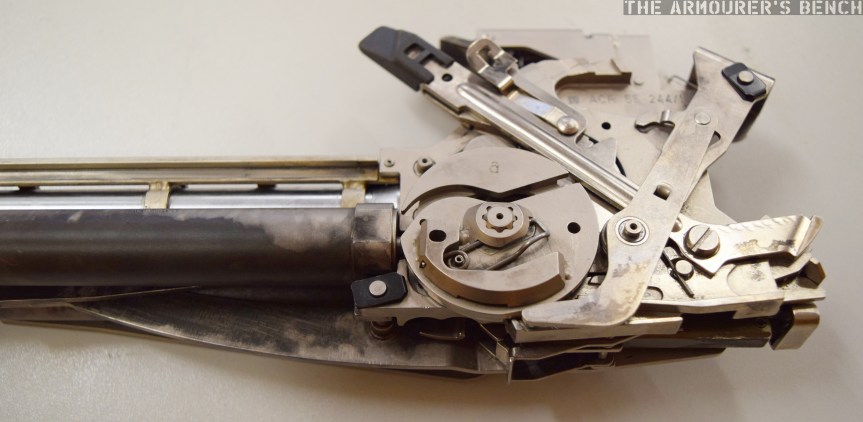
Here are some photos of the action from various angles:
A view of the action from the rear. We can see the striker assembly, clamping plate, ejector lever and cylinder retaining catch (Matthew Moss)From the right side of the gun we can see the two gears which work the breech cylinder – the spur gear and the actuating gear (Matthew Moss)On the underside of the action we can see the rear of the clamping plate, the slide – which is slightly worn, and the sear projecting below it (Matthew Moss)
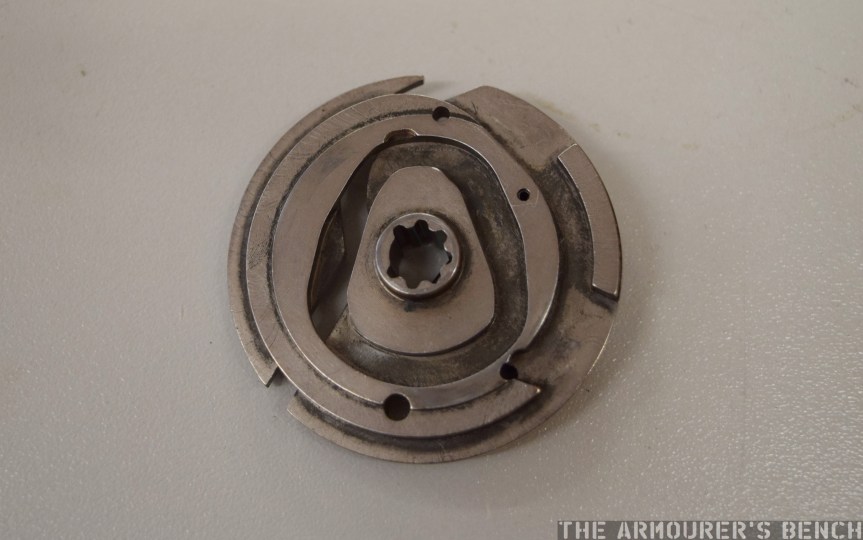
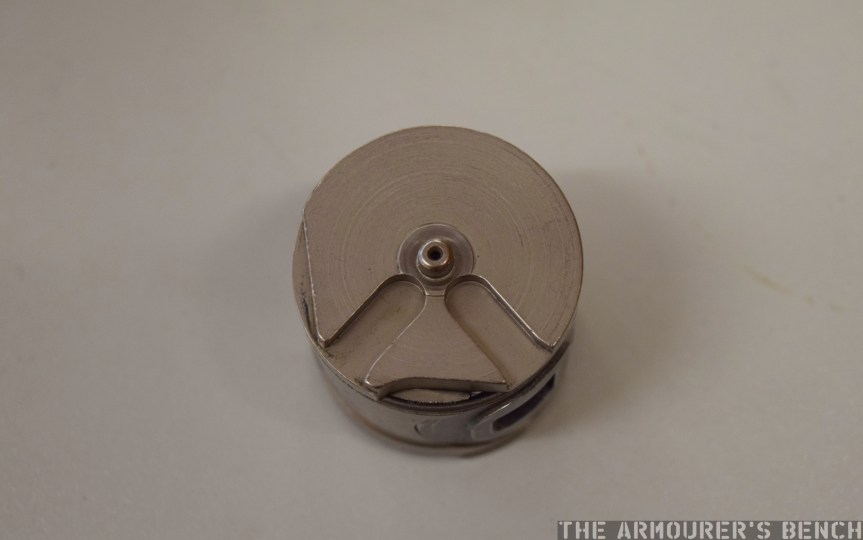
Here’s some close ups of the breech cylinder and control disk:
The top of the control disk, which has to be removed before the breech cylinder can be (Matthew Moss)Underside of the control disk (Matthew Moss)Top view of the breech cylinder (Matthew Moss)A view of the square chamber which is a replaceable part which is held in the breech cylinder by a circular retaining spring – seen on the right (Matthew Moss)The base of the breech cylinder with notches where the actuating gear interfaces (Matthew Moss)
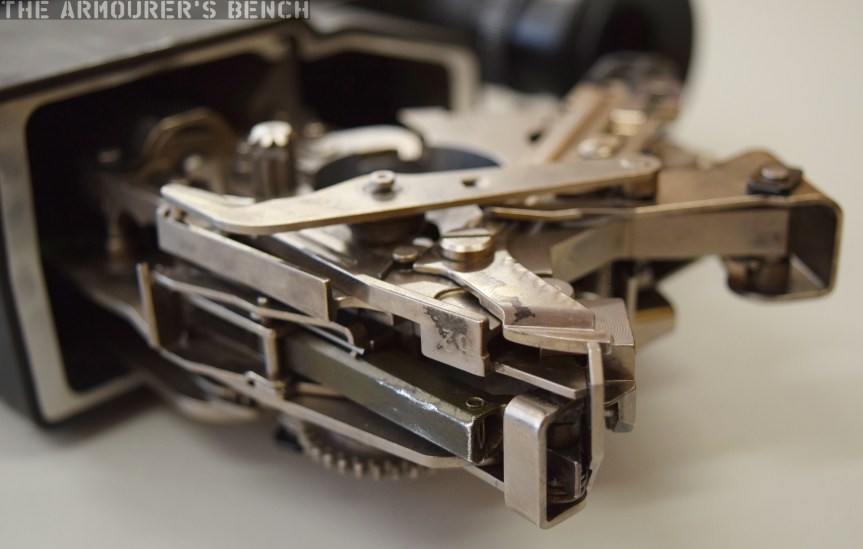
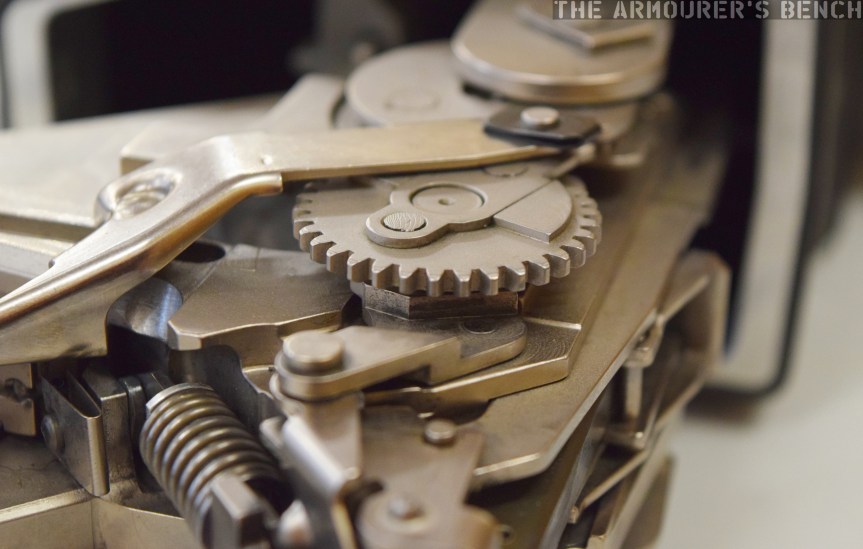
Here are some close ups of the various parts of the action:
A close up of the rifle’s spur gear – which gives the G11 its almost clockwork appearance (Matthew Moss)Another close up of the underside of the action (Matthew Moss)Close up of the end of the barrel, with the square outline of the breech chamber visible – the G11’s caseless ammunition was rectangular but the projectile was round in diameter (Matthew Moss)Another shot of the rear of the action showing the striker / firing pin assembly and spring (Matthew Moss)
According to the 1989 armourer’s manual, provided for the ACR trials, the G11 is made up of a total of nearly 450 individual parts. 144 of those make up the G11’s breech assembly.
With the breech and barrel assembly removed from the centre assembly here’s a diagram I put together showing most of the component parts of the G11’s action:
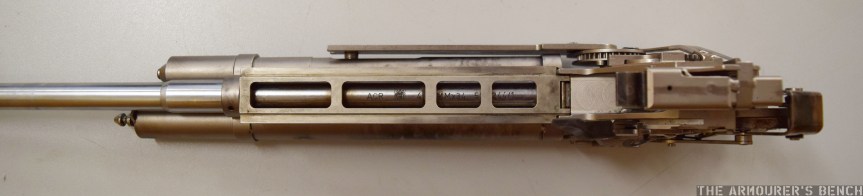
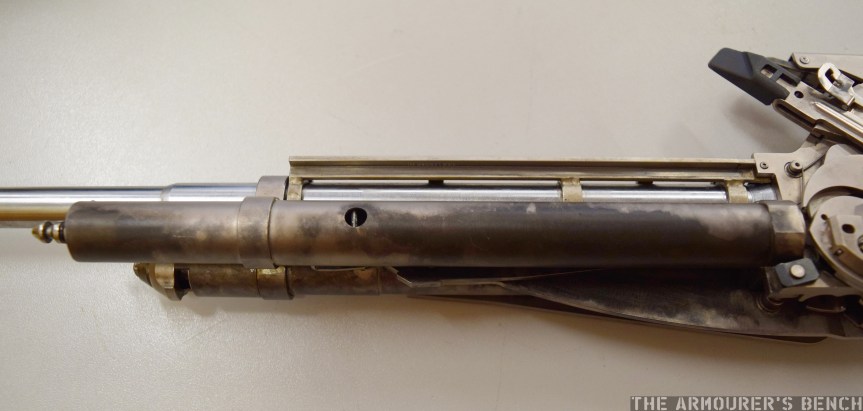
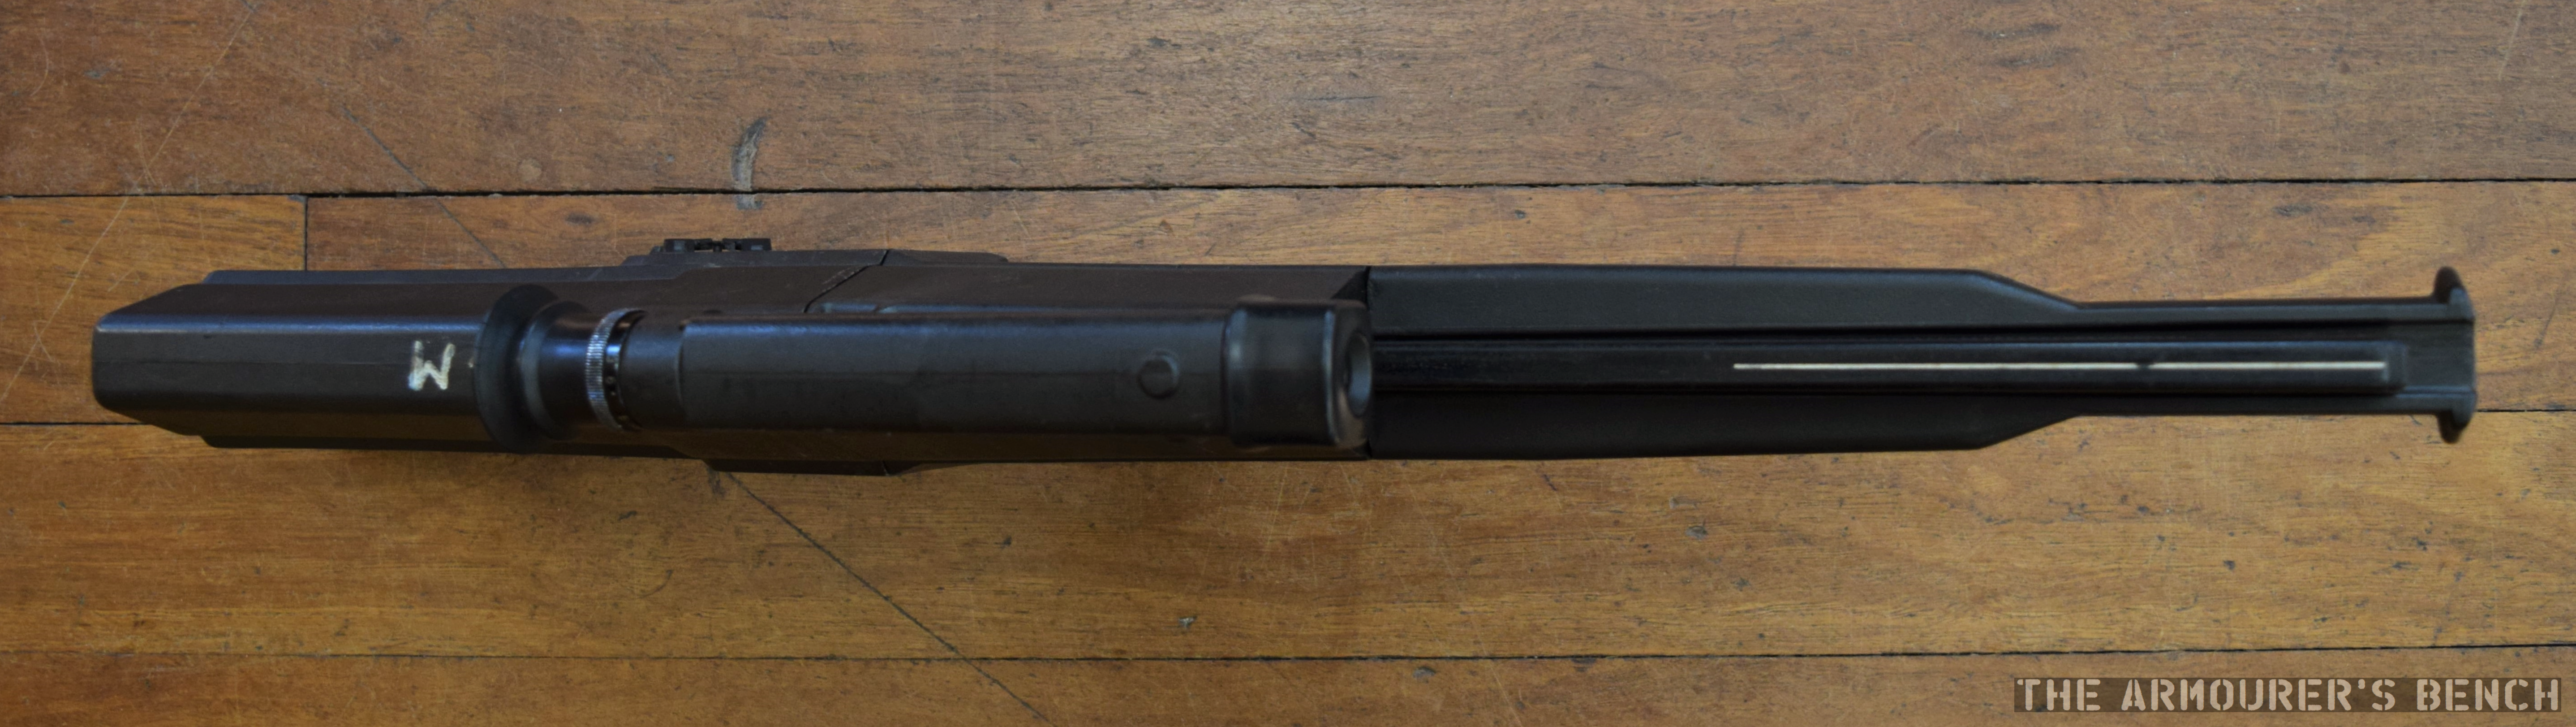
Next lets take a look at the G11’s barrel assembly with its recoil management system and gas piston:
A bird’s eye view of the G11’s breech and barrel assembly, note the barrel markings (Matthew Moss)A side view of the breech with the cylinder and control disk in position (Matthew Moss)A view of the housing of the recoil mitigation system, on the other side is the gas piston system (Matthew Moss)
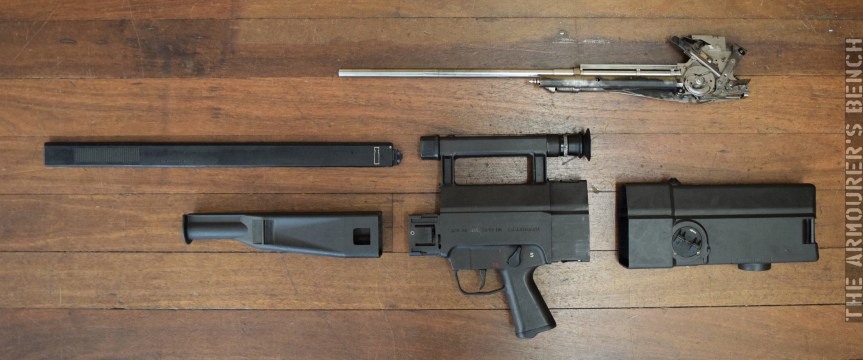
Finally, here’s a photo of the G11 broken down into its major component assemblies: magazine, forend, centre assembly breech & barrel assembly and butt stock:
G11 field stripped (Matthew Moss)
If you enjoyed the video and this article please consider supporting our work here.
Bibliography
HK G11- ACR. Armourer’s Manual for Maintenance of Repair of Rifle, 4.92mm, ACR, March 1989 (source)
Note: While this collection of images covers only the externals of the G11, rest assured that if and when we get the opportunity we will follow this up with hi-res photographs of the weapon disassembled! UPDATE – We disassembled a G11!
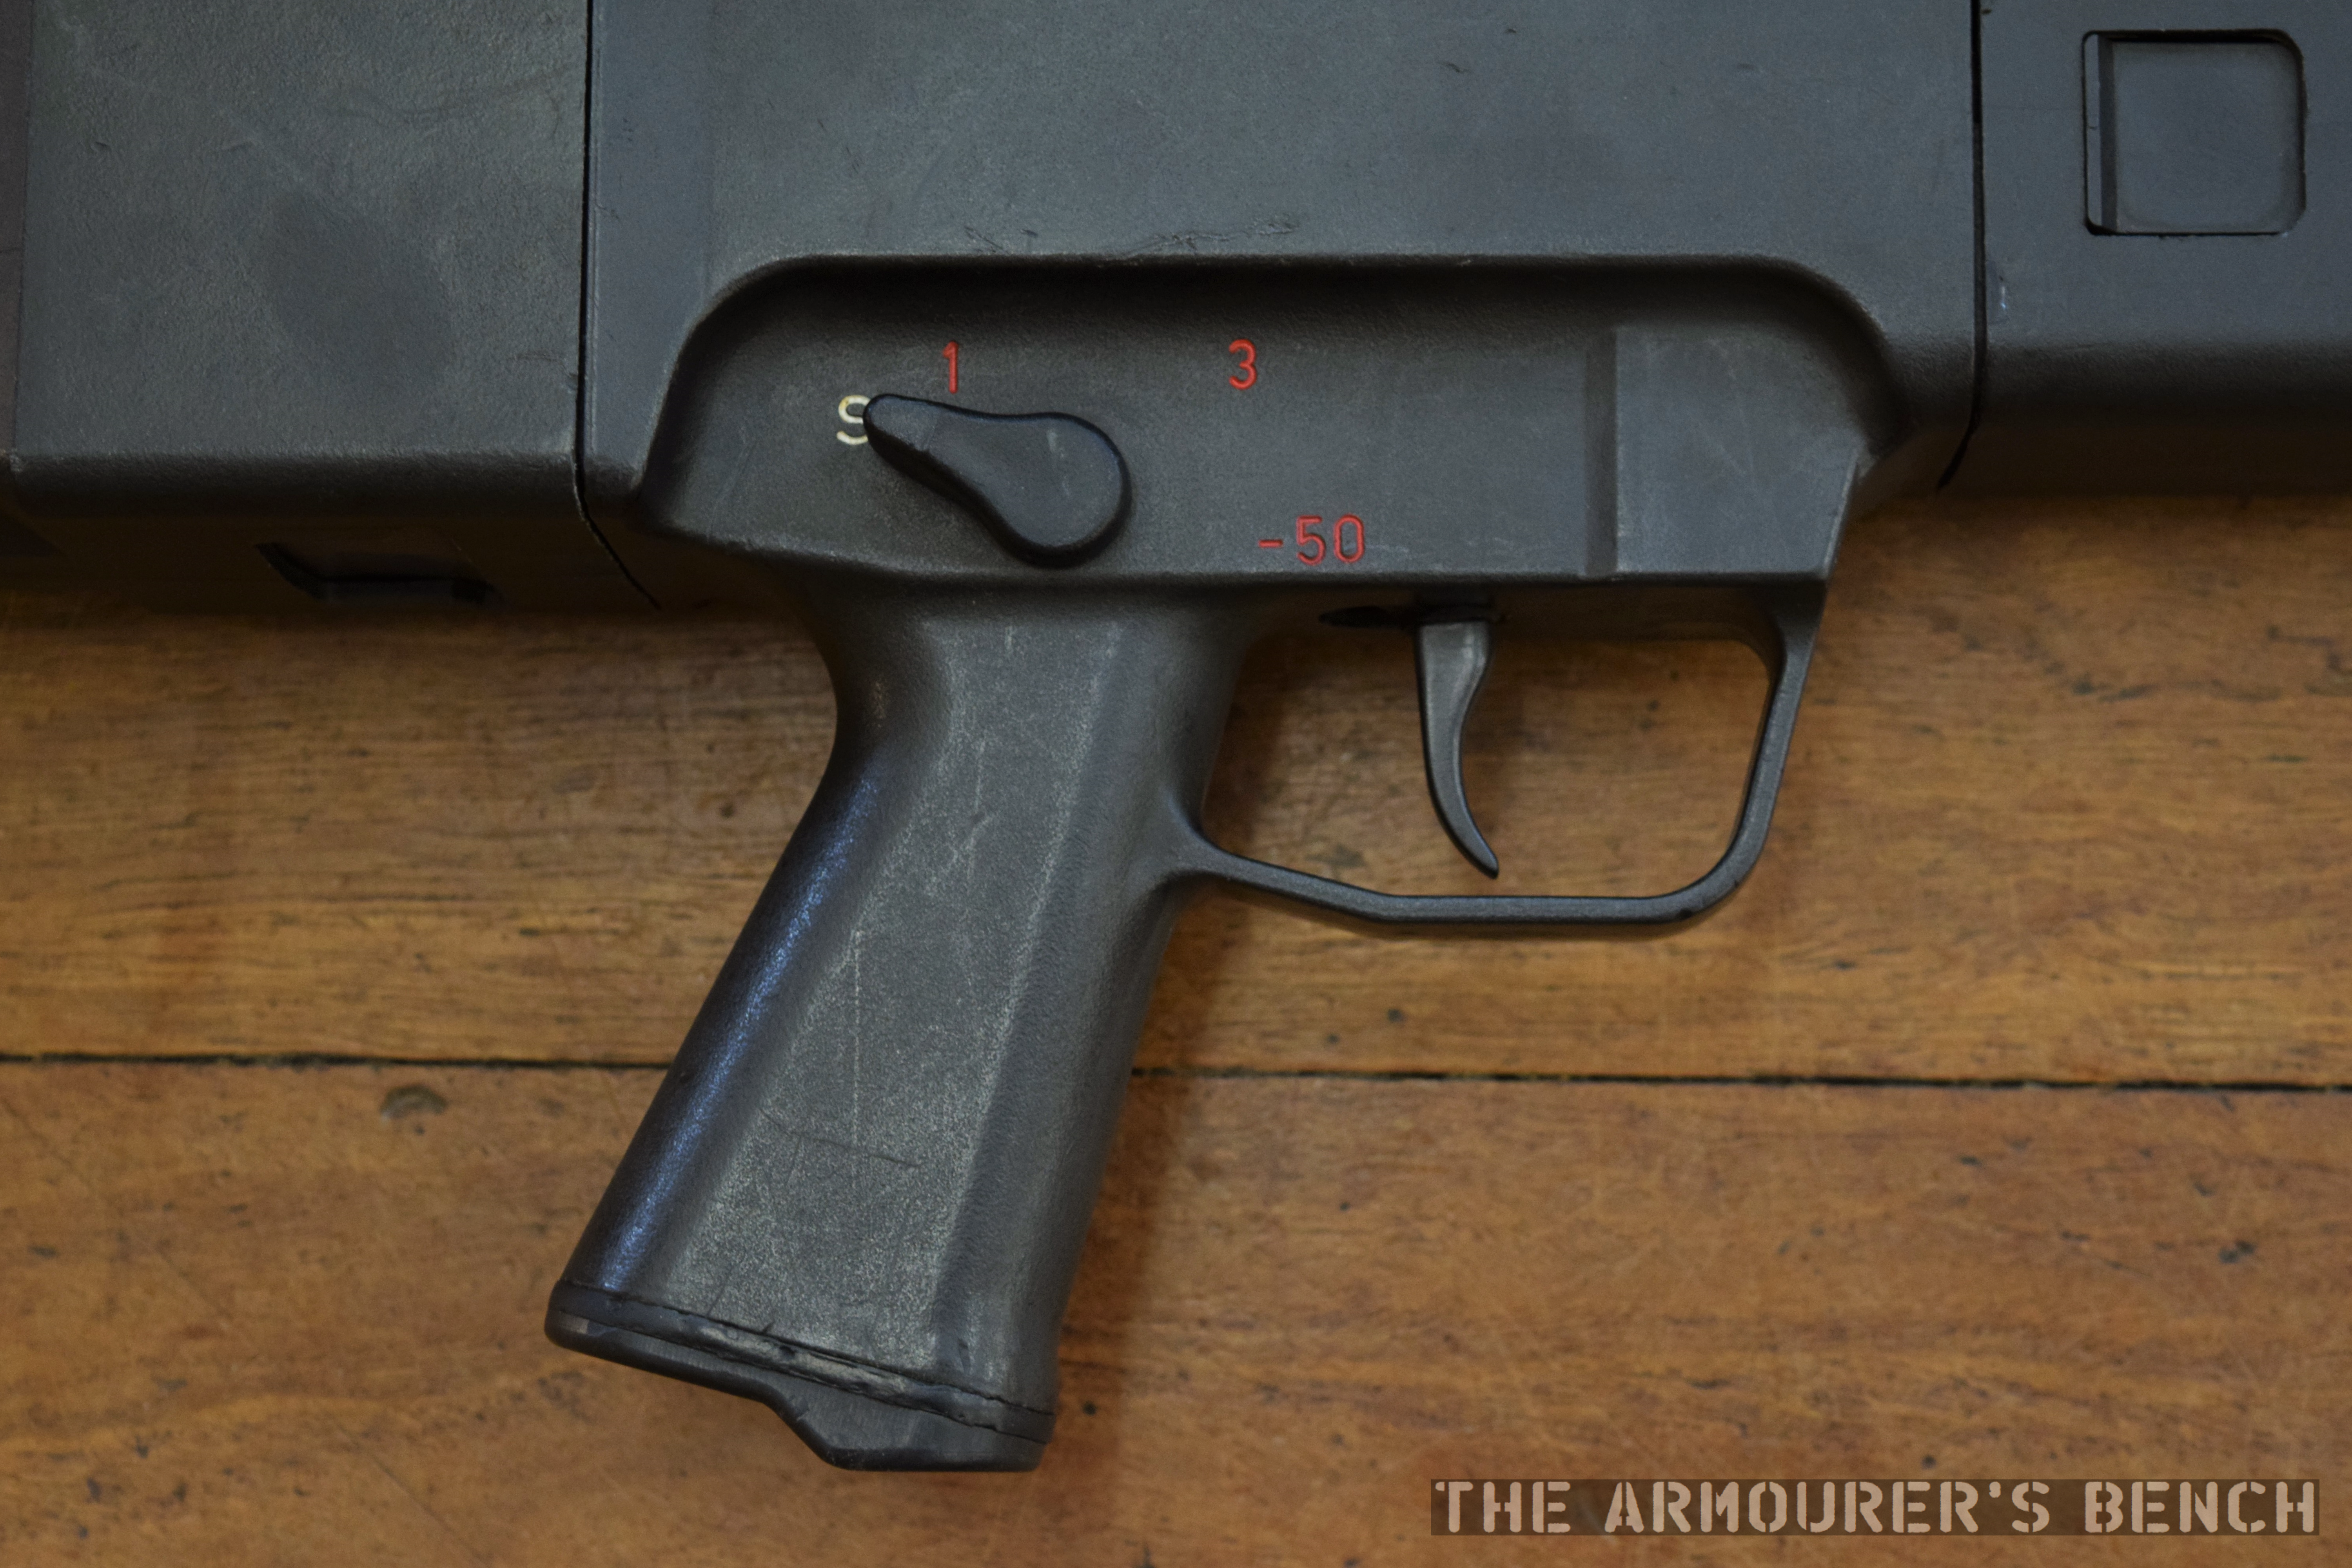
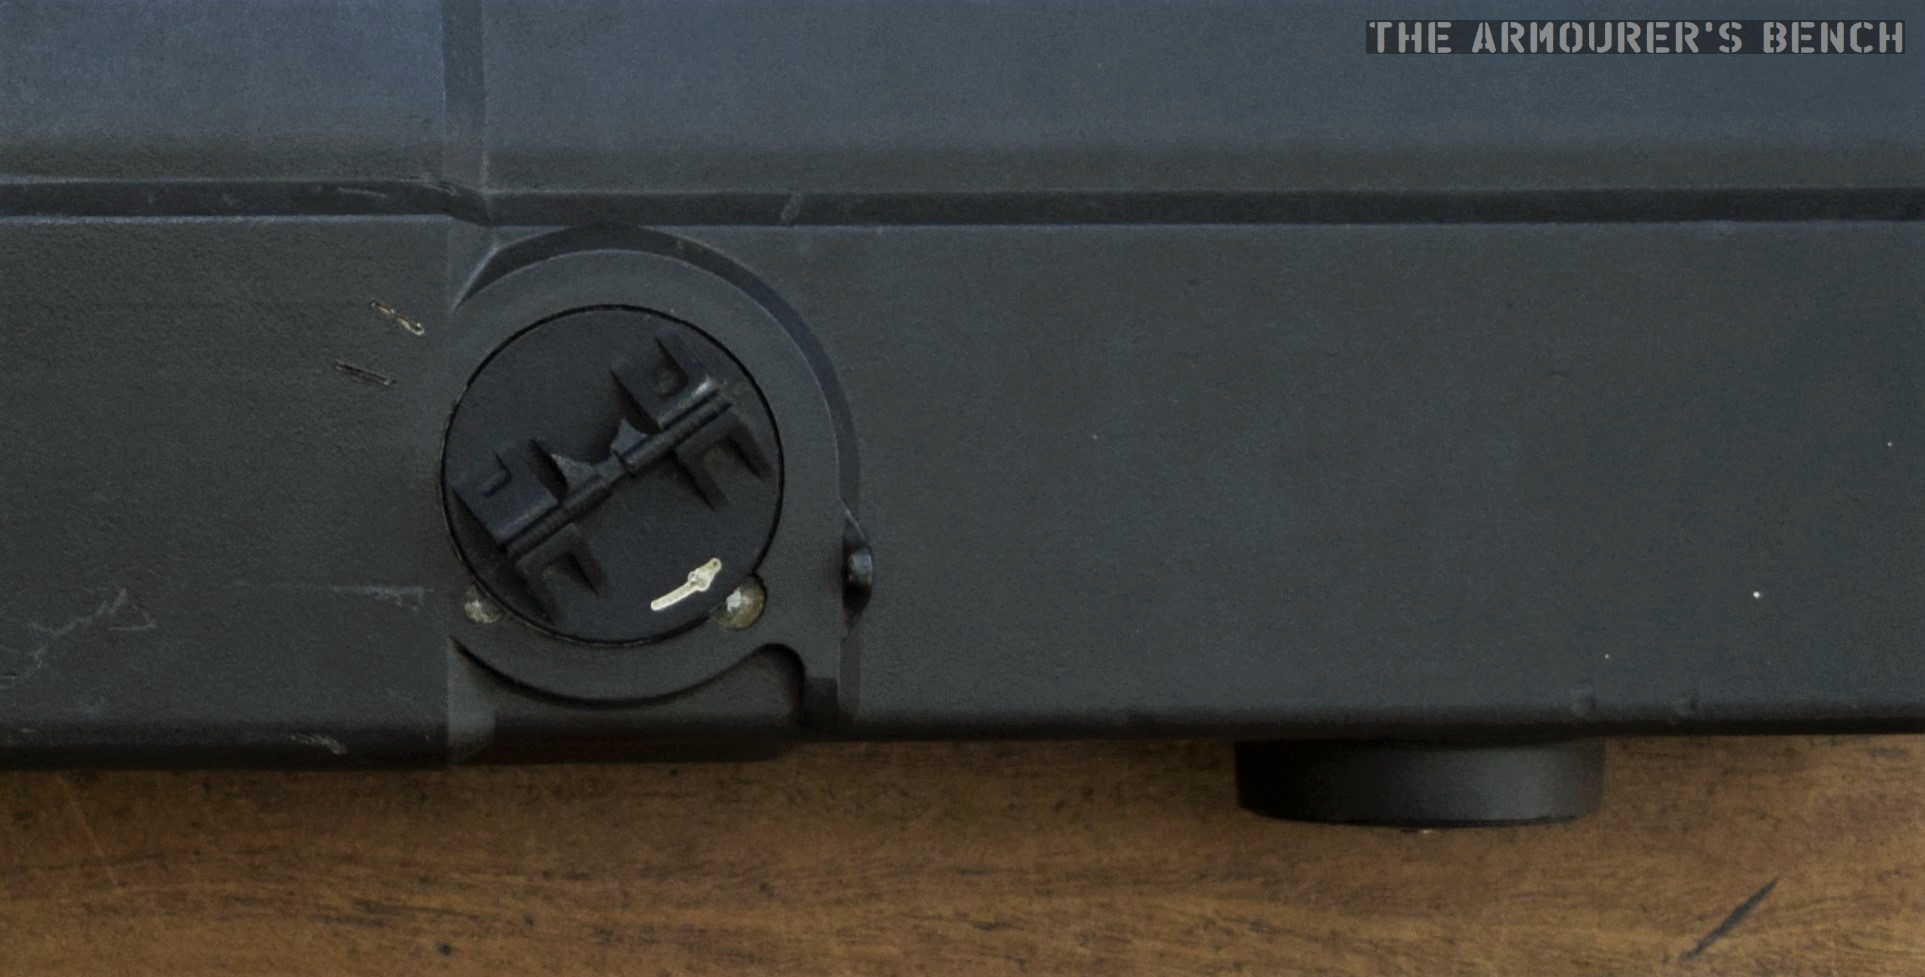
Right side view of the G11, note the muzzle plug inserted into the barrel (Matthew Moss)Left side view of the G11, note the small window in the magazine showing the follower spring (Matthew Moss)Close up of the right side of the G11’s fire selector (safe – semi – hyperburst – full auto), trigger and grip which enclosed a ‘control brush’ used to check the chamber was empty and in cleaning (Matthew Moss)Left side close up of the G11’s selector, trigger and pistol grip – note also the rifle’s designation, serial number, presumably manufacturing date and calibre moulded into the weapon’s casing (Matthew Moss)A view of the G11 from above – note the alignment of the magazine and the lack of later additional channels for spare magazines seen in some G11K2s (Matthew Moss)Close up of the G11’s foregrip and sling loop and an empty magazine loaded into the weapon (Matthew Moss)Close up of the weapon’s rotating ‘cocking handle’and pressure valve, note the white arrow indicating the direction to twist the handle to cock the weapon – the plastic folding handle on this example has sadly broken off, a common issue with G11s (Matthew Moss)Close up of the left side of the G11’s ‘central part’, as HK described it, into which the barrel and breech assembly slide (Matthew Moss)
Many thanks to the collection, which wishes to remain anonymous, that holds this example of the G11 for the opportunity to examine, photograph and film it.
If you enjoyed the video and this article please consider supporting our work here.