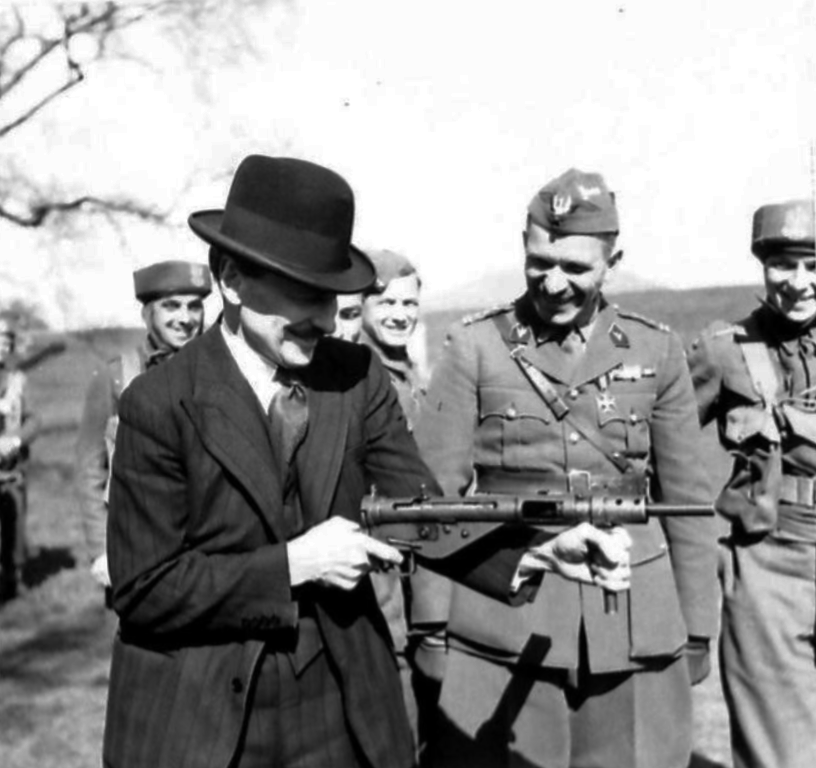
I was recently I was taking a look through the Imperial War Museums’ online image collection when I found a pair of very interesting photographs taken in Scotland in April 1942. They show Deputy Prime Minister Clement Attlee handling a STEN MkII submachine gun while visiting Polish troops. Most interestingly though is the folding front grip which has been added to the Sten!
Clement Attlee with STEN MkII (Imperial War Museum)
The MkII, introduced in August 1941, did not have a folding front grip as standard. The earlier MkI had had a front folding grip, but the MkI*, introduced in October 1942, had eliminated this to speed up production. The original caption of this photo reads:
“Mr Attlee tries the weight and feel of the Sten Sub-machine gun used by the Paratroops.”
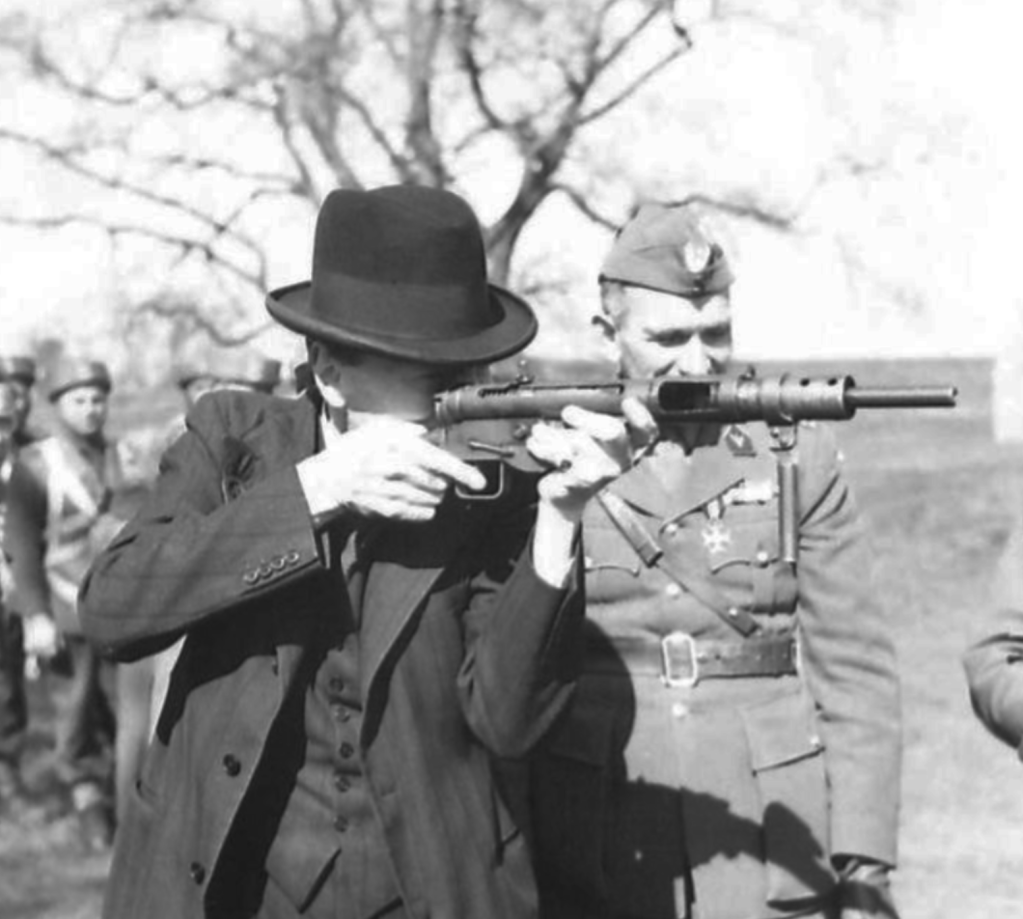
Attlee was visiting the 1st Polish Independent Parachute Brigade during a visit to the 1st Polish Corps) at Cupar in Scotland. In the photos he’s accompanied by Colonel Stanisław Sosabowski, the commander of the brigade. In this second photograph, Attlee is holding the Sten by its trigger mechanism cover and we can see the folding grip more clearly.
Clement Attlee with STEN MkII (Imperial War Museum)
It appears to be made up of a band of steel which slid onto the barrel nut housing – much like the later MkV foregrip. The grip appears to possibly pivot on a rivet and the grip itself appears to be tubular metal. Sadly the photos are fairly low resolution so we can’t see too much more detail.
These were the only two photos of the grip I could find and I haven’t yet been able to find any documentary references to them. It may be that the grip was experimental and provided to the Polish paratroops for testing or it was an adaptation unique to the unit – perhaps something the unit’s armourer made. I’ll need to do more research in the future to try and find out more about the curious STEN accessory!
For more on the STEN check out our video on the origins of the STEN and it’s name below:
Bibliography:
The Polish Army In Britain, 1940-1947 series, Imperial War Museum, H 18884 & H 18883
If you enjoyed this video and article please consider supporting our work here. We have some great perks available for Patreon Supporters. You can also support us via one-time donations here.Thank you for your support!
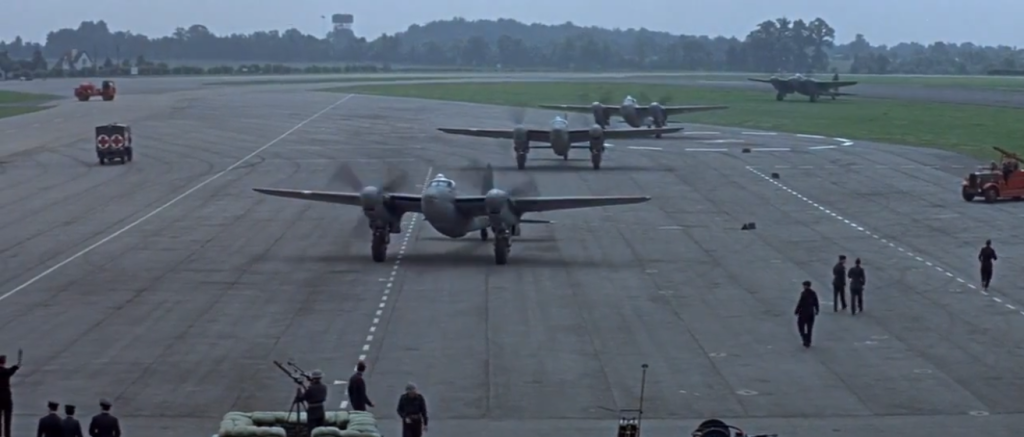
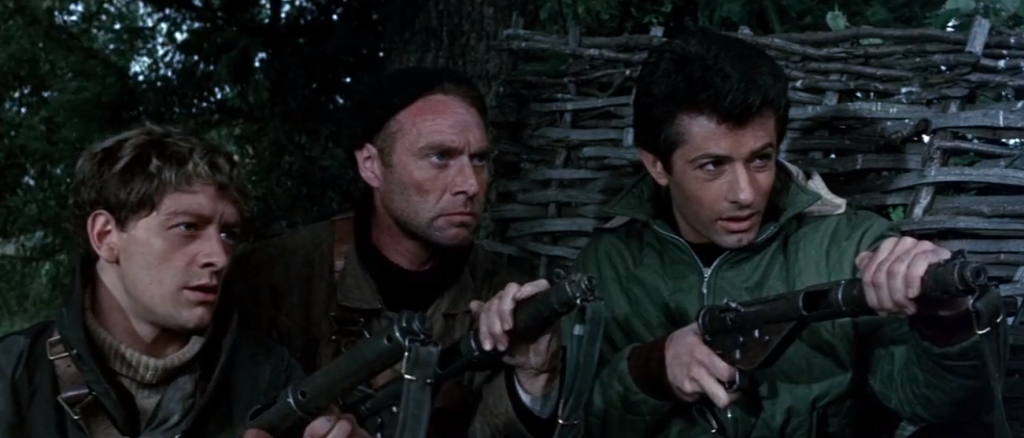
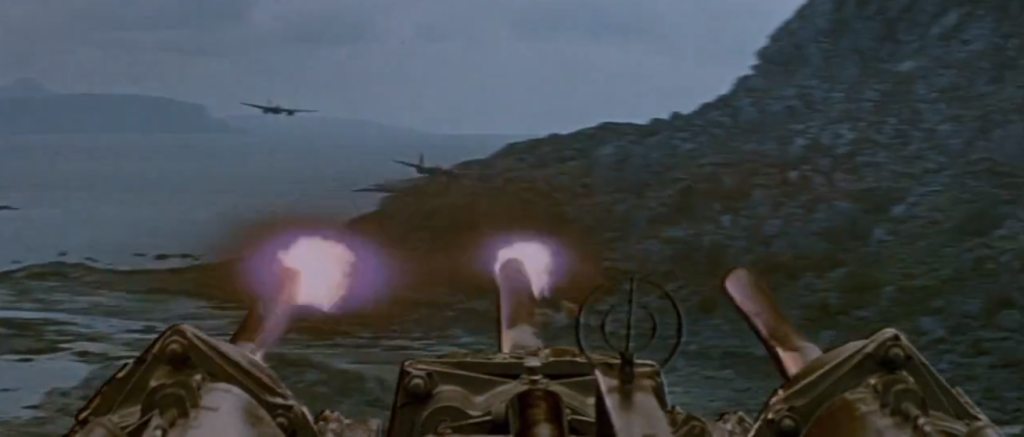
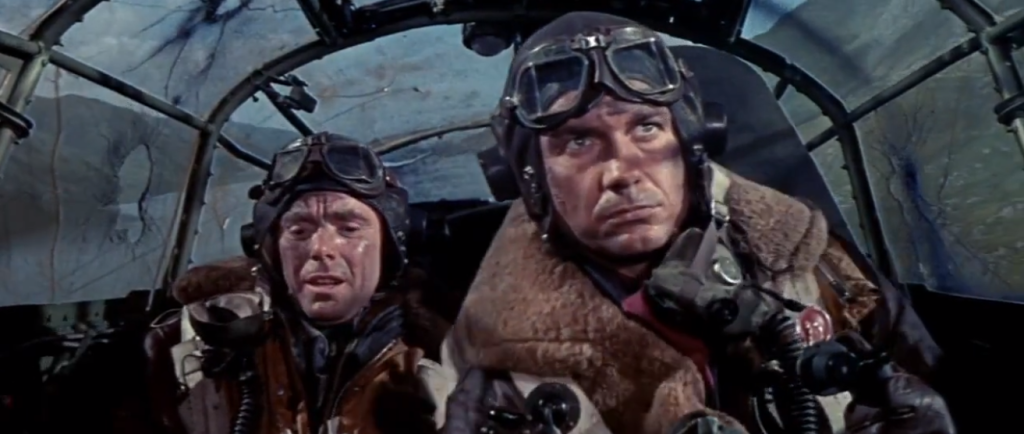
Join us this week as we slip on our flight suits, climb into our cockpits and fire up our Mosquitos for 1964’s 633 Squadron. The squadron is tasked with a secret mission to destroy an enemy factory. The film is based on a book by Frederick E. Smith and stars Cliff Robertson, George Chakiris, Harry Andrews and Angus Lennie.
It’s essential for soldiers to know how to use and maintain their weapons properly. We’ve been collecting training manuals, pamphlets and handbooks (as part of the TAB reference collection) to give us a wider understanding of how troops were trained and how they used their weapons.
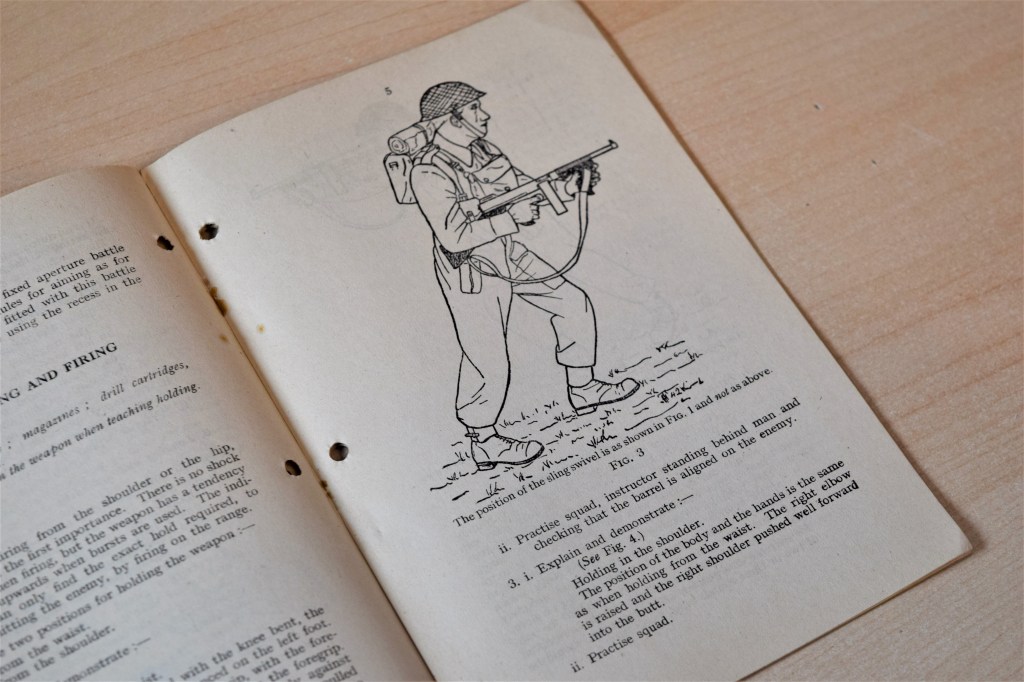
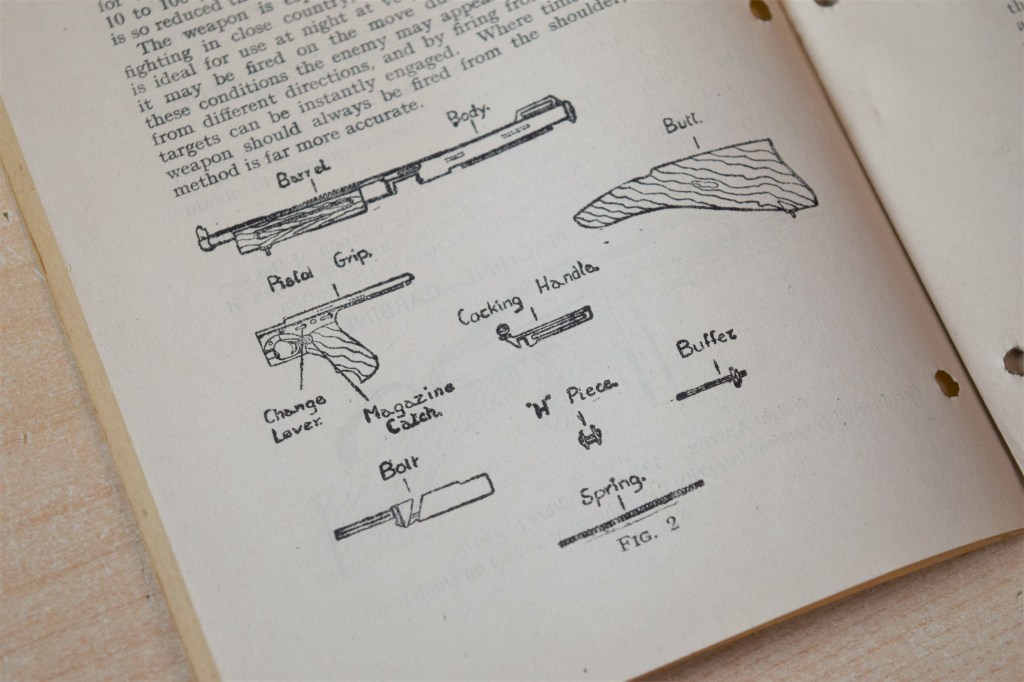
In this video we take a look at the British Army’s 1942 small arms training pamphlet for the ‘Thompson Machine carbine’.
Diagram showing firing the hip (Matthew Moss)
The pamphlet, issued in July 1944, is written for instructors to train troops how to handle, maintain and use the Thompson. The pamphlet was eventually superseded by one covering both the STEN and Thompson.
Diagram showing the Thompson Machine Carbine disassembled (Matthew Moss)
The pamphlet is just 12 pages long but includes some interesting insights and an appendix looking at the ‘spotlight projector’ training instrument.
If you enjoyed these videos and this article please consider supporting our work here. We have some great perks available for Patreon Supporters. You can also support us via one-time donations here.Thank you for your support!
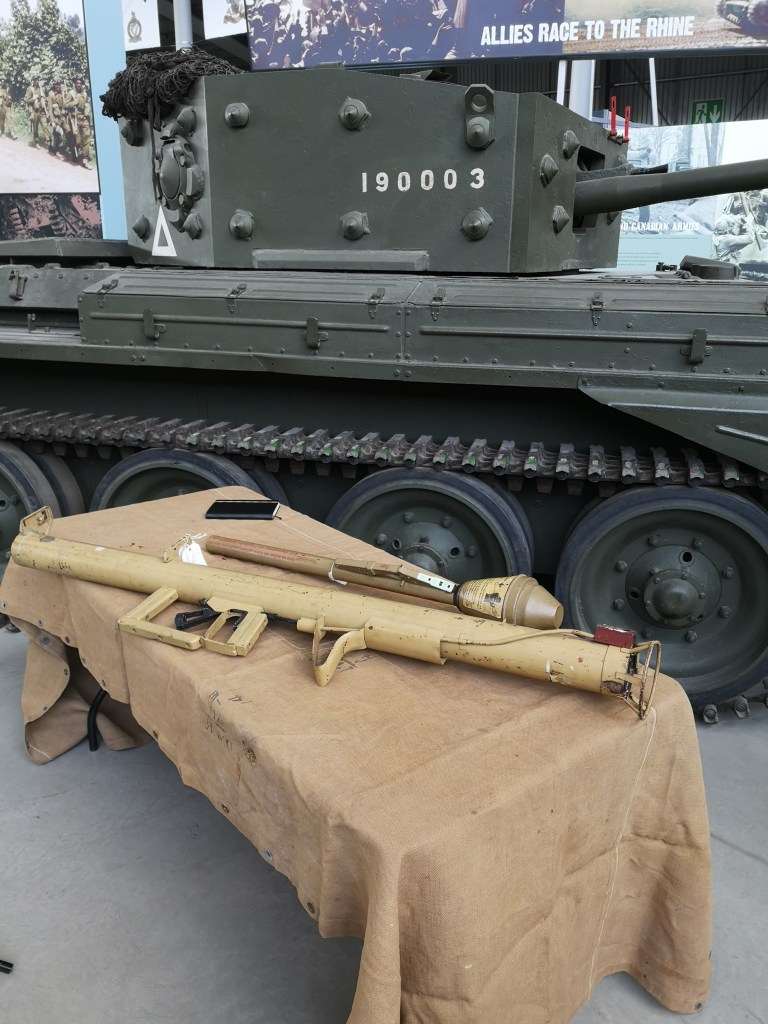
Here’s a behind the scenes look at the filming Matt did at The Tank Museum for the upcoming ‘Rhineland 45 – Decision in the West’ documentary being produced by Realtime History, the guys behind The Great War!
So you may have seen our earlier video looking at the portrayal of PIATs in the 1978 classic A Bridge Too Far! If not check it out.
When I think of Richard Attenborough’s all-star war epic telling the story of Operation Market Garden, I immediately think of the iconic ‘BRING UP THE PIAT’ scene where Anthony Hopkins playing Colonel John Frost commanding 2 PARA calls for the Projector, Infantry, Anti-Tank to take out a marauding ‘Panther’.
But this isn’t the only scene from the film depicting the PIAT! In this video we’ll look at a couple of the other scenes showing the PIAT in action.
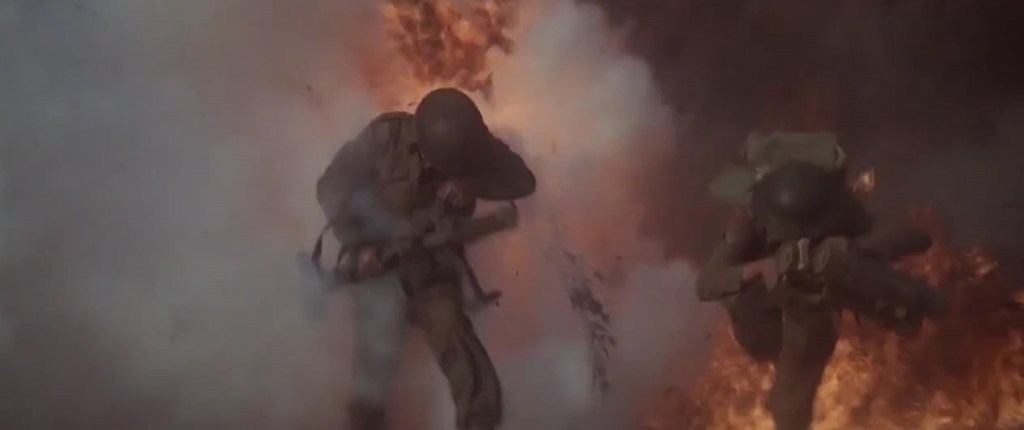
We first see the PIAT during the scene when the Guards Armoured Division’s spearhead meets heavy german resistance. Michael Caine’s Sherman’s get a pasting from some Pak 40s. The British infantry deploys and we see a cornucopia of kit ranging from Brens to Vickers to an M2 Browning. But blink and you’ll miss them a pair of PIAT teams also ‘bring up the PIAT’. A two man team can be seen moving forward, the No.1 carrying the PIAT and the No.2 carrying a 3 round bomb carrier, sadly killed by enemy fire.
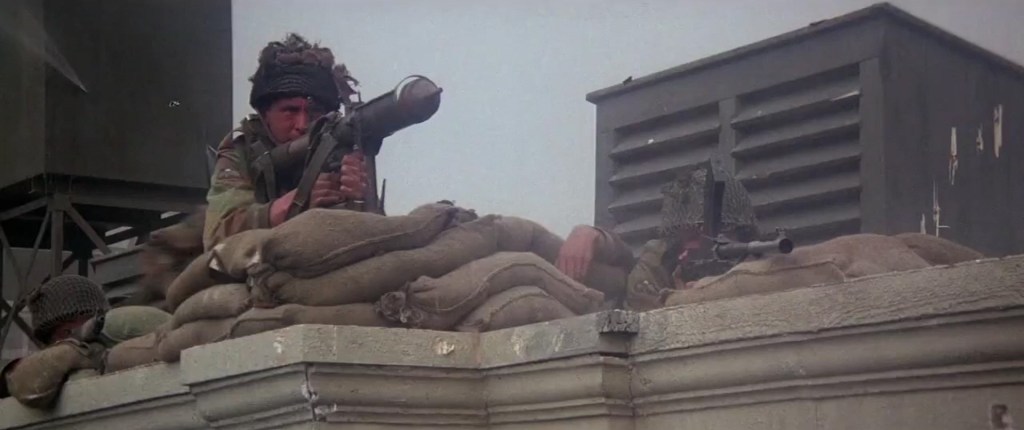
The second scene in which we see the PIAT finally get to work on some German armoured fighting vehicles is during Gräbner’s attack over the bridge. As the PARAs at the Bridge prepare for the attack we see 2 or 3 PIAT positions get ready – loading bombs into their bomb support trays. One PIAT No.1 can be seen slotting the rear of a PIAT bomb into the projectile guide plates to hold the bomb in place – very authentic.
As the column crosses the Bridge Frost orders his men to open fire, Brens, Stens, Rifle No.4s and PIATs open up and the column is stopped in its tracks. During the scene we see a number of PIAT’s fire and knock out SS vehicles. One PIAT No.2 is hit by enemy fire. The first PIAT round fired hits a lead German vehicle causing it to halt, the second flips a Kubelwagen. We then see a No.2 two load a fresh bomb into the bomb support tray – with a tap to make sure its properly in place. We get a great show of the PIAT firing from the front. It’s worth noting that the PIAT doesn’t recock and the spigot is still seen in the bomb tray just before the camera cuts away. Meaning that that PIAT No.1 will have to recock his weapon before he can fire again!
It’s worth remembering without the ‘Bring Up The PIAT’ scene making a point of naming the weapon, most people would never have known what this unusual weapon that dealt so much damage in the earlier scene was! Of course the attack wasn’t stopped by PIATs alone, there were also airborne anti-tank guns, which the film doesn’t show.
Another little titbit of information I learnt since the first ‘Bring Up The PIAT’ video, thanks to my friend Robbie of RM Military History [check out his channel], is that the PIAT was fired in most of these scenes by one of the film’s armourer Bill Aylmore. The information comes from After the Battle – The Battle of Arnhem – War Film: A Bridge Too Far which describes him as formerly a sergeant with the 50th Regt. – which might be a reference to the Queen’s Own Royal West Kent Regiment. The book goes on to say that “Aylmore excelled himself during the filming of the battle on the bridge by being the ace shot with the PIAT. During all the various takes he was able to put the bomb exactly where the director wanted it and where it coincided with the special effects explosions.” – Good shooting indeed!
If you enjoyed these videos and this article please consider supporting our work here. We have some great perks available for Patreon Supporters. You can also support us via one-time donations here.Thank you for your support!
Join us for as we examine the Carol Reed-directed 1944 British classic ‘The Way Ahead’ starring David Niven, Stanley Holloway, William Hartnell, Peter Ustinov and John Laurie. We’re joined by special guest Richard Fisher, of the Vickers MG Collection and Research Association, who picked the film partly due to it’s iconic scene featuring a Vickers Gun! The film follows a platoon of men through their call up, training and up to their first experience of battle!
You can watch ‘The New Lot’ (1943) on the IWM’s site here.
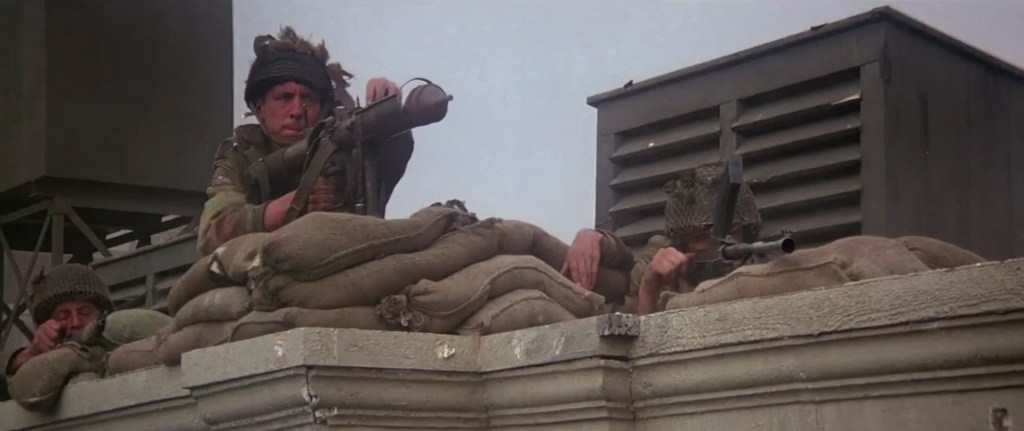
We have examined several on screen appearances of the PIAT previously, in this article we will look at a scene from the 2014 Polish movie, MIASTO 44 or City 44/Warsaw 44. The film follows a group of young members of the Home Army during the Warsaw Uprising.
In the scene we’re going to analyse today a Home Army squad are in a defensive position on the first story of an apartment building when a German Goliath remote controlled mine approaches their position. They immediately open fire on the Goliath with small arms, some rifles, a couple of submachine guns including a Sten, a PPSh-41 and an MP40 as well as a captured MG-42. While they’re pretty well armed, they’re low on ammo.
With the small arms fire ineffectual the squad leader calls for the PIAT. The Home Army had an estimated 70 PIATs at the start of the uprising. The British Projector, Infantry, Anti-Tank was the Pole’s primary infantry anti-tank weapon. By the 12th September the allies had managed to drop more PIATs bringing the number available to around 250.
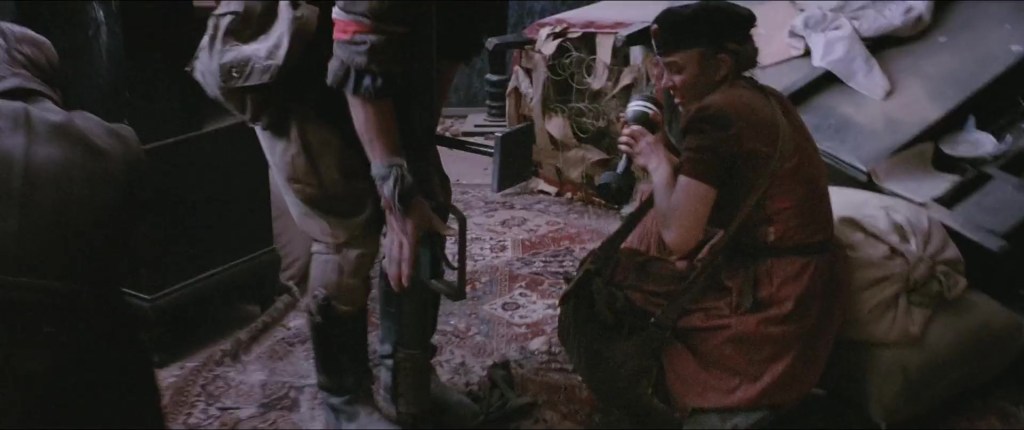
What’s so special about this scene is that it depicts the cocking of the PIAT! As the others open fire the PIAT number one can be seen rotating the outer casing to unlock it and then pulling it up until the spring inside is cocked. He then lowers the casing and locks it ready to fire. We don’t see it but the No.2 has loaded a bomb into the bomb support tray and the No.1 places the monopod on the sandbags and takes aim.
A member of the Home Army Cocking the PIAT
So not only do we have photographs of the PIAT in use at Warsaw we also have some good accounts of its use, one from Zbigniew ‘Deivir’ Czajkowski, a corporal and patrol leader with the Home Army’s ‘Parasol’ scout battalion describes using a PIAT against a German tank during street fighting. Czajkowski describes how the man about to fire the PIAT had forgotten to prime the bomb, he then describes firing on the tank below their position:
“I press the heavy weapon into my shoulder. The tank is in front of me, as if on a plate. I can see the enormous armour plating and the smoke coming from its muzzle. I set my sights. Slowly… carefully… The tank fires, below us again. I aim just behind the turret. There! I squeeze the trigger. The PIAT recoils, the round flies through the air… nearly there… It misses the tank and explodes to the rear of it. “Fuck!” Now my colleague tears the PIAT out of my hands. I don’t stop him. I load a new round. Two more shots from the tank. Presumably they haven’t noticed us. Suddenly it dawns on me – we’re on the second floor! “Aim lower, much lower, under the tracks. We’re too high up here.” The barrel of the PIAT tilts down. I’m oblivious to everything glued to the gap in the wall. The weapon barks. There’s a flash of light against the side of the tank. Got him! The tank is momentarily covered in smoke.”
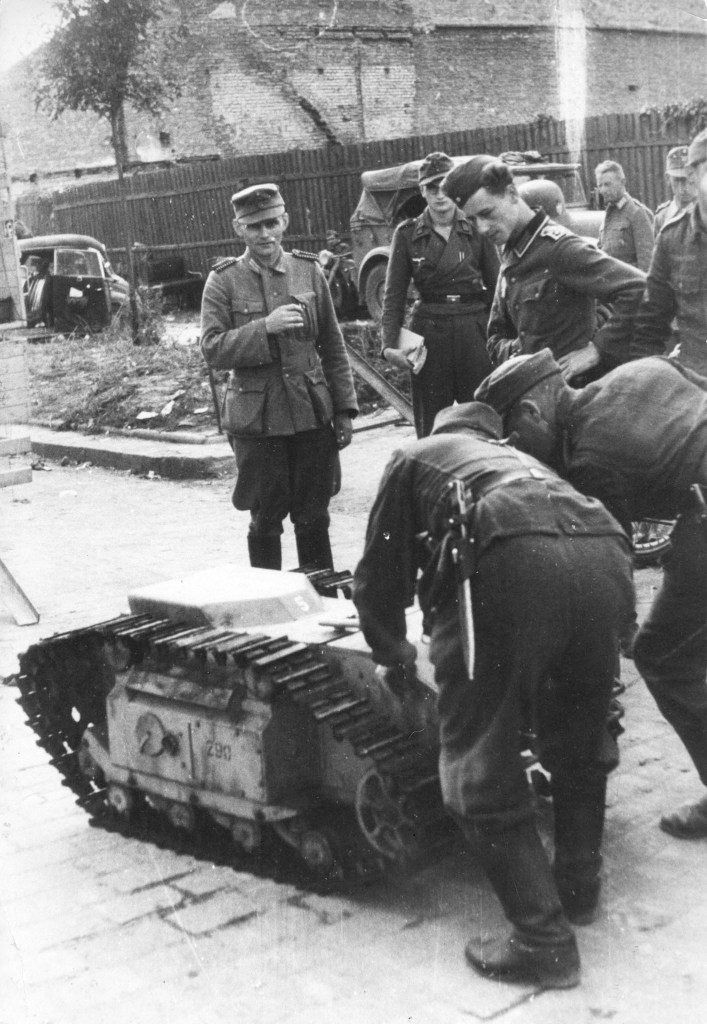
While not a tank, the Goliath seen in the film, were used during the fighting in Warsaw. The Goliaths were armoured, remote controlled bombs could be steered from cover. These tracked mines could deliver a 60 to 100kg payload of high explosive. Enough to destroy positions and heavily damage buildings. A pair of Goliaths are also seen in the earlier Polish film on the uprising – 1957’s Kanal – which also features a PIAT, albeit a wooden mock-up, which takes on a German tank.
A Goliath Remote Controlled Mine in Warsaw (Bundesarchiv)
In Warsaw 44 the PIAT No.1 manages to land his bomb just in front of the approaching Goliath, the blast apparently is enough to break one of the mine’s tracks – perhaps shrapnel or debris struck it. The victory is short-lived, however, and the Polish position is raked by machine gun fire – killing the PIAT No.1 – and a full German assault follows.
The film’s depiction of the PIAT is quite good, although the PIAT appears to be cocked very easily. The weapon’s recoil seems a little light but is represented with the No.1 being sharply pushed back. There is a short flash as the remains of the bomb’s propellent cartridge are seen as the bomb leaves the spigot. We can also see that the spigot is still visible in the bomb tray, meaning the weapon has not re-cocked itself.
The PIAT gave the besieged soldiers of the Home Army a much-needed weapon capable of taking on enemy armoured vehicles. But a few dozen PIATs weren’t enough to turn the tide and the valiant Poles were forces to surrender after two months hard fighting. The film, Warsaw 44, gives a pretty immersive idea of what the fighting in the city might have been like and is worth checking out.
Bibliography:
Miasto 44 (2014) Warsaw 1944: An Insurgent’s Journal of the Uprising, Z. Czajkowski, (2013)
If you enjoyed these videos and this article please consider supporting our work here. We have some great perks available for Patreon Supporters. You can also support us via one-time donations here.Thank you for your support!
Join us as we look at 1943’s ‘Bataan’ starring Robert Taylor, Robert Walker, Lloyd Nolan, Kenneth Spencer and Desi Arnaz. Directed by Tay Garnett, it’s one of the few films to look at the brutal Battle of Bataan. It’s a classic last stand movie and incorporates elements from the battle which saw some of its hardest fighting 79 years ago this month.
In this episode of Fighting On Film we examine 1951’s ‘Go For Broke!‘, written & directed by Robert Pirosh and starring Van Johnson – who had worked together on ‘Battleground‘ (FoF Episode 6). The film tells the unique story of the 442nd Infantry Regiment, a US Army unit made up of Japanese-Americans who became the most decorated unit of its size of World War Two!
Late last summer we visited the Anglesey Transport Museum in North Wales. They had a great collection of classic and vintage cars and bikes and most interestingly they had a little collection of British military vehicles.
They had a number of trucks and special purpose vehicles from the Royal Engineers, REME and RLC and even a Green Goddess Fire Engine. They also had a couple of pretty cool Cold War British Army armoured personnel carriers.
Alvis Saracen
Alvis Saracen (Matthew Moss)
The Saracen was a six-wheeled armoured personnel carrier (APC) built by Alvis. It entered service in 1952 and was used extensively in Malaya and Northern Ireland. The Saracen could carry an 8 man section along with its 2 man crew. It had a 160HP Rolls Royce engine and depending on when during its service life its turret could be mounted with a .30 calibre M1919A4 or an L37 vehicle-mounted general purpose machine gun.
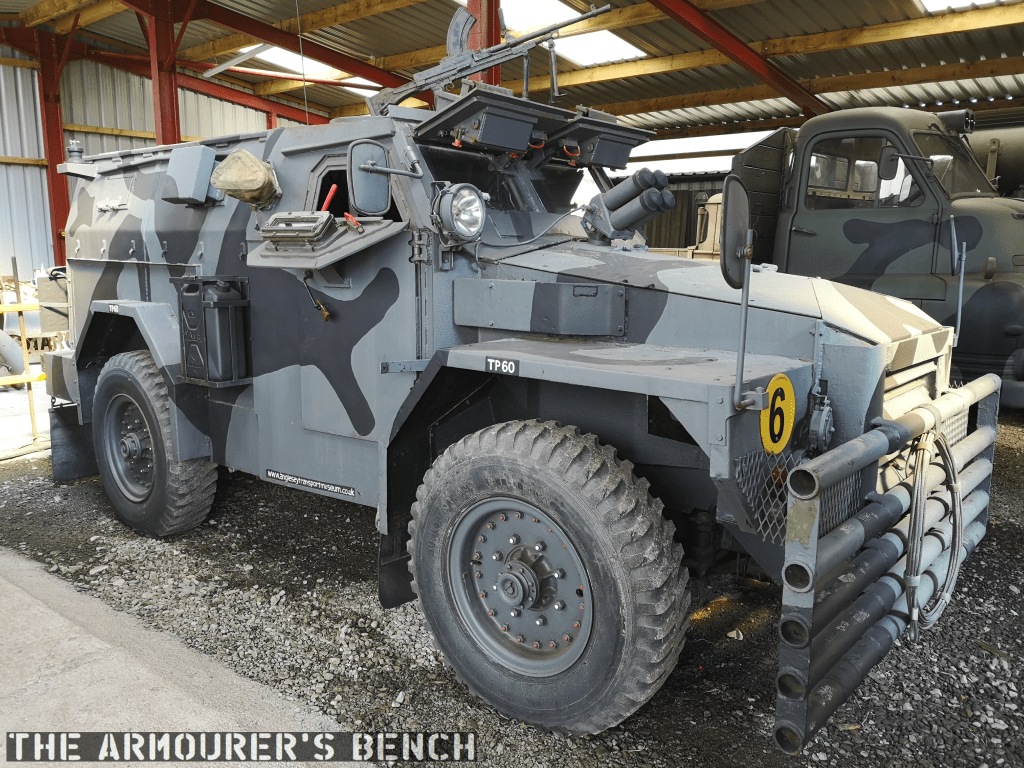
Humber Pig
Humber Pig (Matthew Moss)
Another APC which was in service alongside the Saracen, the ‘Truck, Armoured, 1 Ton, 4×4’, better known as the Humber Pig. Based on a truck chassis, it had a 120HP 6 cylinder engine and room for 6 men on the benches in the back. It could be mounted with an L4 Bren gun. It saw extensive use in Northern Ireland during operation Banner and was in service from 1956 through to the early 90s.
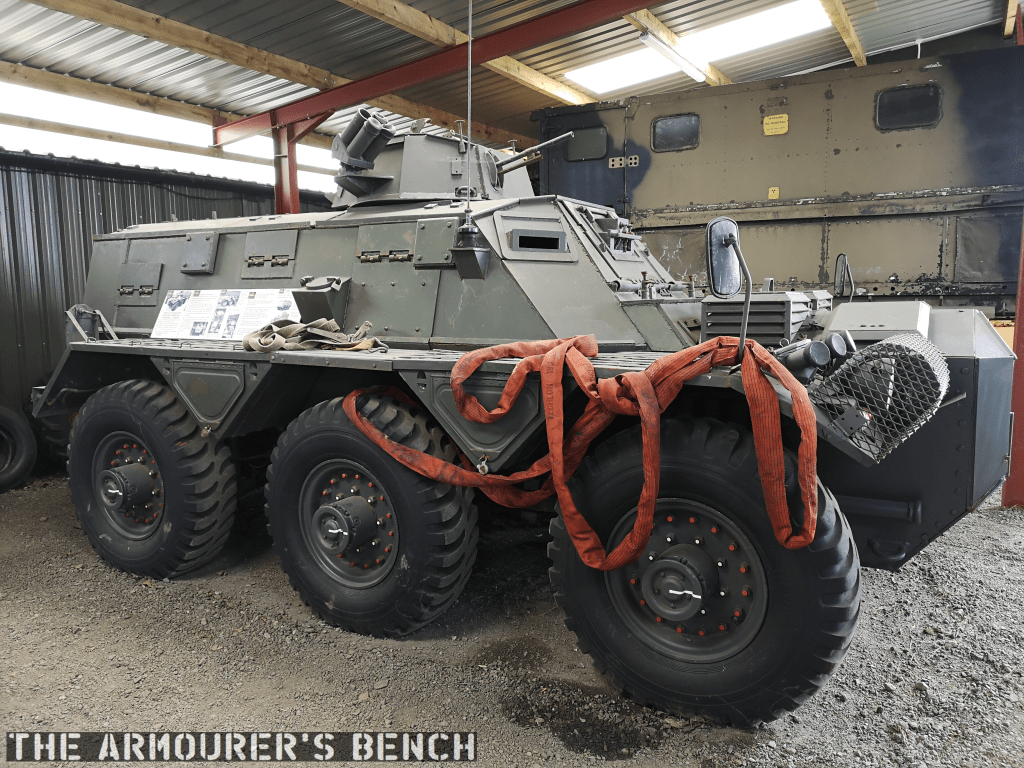
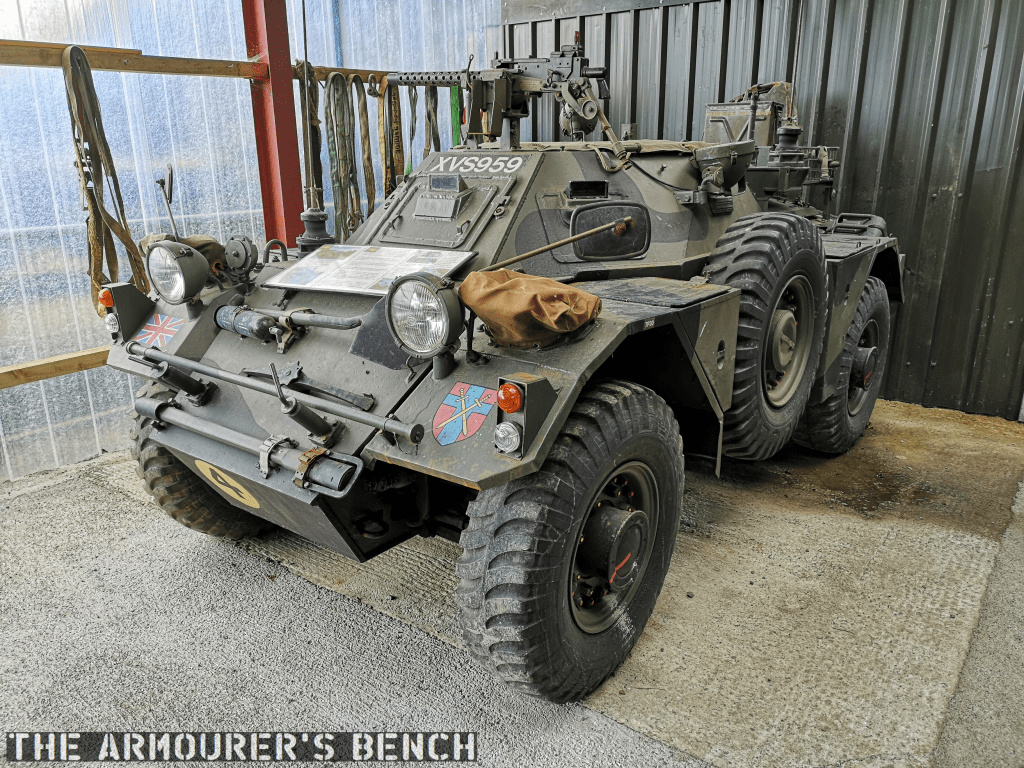
Daimler Ferret Mk1 Scout Car
Daimler Ferret (Matthew Moss)
Next to the Pig in the collection was a Mk1 Daimler Ferret scout car. Fitted out with an M1919A4 and six forward-firing grenade launchers – for smoke grenades. The later Mk2 had a turret but the Mk1 made use of its low profile. This one has its canvas cover over the fighting compartment. The 4×4 Ferret was powered by a 130HP Rolls Royce B60 straight six. Perfect little run-around to do the shopping in.
On the top of the hull is the pintle mounted Browning M1919A4 machine gun. This would have been operated by the Ferret’s commander. We can see the mount allows it to be aimed and fired from somewhat inside the hull. The Ferret entered service in the early 1950s and remained in use into the late 1980s/early 1990s. Just short of 4,500 Ferrets were manufactured.
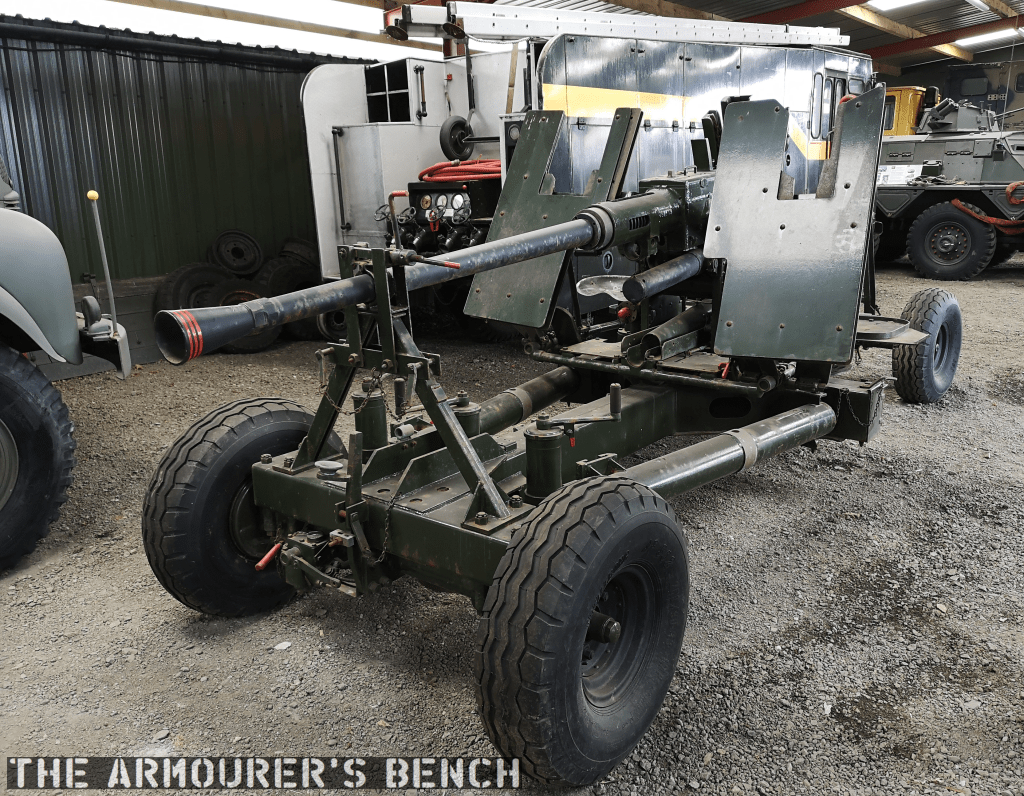
Bofors QF 40mm Mk1
QF 40mm Mk1 (Matthew Moss)
At the centre of the military vehicle collection was a QF 40mm Mk1, better known as a Bofors. Both land and naval versions of the Bofors were used during the Second World War and after. Capable of firing 120 40mm shells per minute, it was normally manned by a four man crew. It filled the British army’s light Anti-Aircraft gun role and remained in service well into the 1980s.
We can see the gun’s huge recoil spring and to the rear of the gun is a case deflector which connected with a trough which channels the spent cases down below the gun. The gun still has most of its controls and traverse and elevation crank handles in place. On top of the gun are the huge guides for the four-round clips of 40mm shells.
If you enjoyed these videos and this article please consider supporting our work here. We have some great perks available for Patreon Supporters. You can also support us via one-time donations here.Thank you for your support!