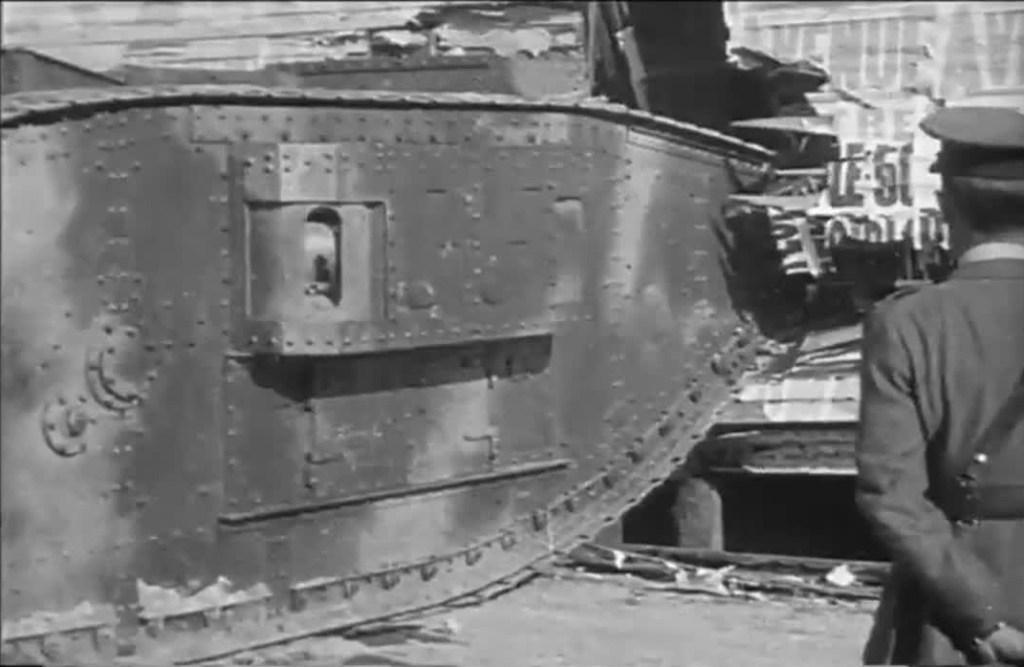
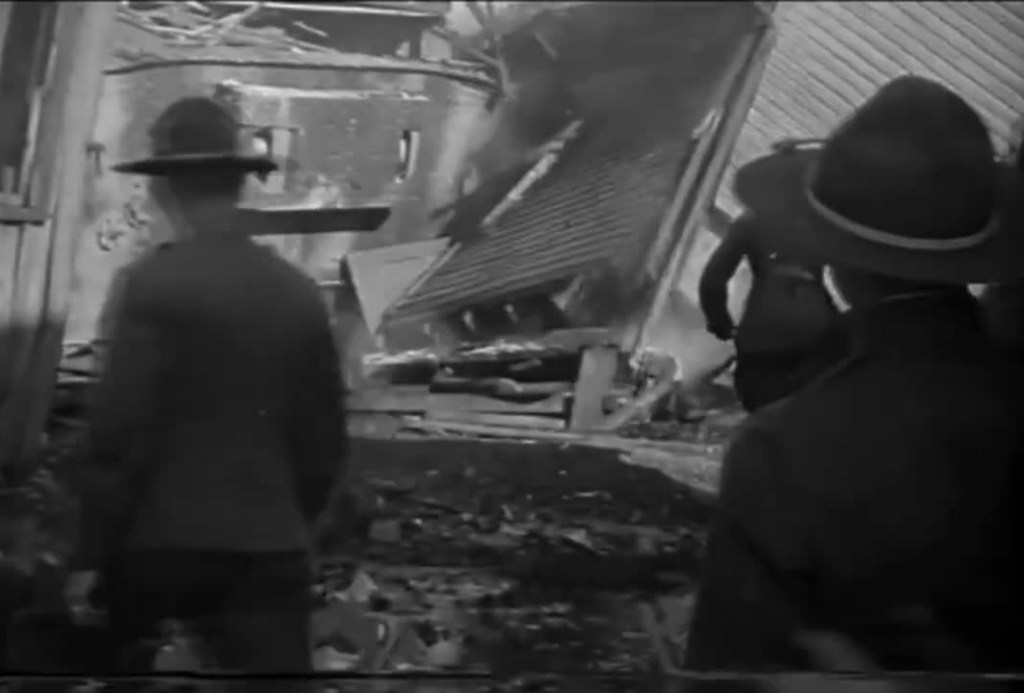
I’m this short video a British MkIV heavy tank ploughs through a series of wooden buildings during a 1917 demonstration.
The tank crashes into the first building
The MkIV was a ‘female’, machine gun-armed, tank that weighed in at around 27 tons. Designed to support infantry, it had a top speed of just 4mph.
The tank pushes over and crushes another wooden-framed building
In this footage the tank does not have its guns mounted as it runs through a succession of wooden framed builds, as British and American officers and men look on.
Don’t forget to check out our series on World War One tanks here.
The Walther P5 was developed in the mid-1970s as an response to the West German police’s continued search for a 9x19mm service pistol to replace the older smaller calibre pistols then in service, like the Walther PP. It was developed to fit the new police specification for a small, handy pistol which could be brought into action quickly. Walther’s design competed against pistols from Mauser, Heckler & Koch and SIG Sauer.
Walther P38 (Rock Island Auctions)
The P5′s design evolved from the P38, combining the lock work and dual recoil springs of the P38 (re-designated the P1 in 1963) with a shortened barrel and a full length slide. While a shortened P38k had been produced in the early 1970s, this was only an as an interim solution. The P38K retained the same slide and frame as the original P38s, but had the front sight mounted on the front strap of the frame and none of the pistol’s contours were rounded to aid drawing and returning to a holster. Only around 2,600 P38Ks were produced.
Following the attack on the 1972 Munich Olympics games West German police began the search for a new service police. Walther’s response, the P5, was introduced in 1978. The P5 is a locked-breech pistol and has double-action/single-action (DA/SA) trigger. It uses the same short-recoil operated system and locking mech as the P38. This means that the barrel and slide recoil together for a short distance before the locking block falls and allows the slide to continue moving rearward, ejecting a spent case and chambering a new round.
Walther P5 (Matthew Moss)
Walther moved the P5’s decocker from the slide to the frame and this also served as the slide stop and slide release. I would say that the P5’s decocker is easier to operate, with a shorter length of travel, than the SIG P6’s.
Following the West German police specification Walther designed the pistol to be safely and rapidly brought into action, and as a result dispensed the manual safety. Instead, the pistol could be carried in condition two – with a round in the chamber and the hammer down. This was safely achieved by some upgrades to the P5’s hammer and firing pin. There is a small recess in the pistol’s hammer for the firing pin. The firing pin only moves into alignment with the hammer surface when the trigger is pulled.
The P5 has a 3.5 inch (9cm) barrel and fed from an 8-round, single stack, magazine with a heel release. Like the P38 the pistol ejects to the left rather than the right. The P5 has a stronger and more durable fully enclosed slide which is contoured to aid holstering. The pistol has an alloy frame, with full-length slide rails and an enlarged trigger guard for use with gloves.
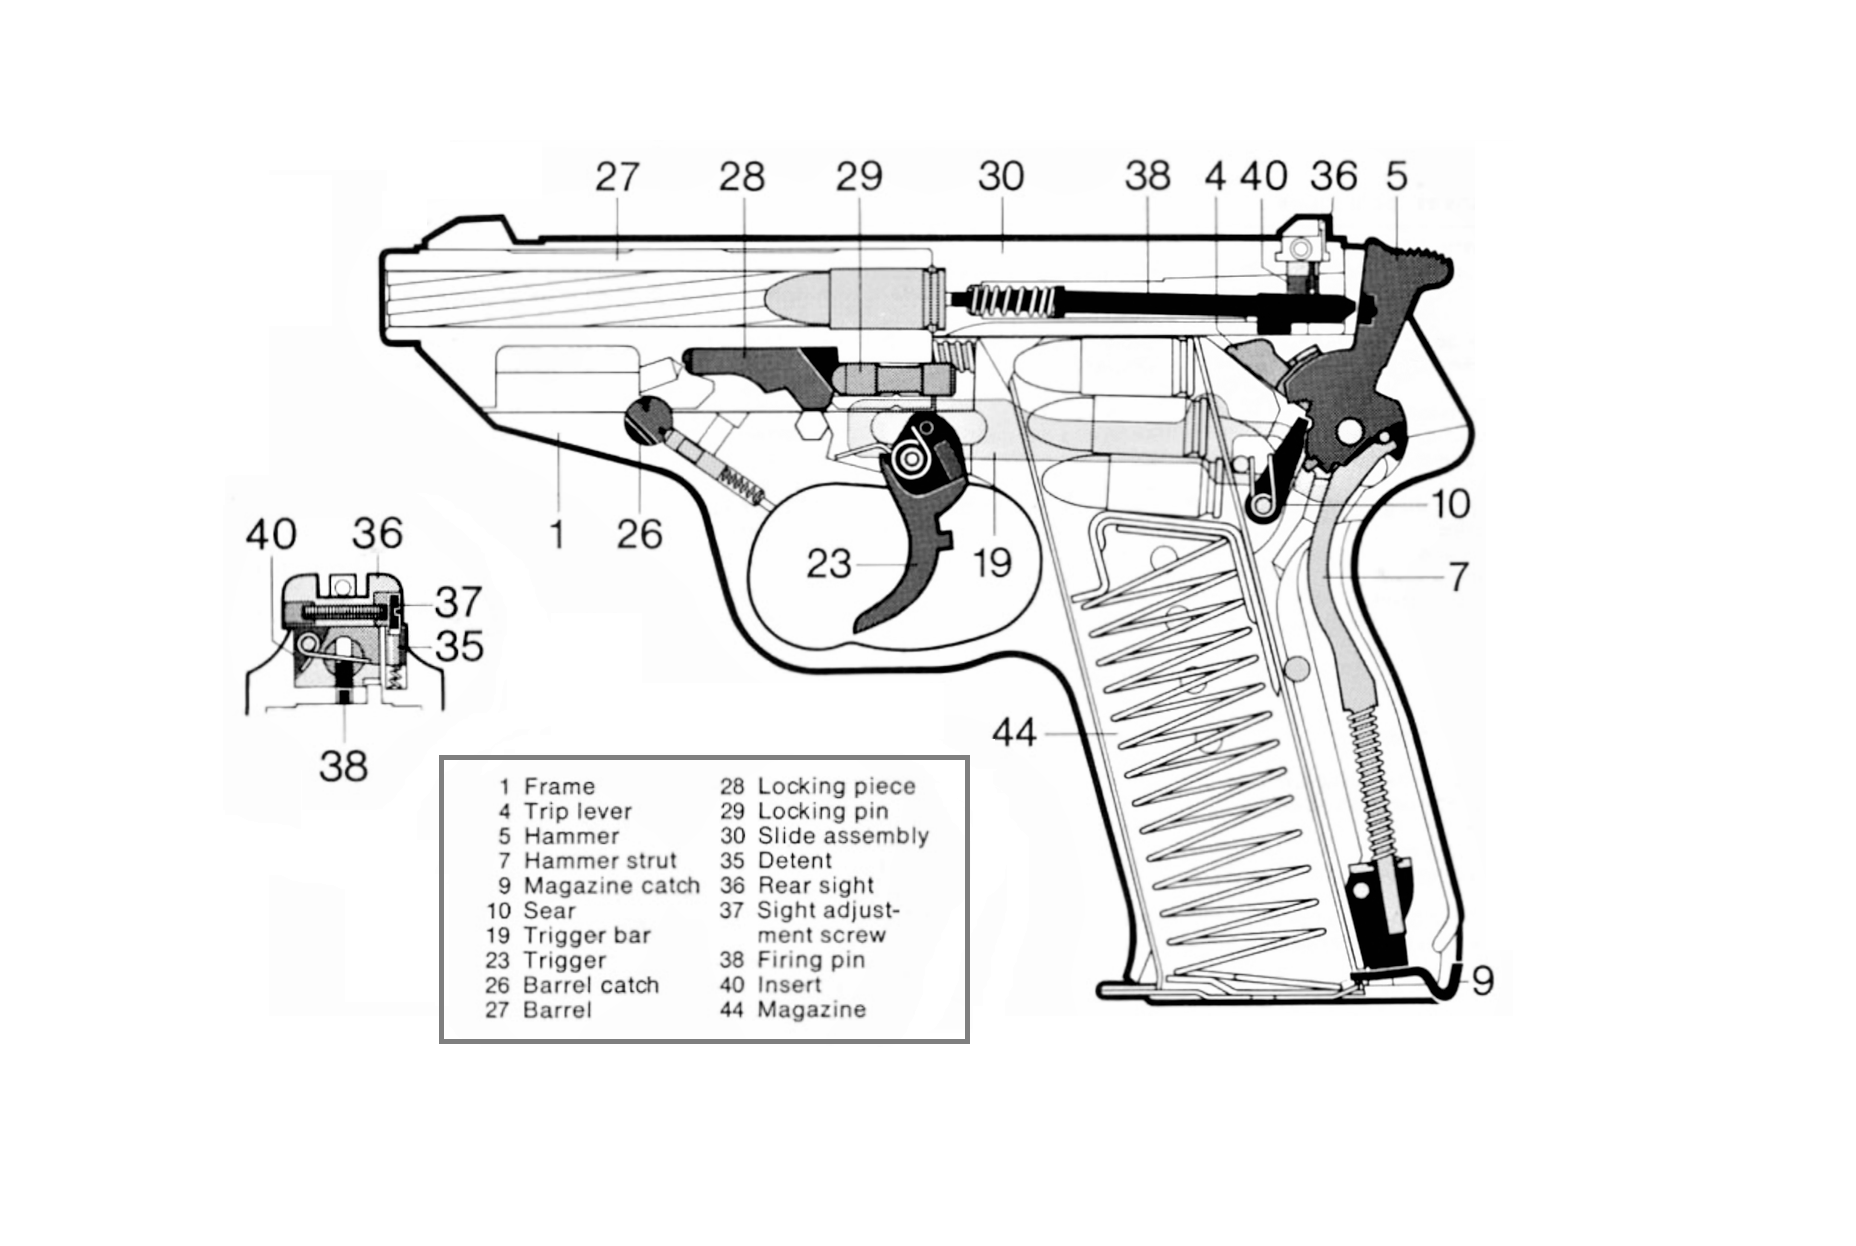
Diagram showing the P5’s parts and internal layout (Walther)
In addition to the P5, Walther also developed a compact model for plain clothes use which had a slightly shorter barrel (3.1 inches), slide and a truncated hammer. It was introduced in 1988 and had a lighter alloy frame with the P5 Compact weighing 750g (1.65lbs) rather than 795g (1.75lbs). While early production pistols retained the heel magazine release the majority had a thumb release. A small number of P5-Lang, long barrel target pistols were also produced in the late 1980s.
Disassembly is simple and comes directly from the P38. The slide is retracted a little until the barrel catch can be rotated. The slide and barrel can then be slid forward off the frame once the trigger is pulled.
The P5 proved to be an accurate and reliable pistol and once it was accepted by the police trials (along with the designs from Heckler & Koch and SIG-Sauer – the P7 and P6 respectively.) It was adopted by uniformed officers of Baden-Württemberg and Rhineland-Palatinate’s State Police – these pistols were marked ‘BMI’ for Bundesministerium des Innern – the Federal Ministry of the Interior. This pistol is a BMI-marked gun and dates from February 1983.
Walther P5 brochure cover (Walther)
It also became the standard issue sidearm of the Dutch police who purchased around 50,000 pistols, becoming Walther’s largest customer for the P5. The Dutch guns were later fitted with aftermarket Houge rubber grips and some changes to the hammer safety system were later made in the mid-1990s. The Dutch police retired the P5 in 2013 replacing it with the P99Q.
The P5 also saw some military sales with elements of the Portuguese Army adopting it and the P5 Compact was also adopted by the British Army. Selected in the late 1980s for issue as a personal protection side arm. It was designated the Pistol L102A1 and was extensively issued to British troops in Ireland for use while in plain clothes or off duty.
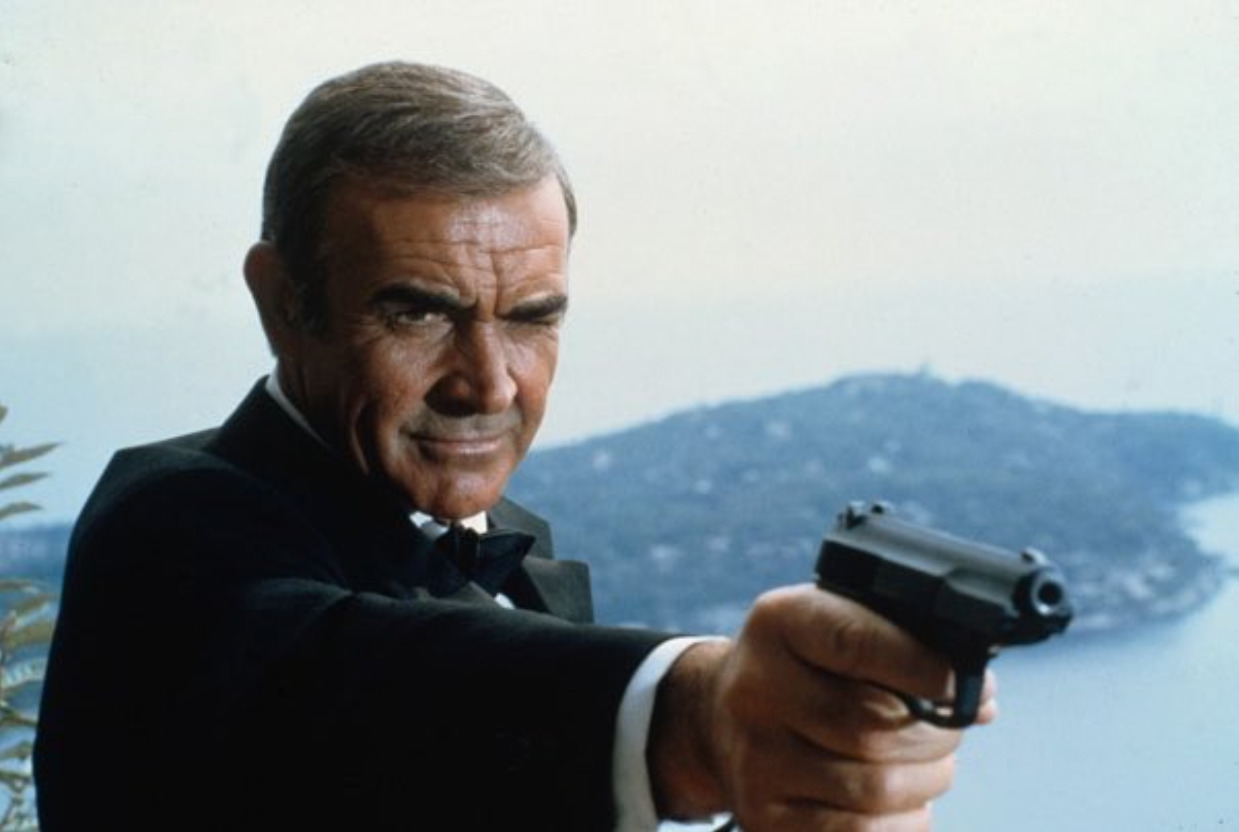
The P5 on screen: Sean Connery as James Bond in, the technically unofficial, 1983 Bond movie Never Say Naver Again. Roger Moore’s Bond also carried it in Octopussy (also in 1983)
While certainly one of Walther’s lesser known pistols the P5 is a well-made, well-designed duty pistol, with comfortable ergonomics – the fiddly magazine catch not withstanding – and the slide and decocker are very smooth to operate. The trigger pull in both the single and double action modes is also pretty good. Overall, around 100,000 pistols were produced before production came to an end in 1993.
I recently had the opportunity to visit the National Army Museum in London and check out their current exhibition, The Art of Persuasion, a look at the wartime work of graphic designer Abram Games. While you may not recognise the name you will probably recognise some of his impressive and striking posters.
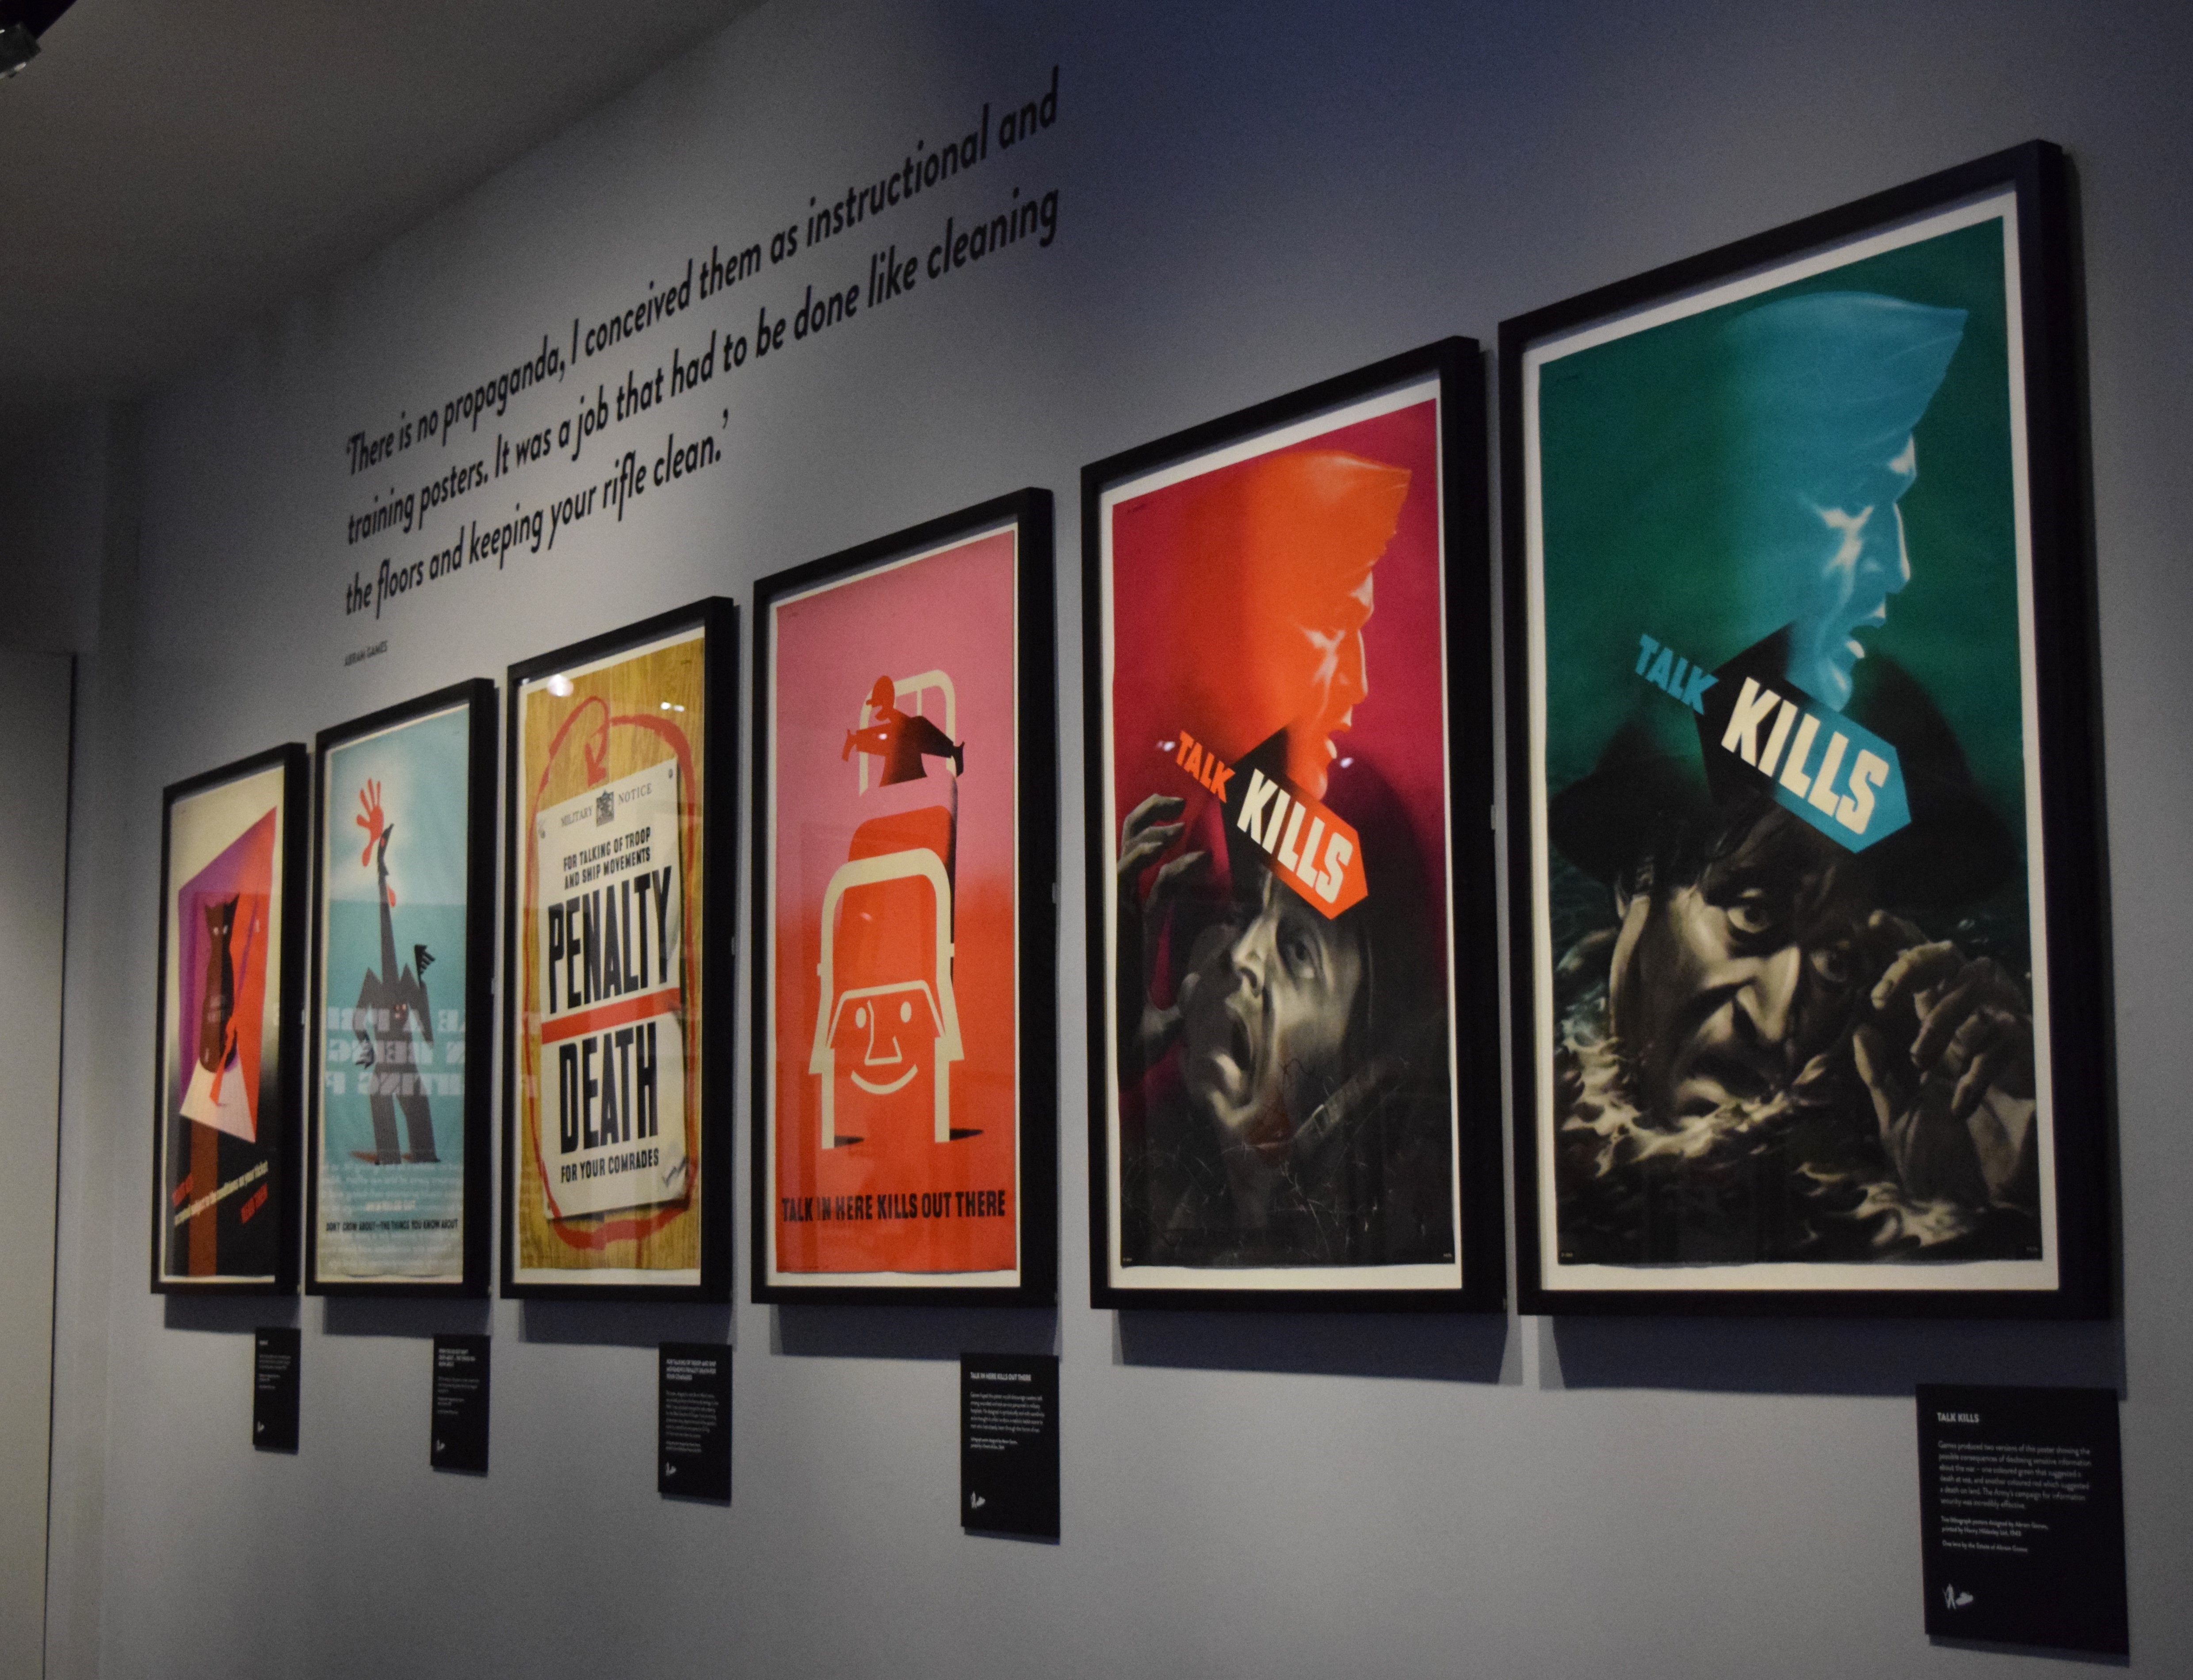
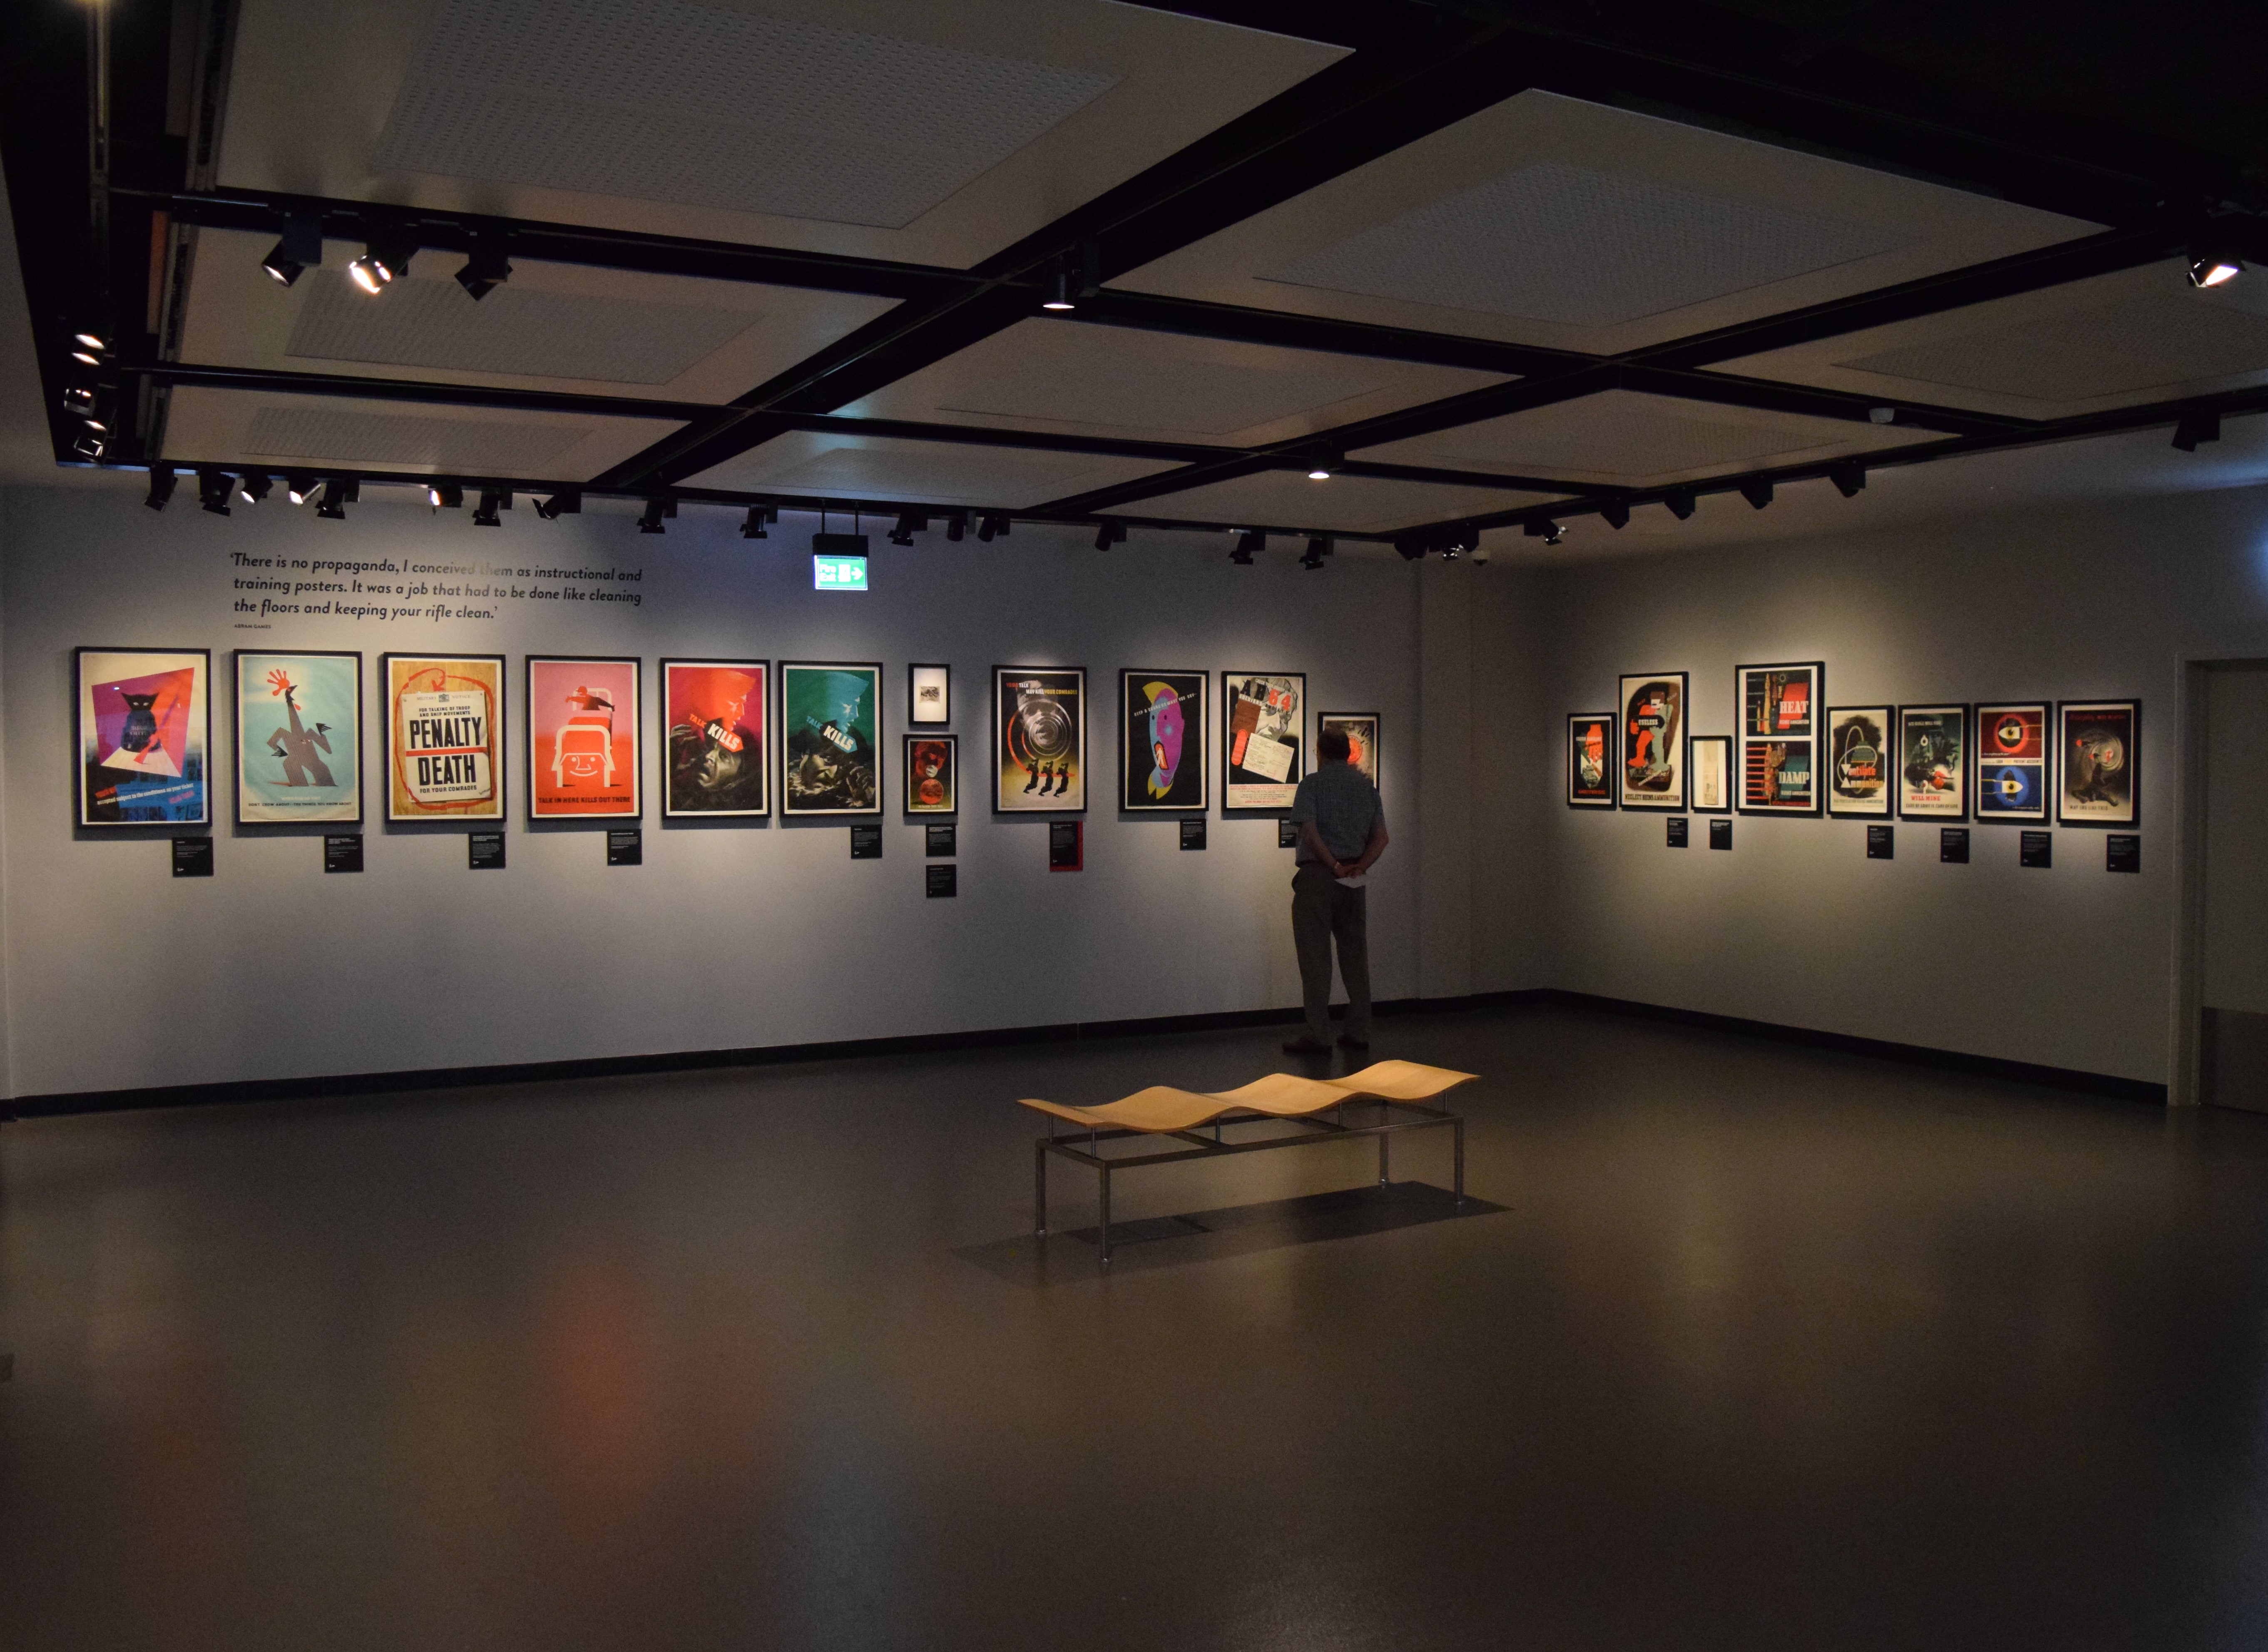
Games’ work is instantly arresting with an eye-catching starkness which underlines the messages he sought to convey. In the video above I aim to give a feel for the exhibition and, if you are unfamiliar with him, a feel for Games’ work.
He joined the army in 1940 and began designing posters for both military and civilian audiences in 1941. Over the next 5 years he designed over 100 posters, some of which have become iconic.
Some of Games’ posters designed to dissuade loose talk (Matthew Moss)
Describing himself as a ‘graphic thinker’ Games used silhouettes and contrasting colour and vivid subjects. Largely self-taught Games was extremely passionate about his work and by November 1942 had been made ‘Official War Poster Artist’.
A shot of the exhibition space showing some of the posters on display (Matthew Moss)
The exhibition not only displays his work but also explains how Games created his posters, often working from models or taking photographs of soldiers training. Some posters have his original sketches displayed next to them to show how the concepts evolved.
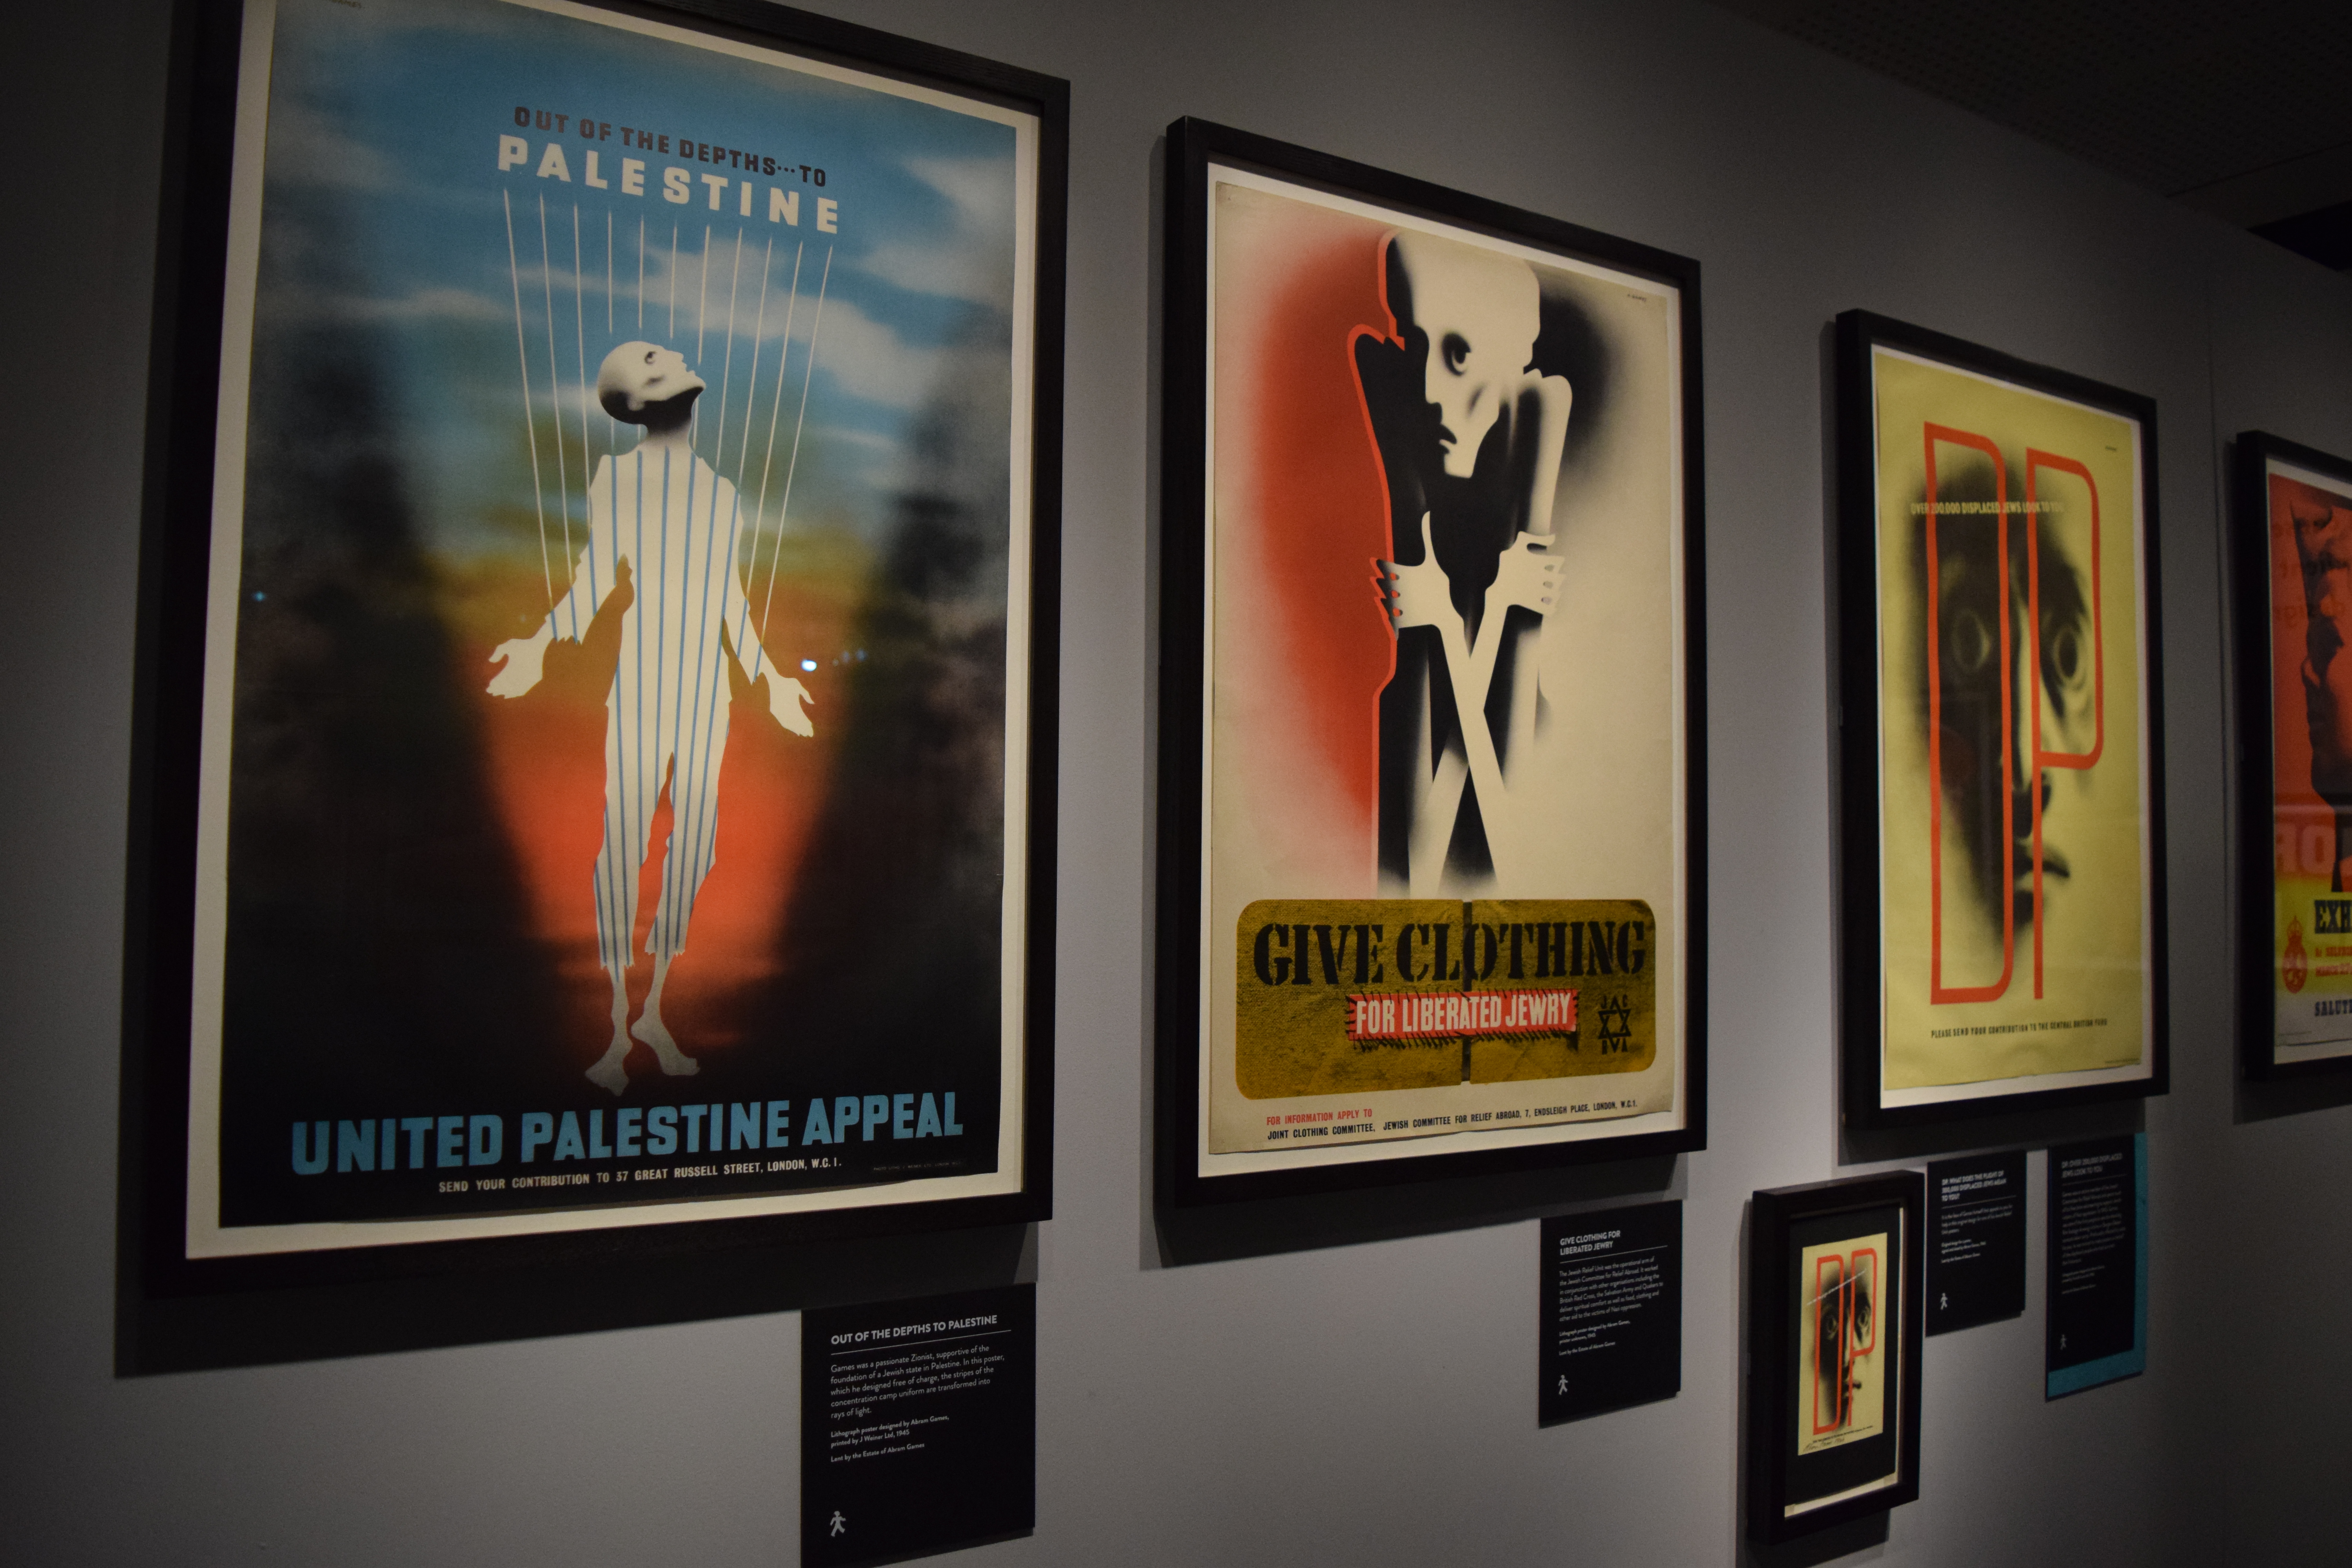
His posters encouraged young women to join the ATS, soldiers to volunteer for the Commandos and civilians to support the war effort. In addition to posters for the War Office, some of his most recognisable work, including the ‘Your Britain, Fight For It Now’ posters were designed for the Army Bureau of Current Affairs in an effort to raise morale and promote the idea of post war reform and progress. He also designed a series of powerful, striking posters for appeals to aid Europe’s Jews, a cause he was deeply connected to as a Jew. Games was demobilised in 1945 and enjoyed a long, successful civilian career, he died in 1996.
Appeal posters to aid Europe’s Jews (Matthew Moss)
The National Army Museum’s exhibition works hard to give a feel for not just the work but also the man and his motivations. Games’ wartime posters are extremely rare, unsurprising when most were covered or torn down after a few months, so it was a treat to see them in person. Up close you get a sense of what it would have been like to see one on a barrack wall or a billboard 75 years ago. The exhibition also had some interesting interactive elements with a touch screen allowing visitors to create their own Games-style posters as well as another screen with video interviews with Games’ daughter and people who knew him talking about his work.
Games’ work are not just pieces of art but also important historical objects that can help us understand what the war was like and what motivated people to fight.
Find out more about the exhibition on the National Army Museum’s website, here.
Matt recently had the pleasure of attending the Autumn 2019 Soviet Threat event at the Hack Green Nuclear Bunker in Cheshire. One of the people Matt had the chance to speak to was Allen from the MECo group of collectors and reenactors.
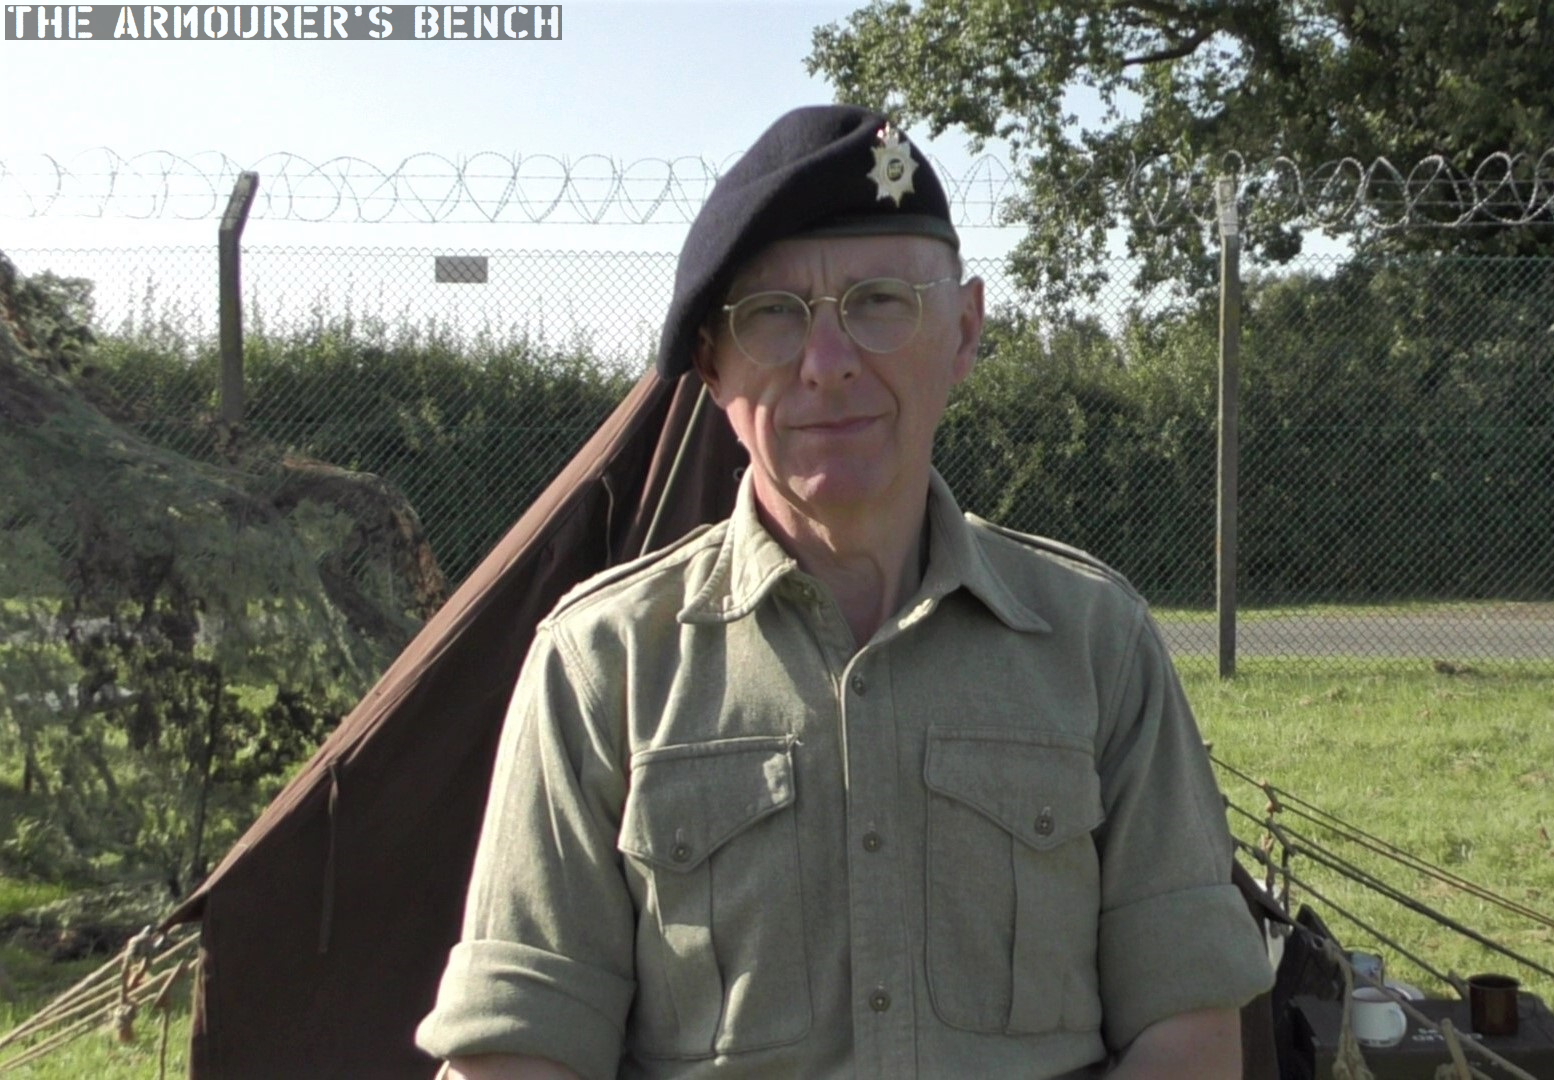
Allen portraying a member of the Royal Army Service Corps, c.1964 (Matthew Moss)
Allen was portraying a member of the Royal Army Service Corps, with uniform representing that of 1964, the year before the corps became the the Royal Corps of Transport. Allen was kind enough to explain his uniform and kit on camera.
Check out our earlier video with Rifleman Moore discussing his 60s PARA portrayal here.
Matt had the pleasure of attending the Autumn 2019 Soviet Threat event at Hack Green Nuclear Bunker in Cheshire at the weekend and spoke to many of the reenactors and collectors attending the event. Check out our earlier video about the event here.
One of the people Matt had the chance to speak to was Simon of the Rifleman Moore YouTube channel. Simon is a collector of uniforms and kit and part of the MECo group of collectors and reenactors. Simon was kind enough to film a quick video with Matt and discus his kit.
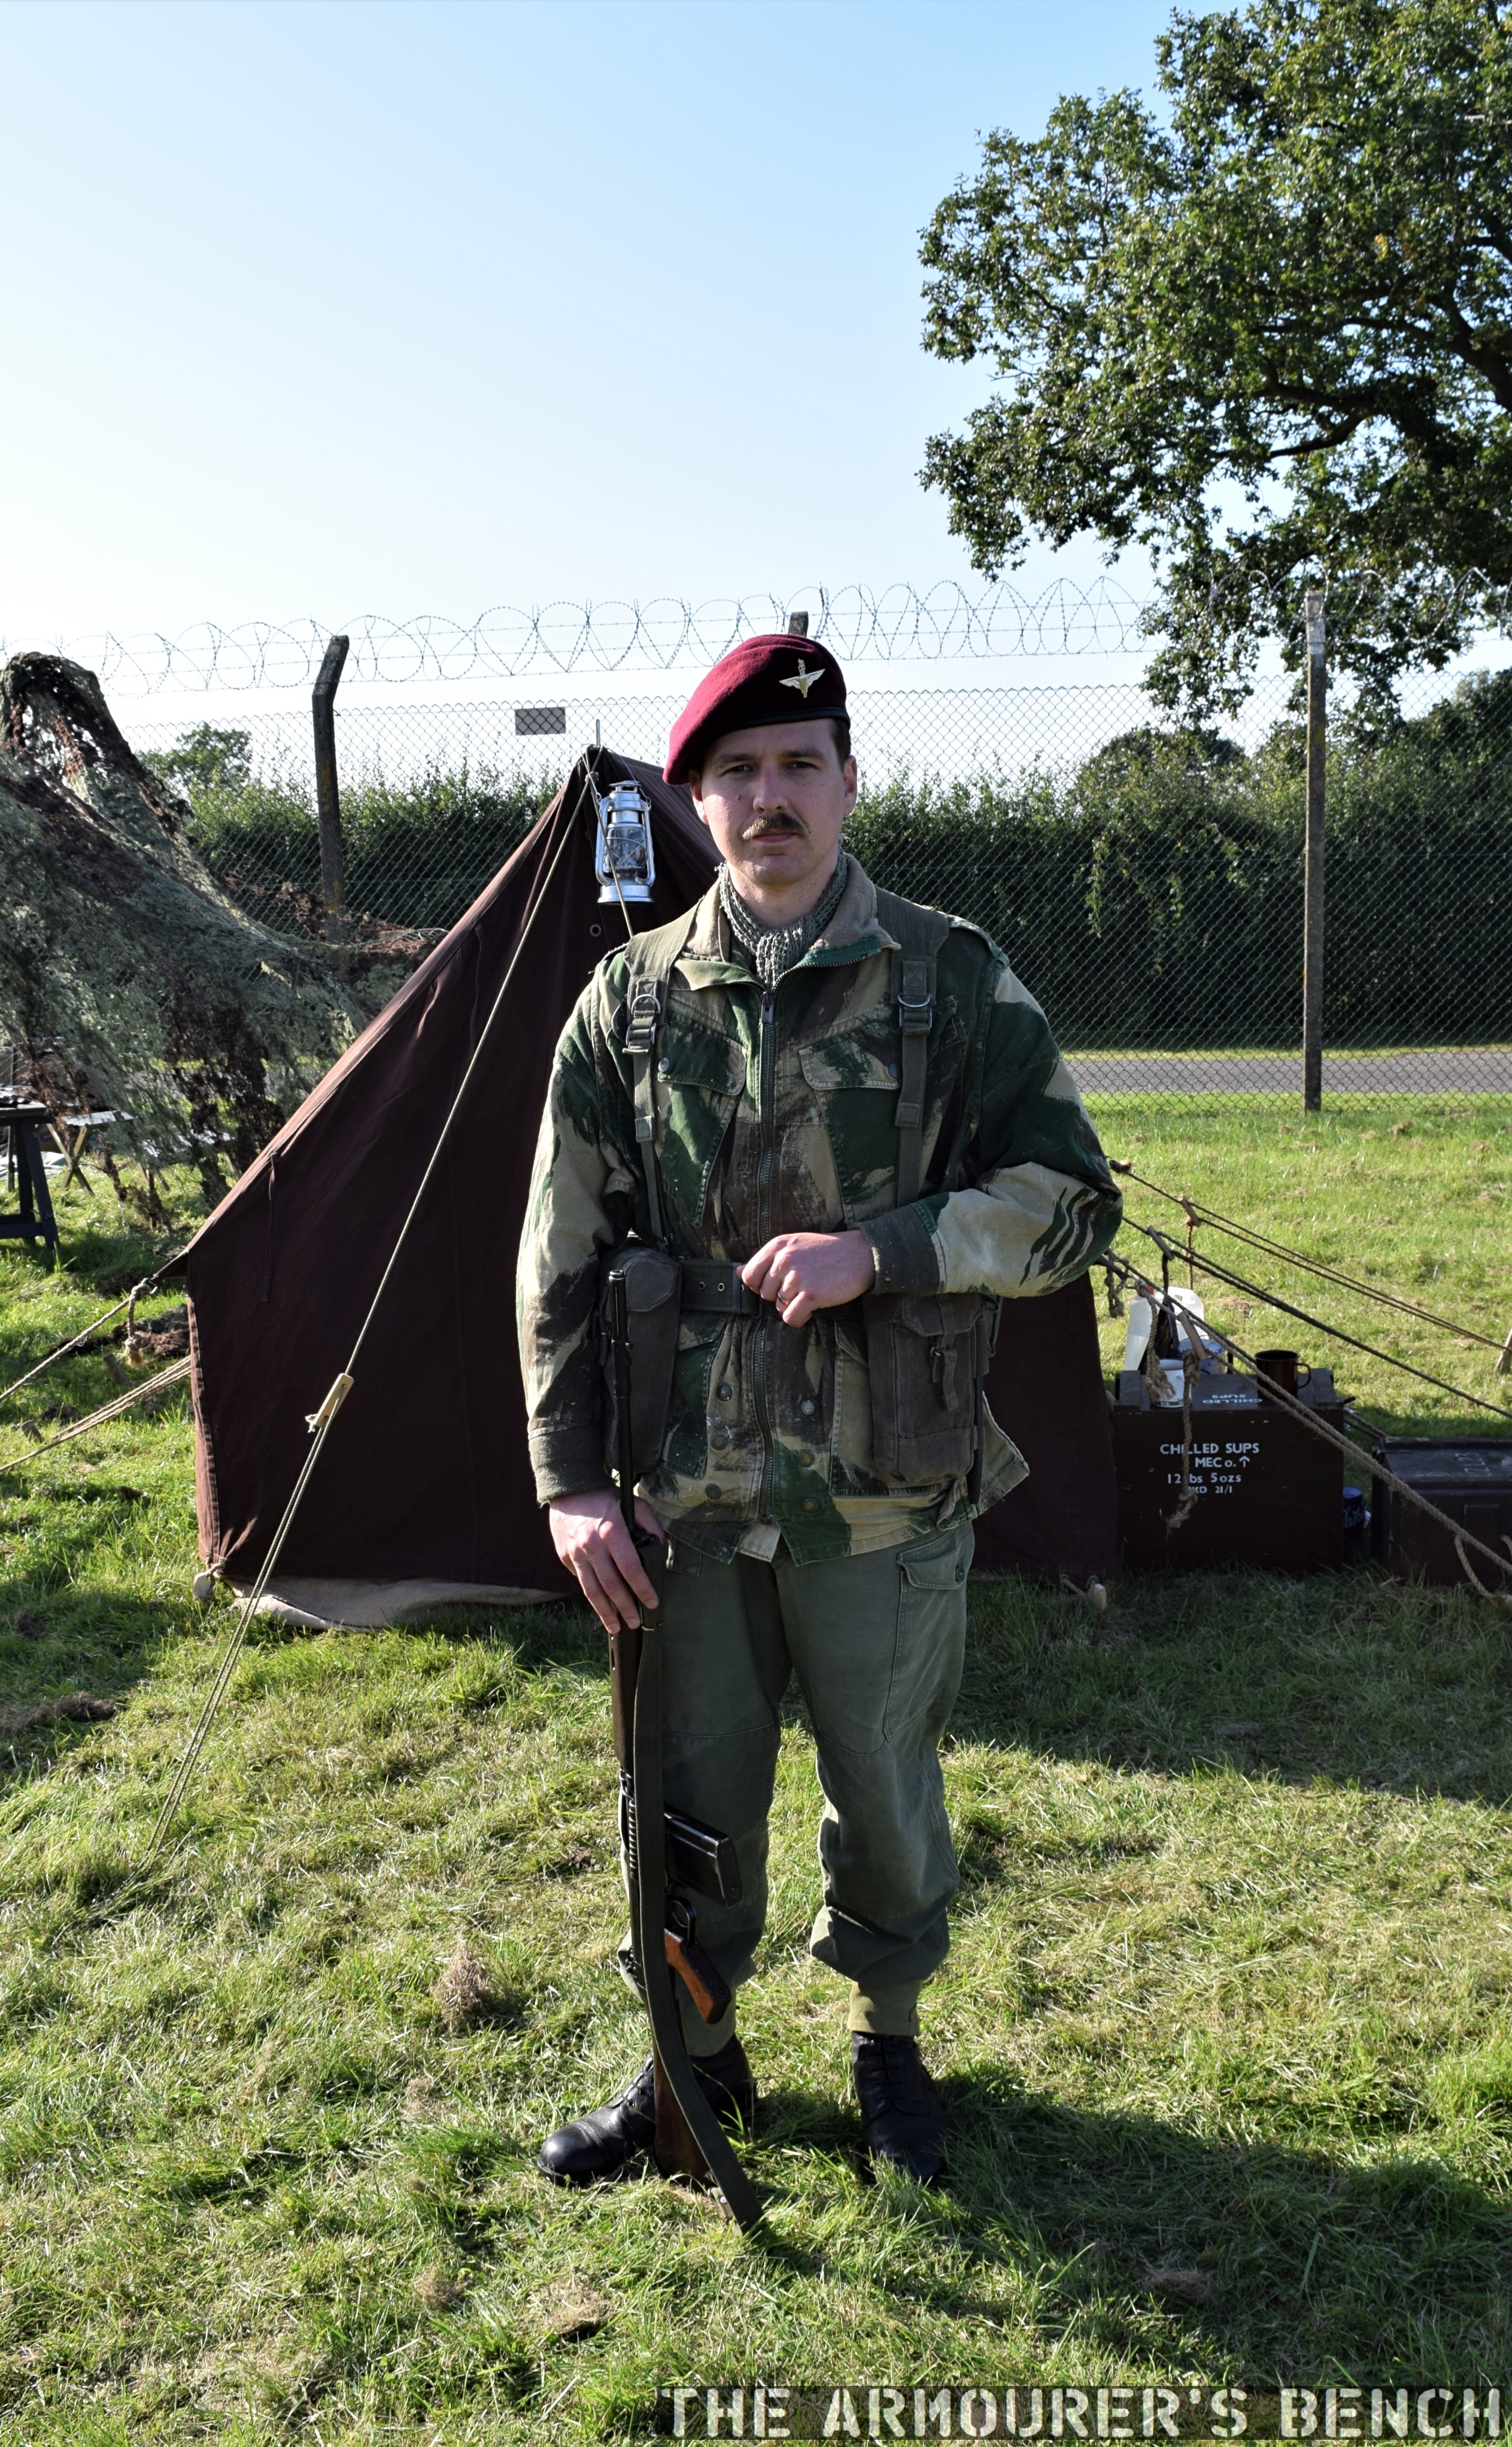
At Soviet Threat he was portraying a member of the British Army’s PARA’s as they would have been dressed and equipped circa 1964 – twenty years on from Operation Market Garden, which took place 75 years ago this year.
A full-length photo showing Simon’s portrayal of a 1960s PARA, complete with SLR (Matthew Moss)
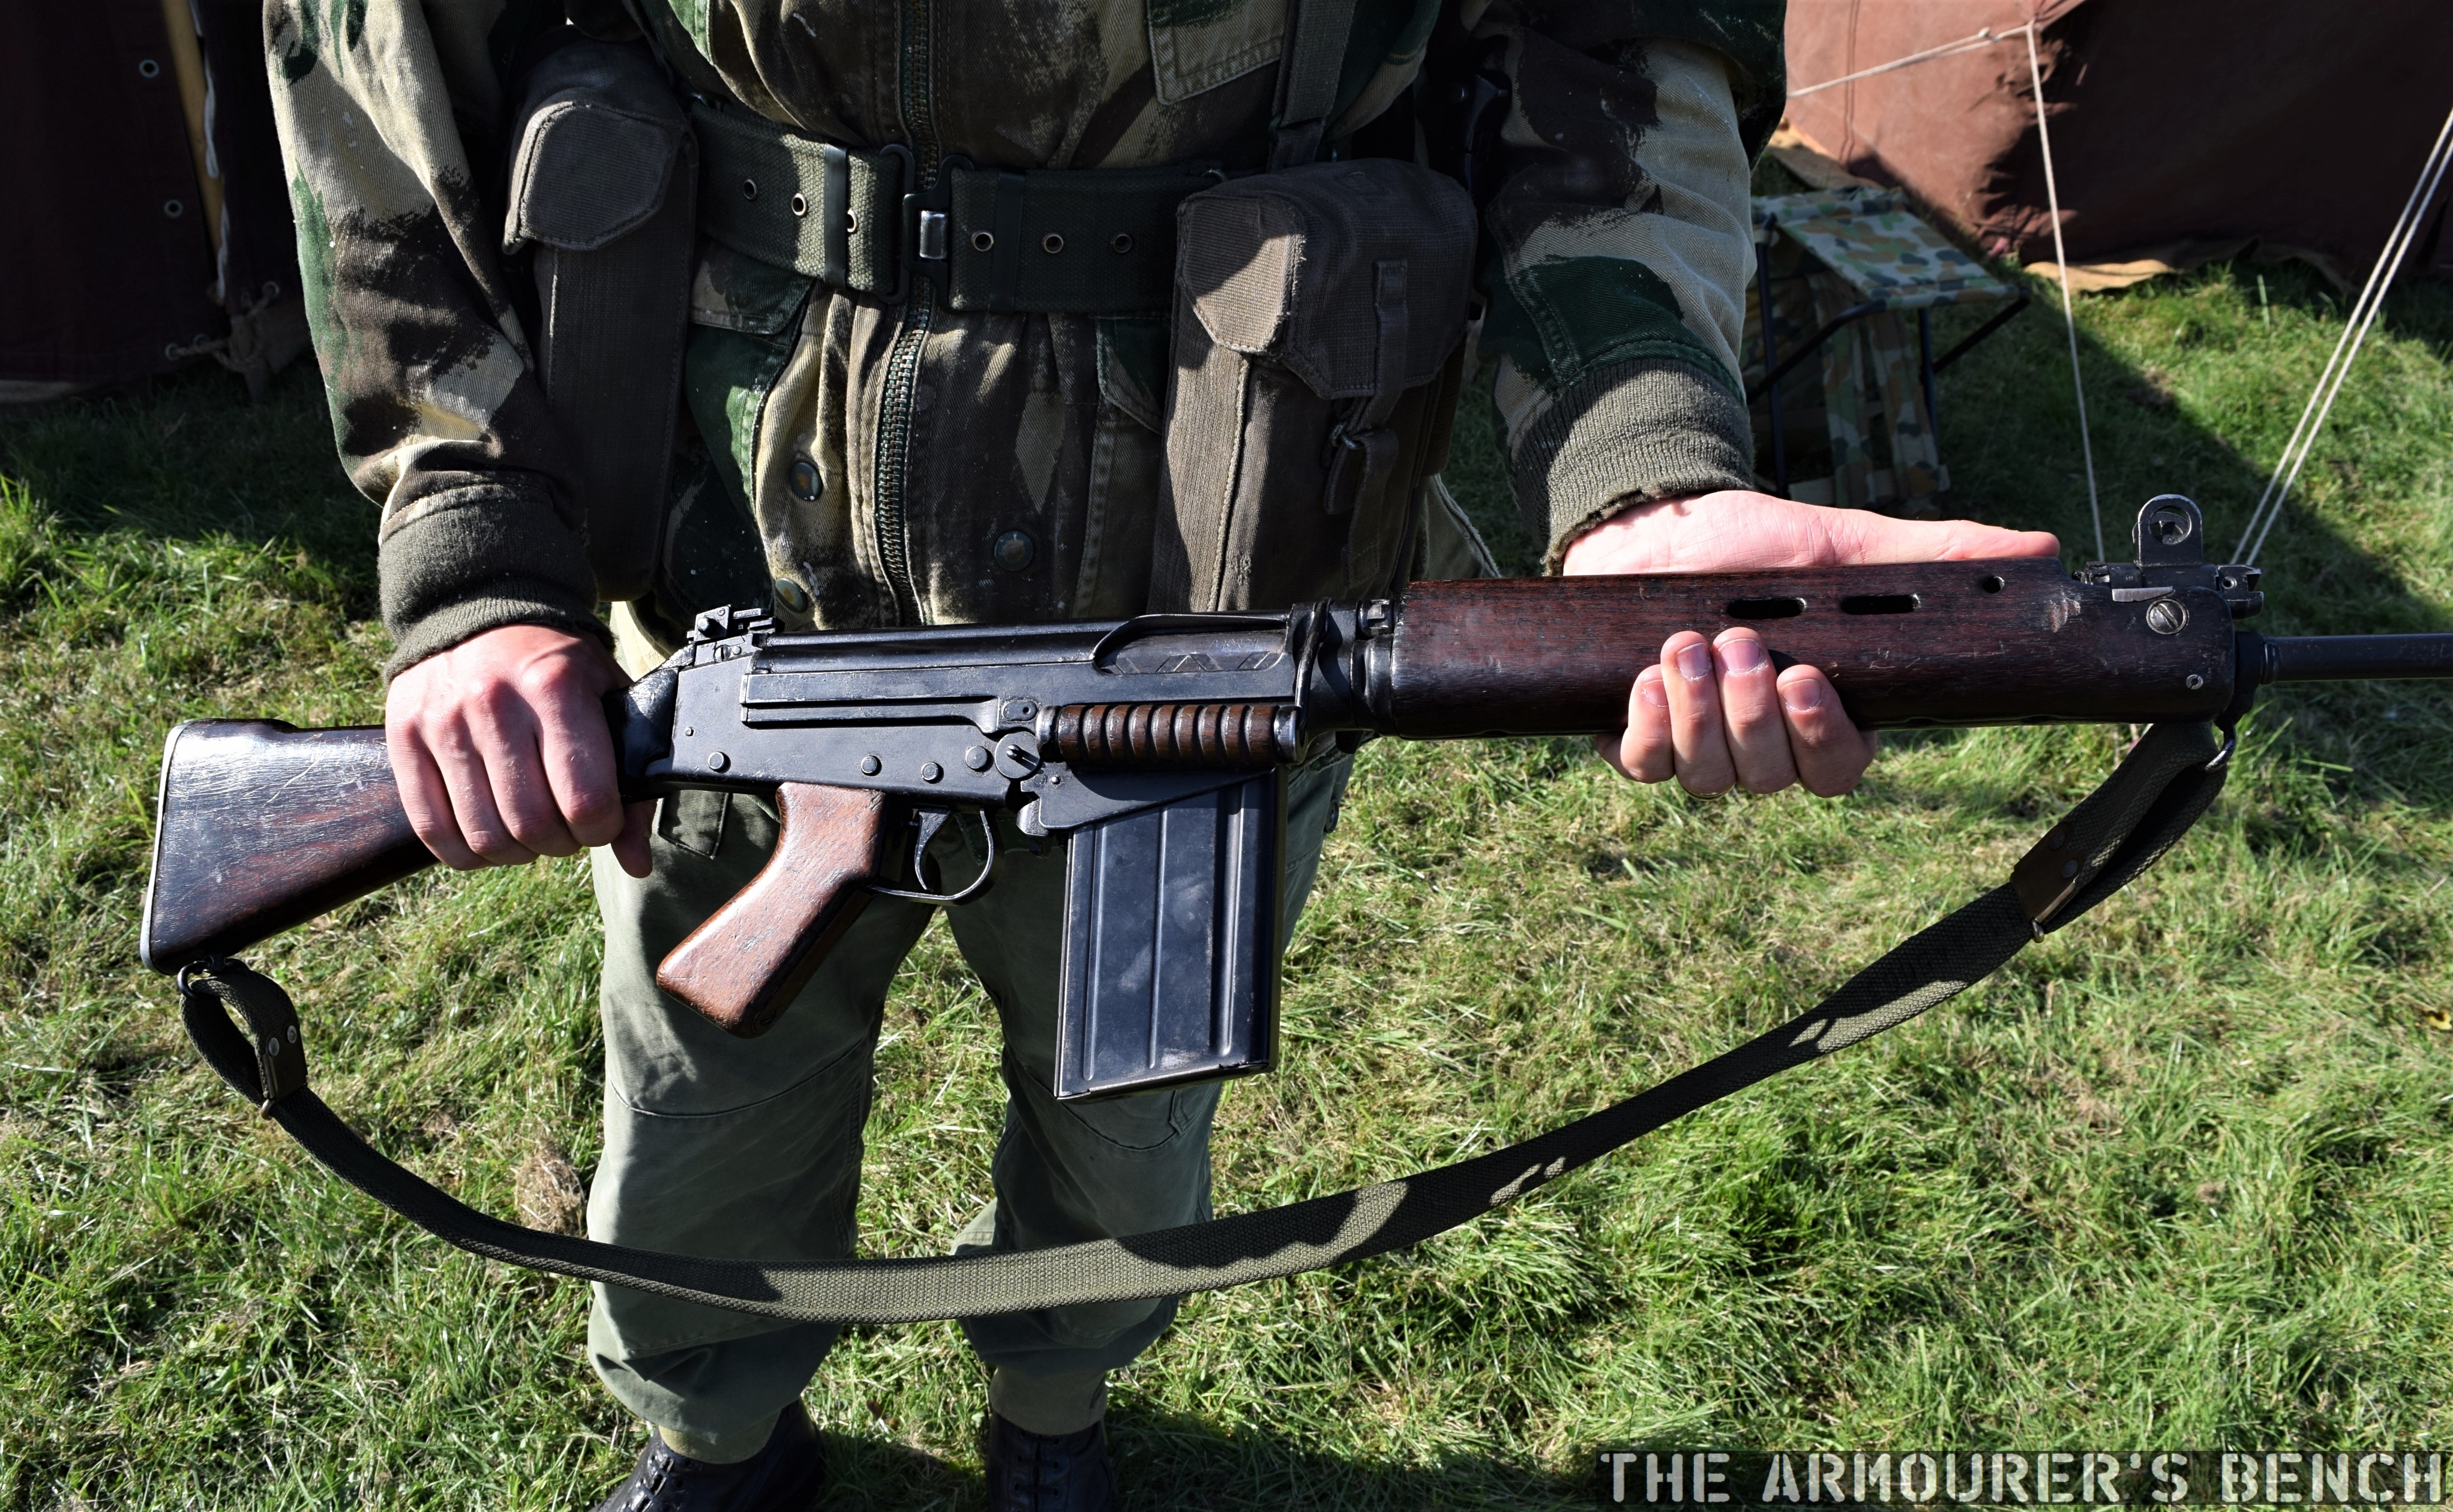
Here’s a closer look at the deactivated L1A1 Self-loading Rifle Simon completed his portrayal of a period PARA with.
A nice example with period-correct wooden furniture and rifle sling (Matthew Moss)
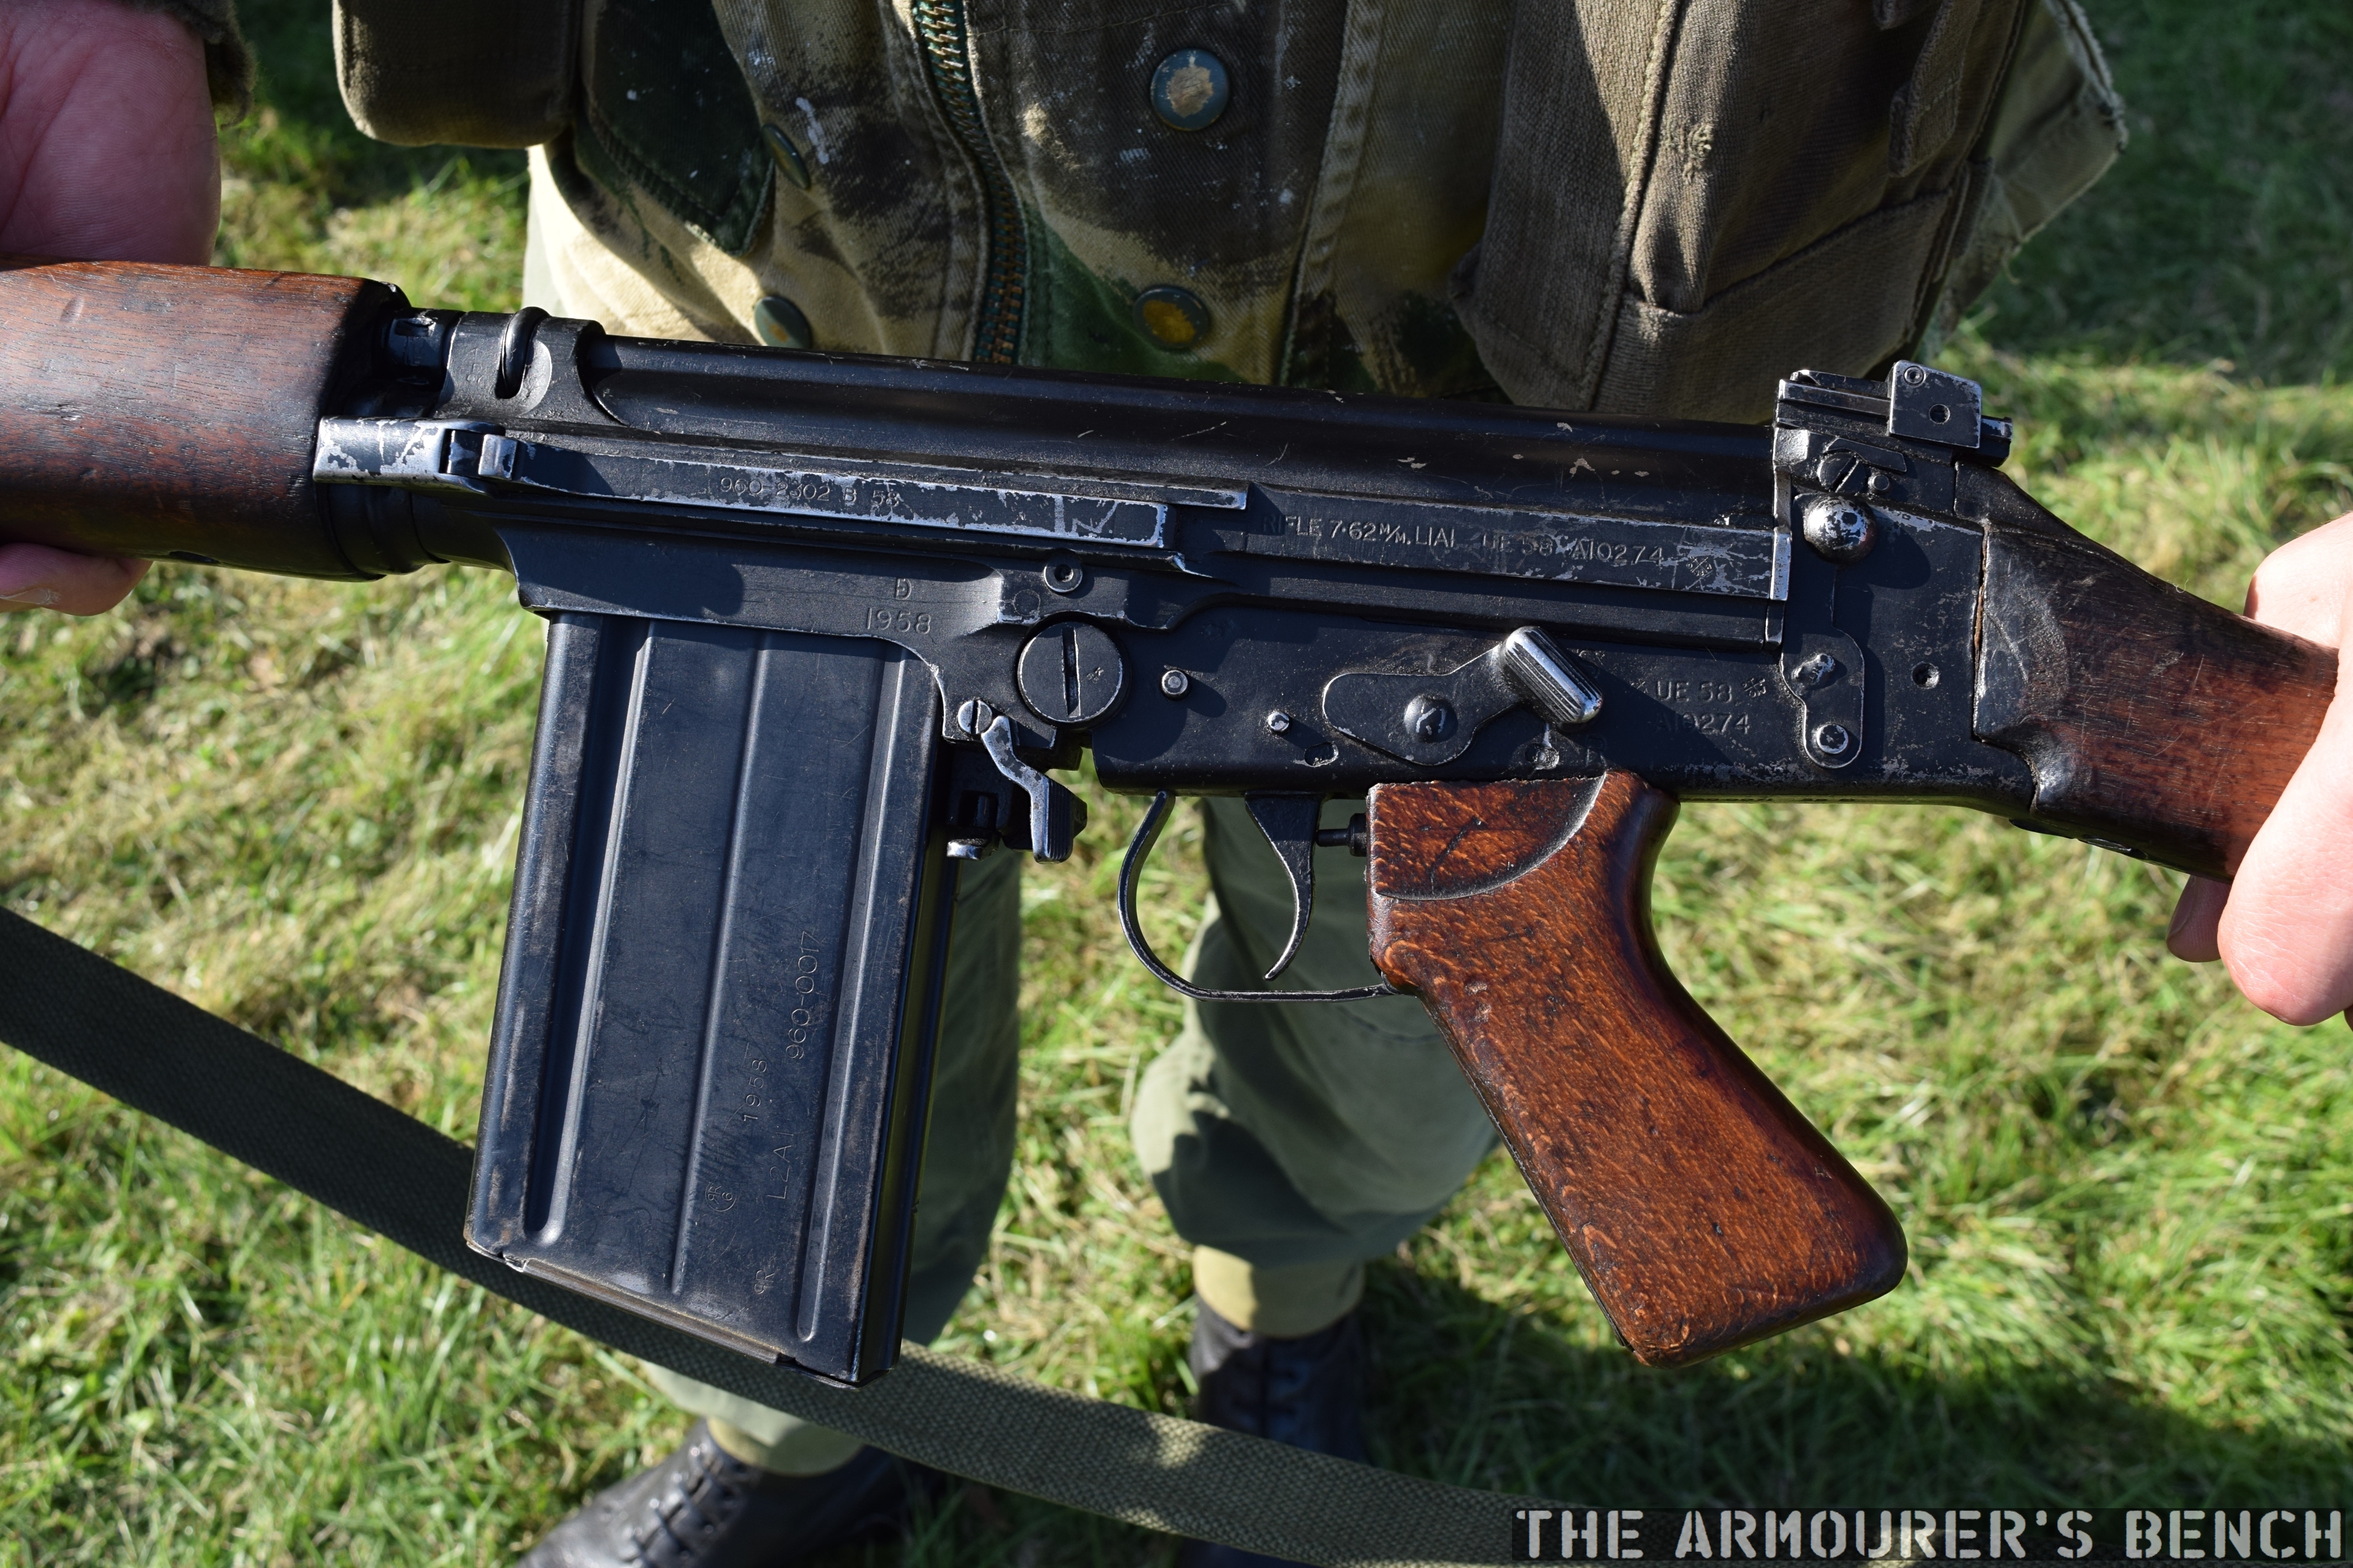
A closer look at the rifle’s markings (Matthew Moss)
The rifle was an Royal Small Arms Factory Enfield-production L1A1, inch pattern semi-automatic adaptation of the FN FAL, manufactured in 1958, as attested to by it’s UE58 prefixed serial number.
Many thanks to Simon for taking the time to speak to us and run through his uniform and kit. Check out his channel here.
This weekend I visited the Hack Green nuclear bunker in Cheshire, UK. They have a bi-annual Cold War history event called Soviet Threat where reenactors and collectors are invited down to display their kit. I had the pleasure of meeting to some really interesting people and seeing some cool vehicles and kit.
I spoke to Lucy, the Hack Green Bunker museum’s curator but sadly had some sound problems. Hopefully, we’ll get to speak to Lucy about the museum in more depth in the future! I also spoke to a number of the groups and individuals attending and we’ll have a couple more videos coming up.
Here’s some photos from the event:
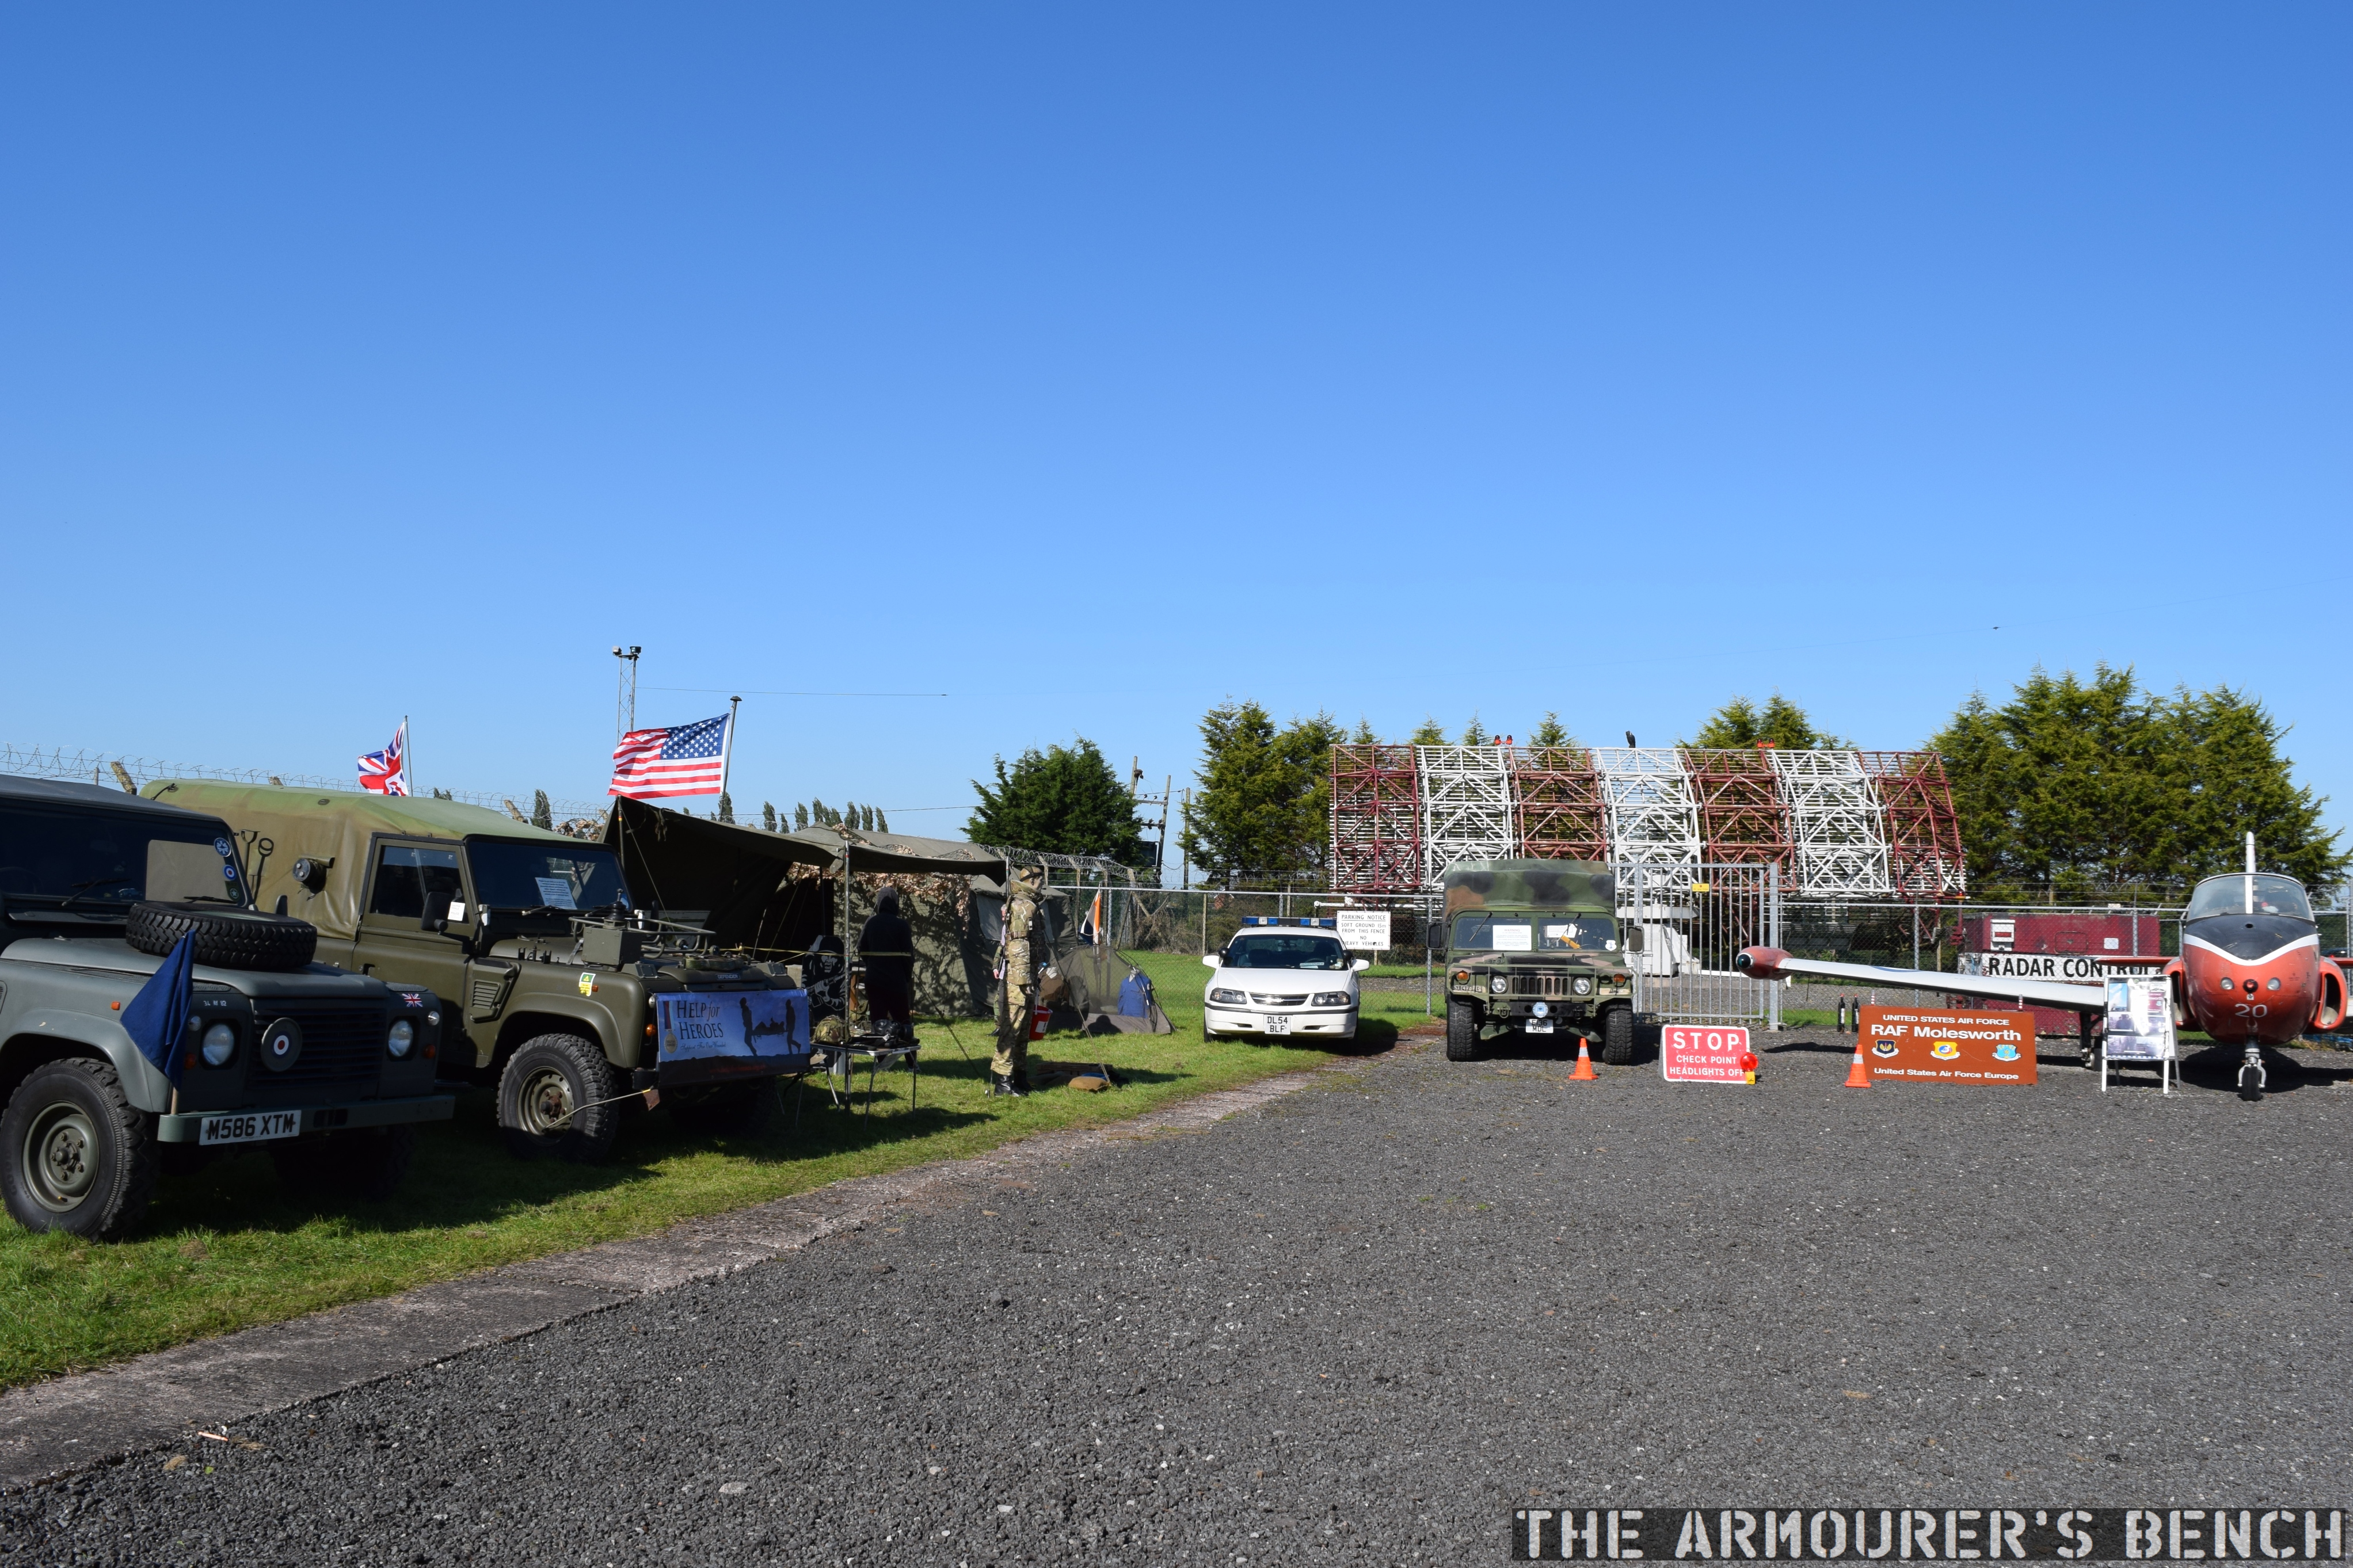
Some of the vehicles on display at Soviet Threat, including a HMMWV and a jet trainer (Matthew Moss)
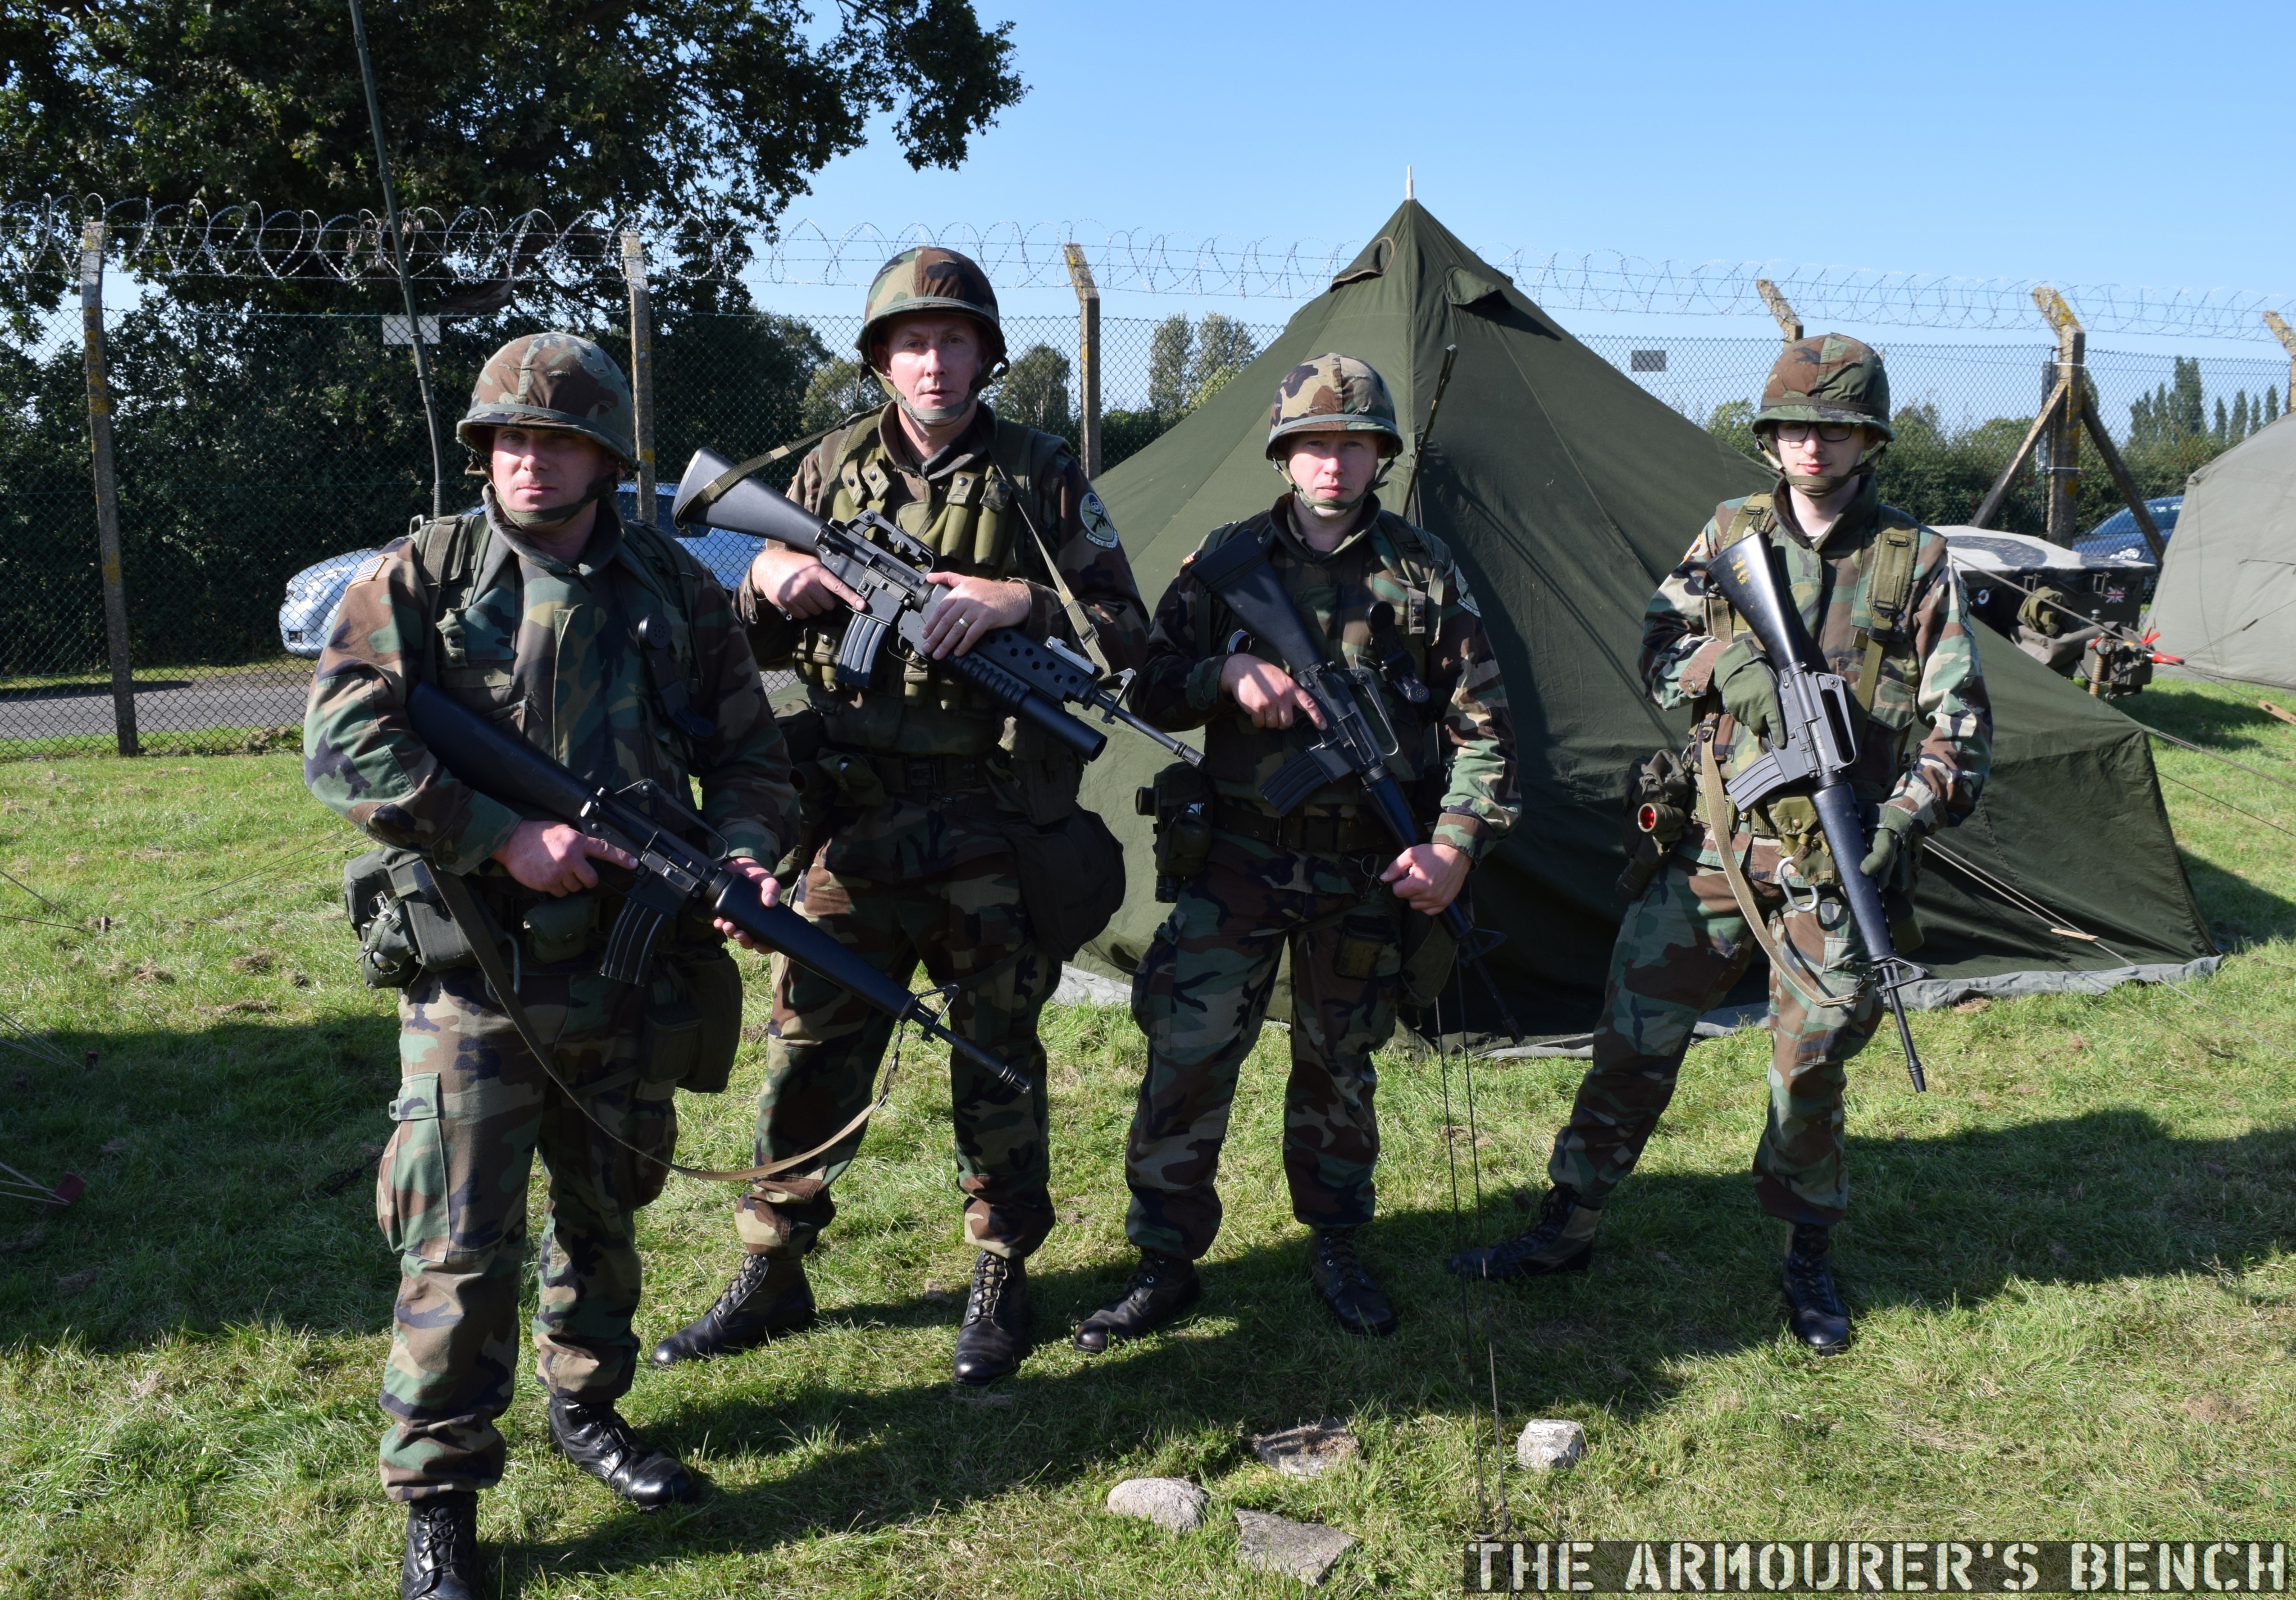
Members of Lazy Company prepare for guard duty (Matthew Moss)
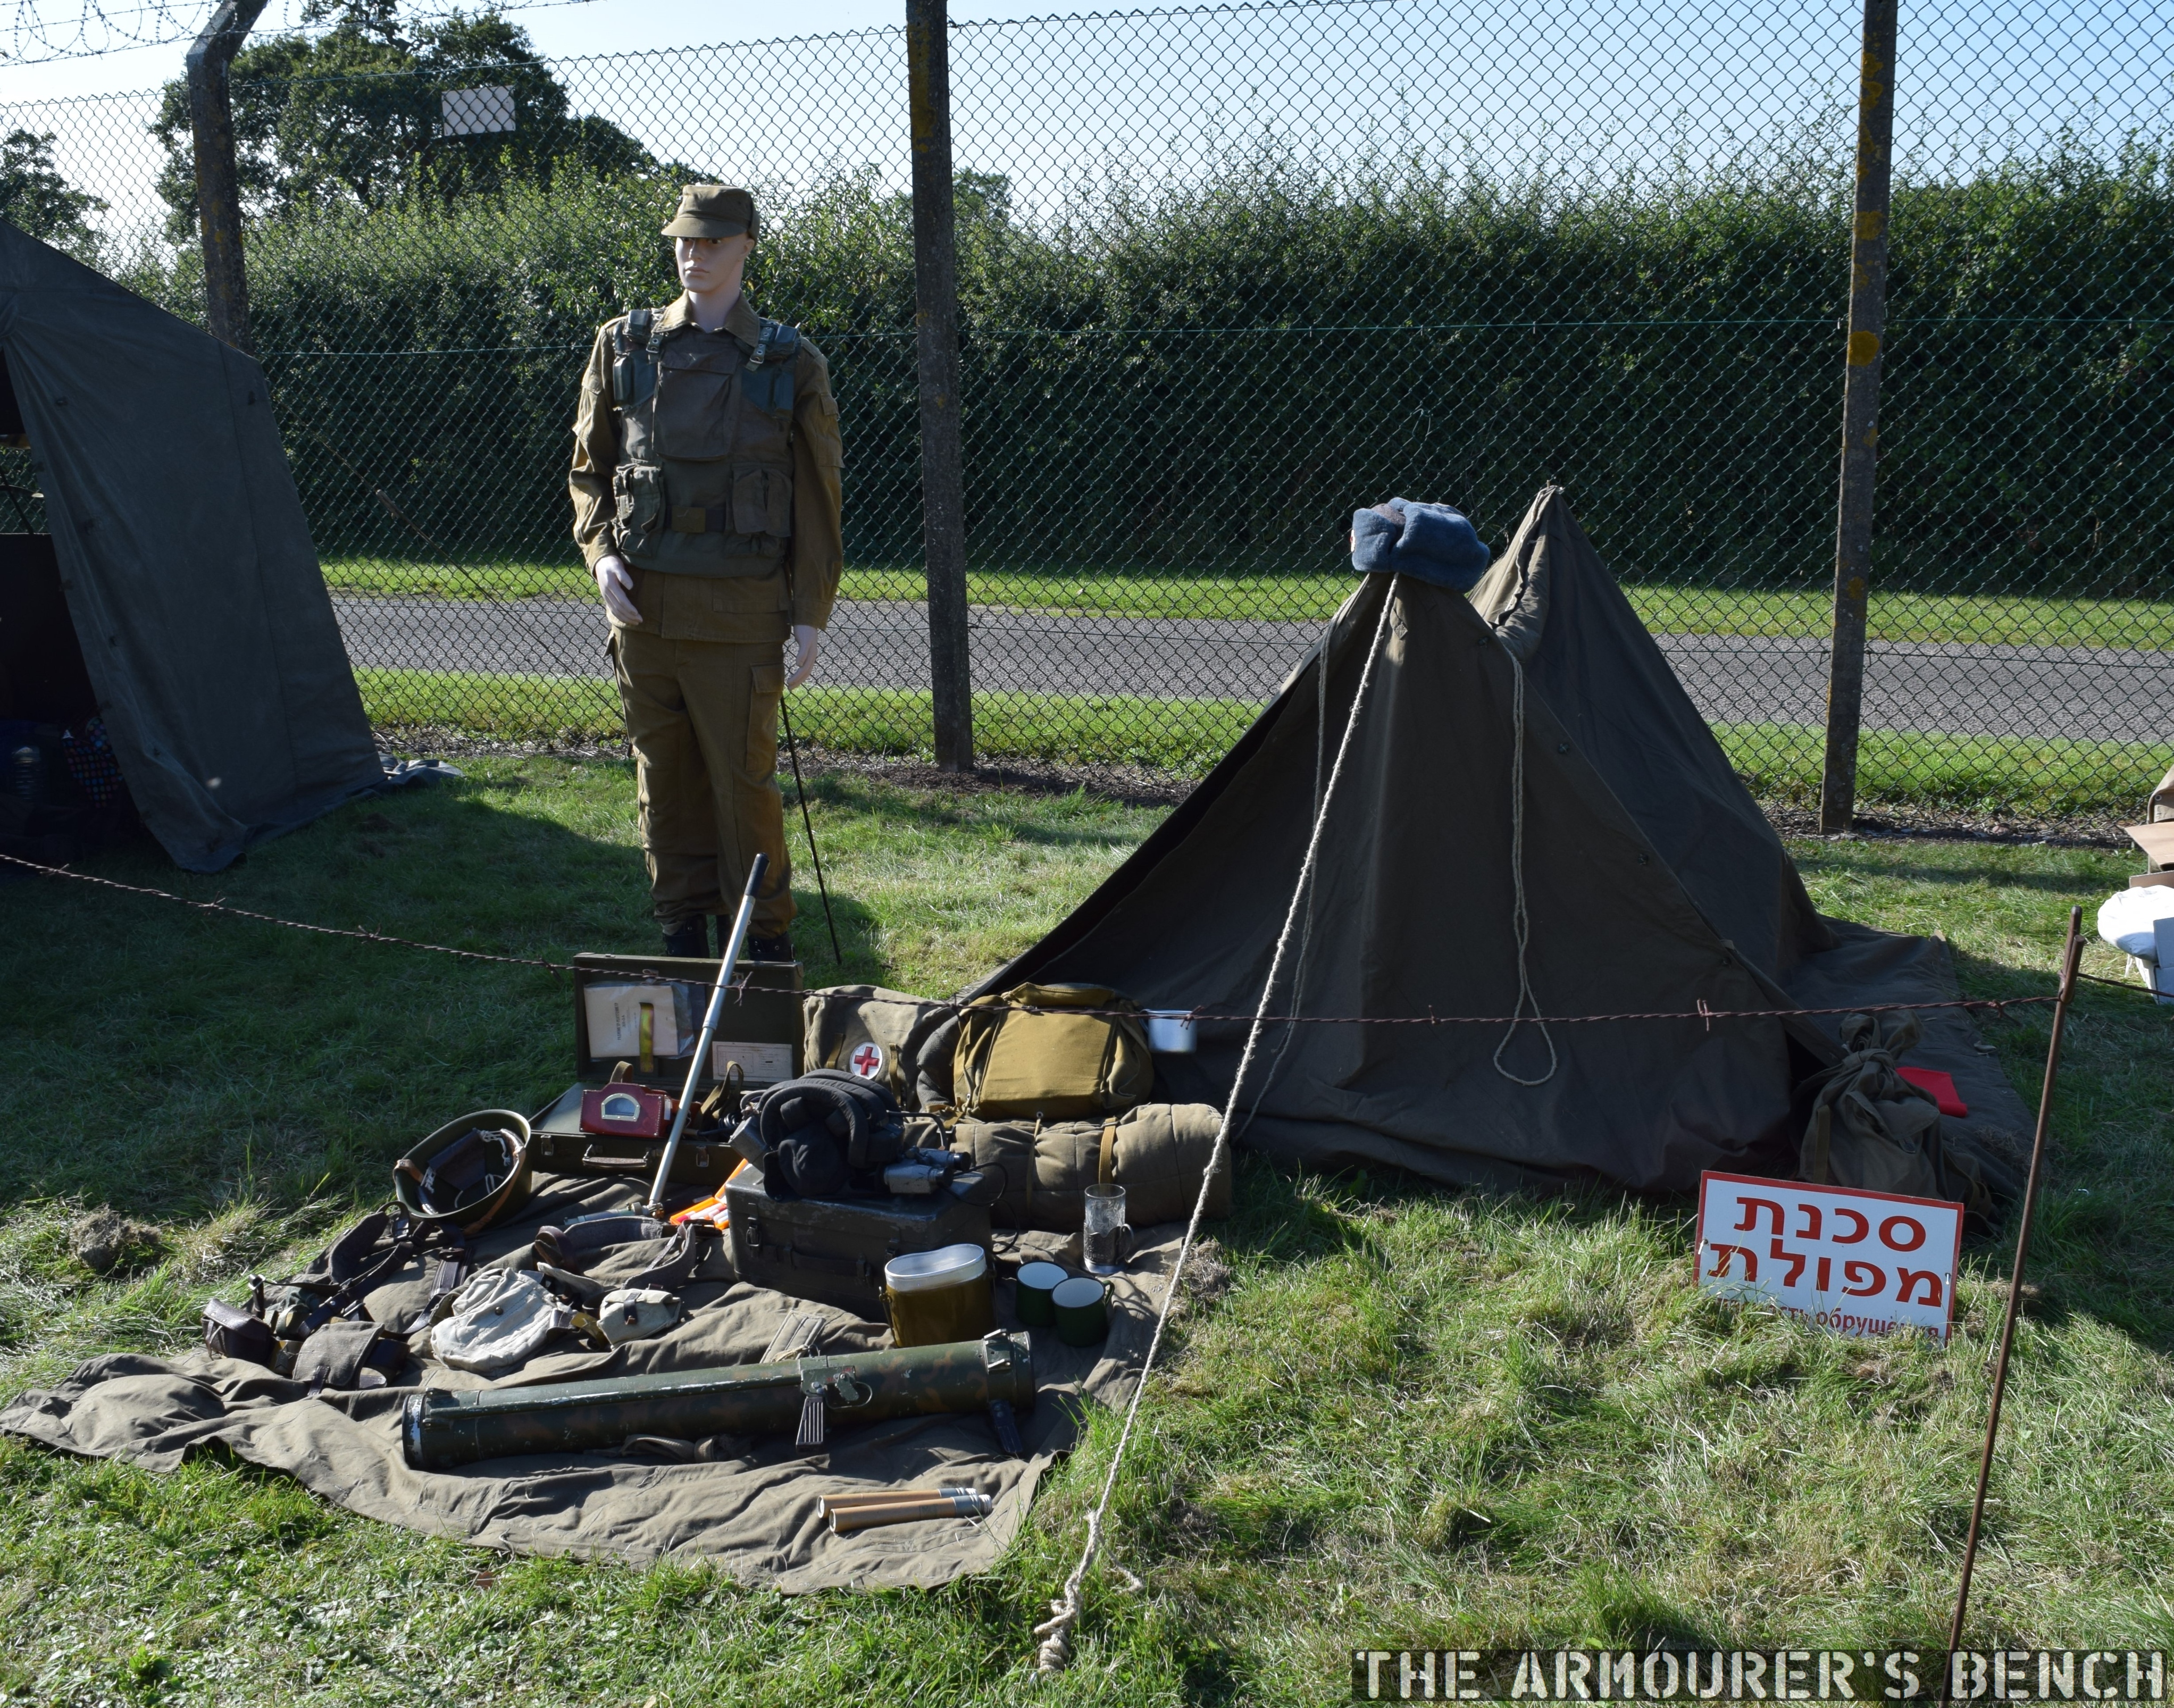
A Soviet camp display (Matthew Moss)
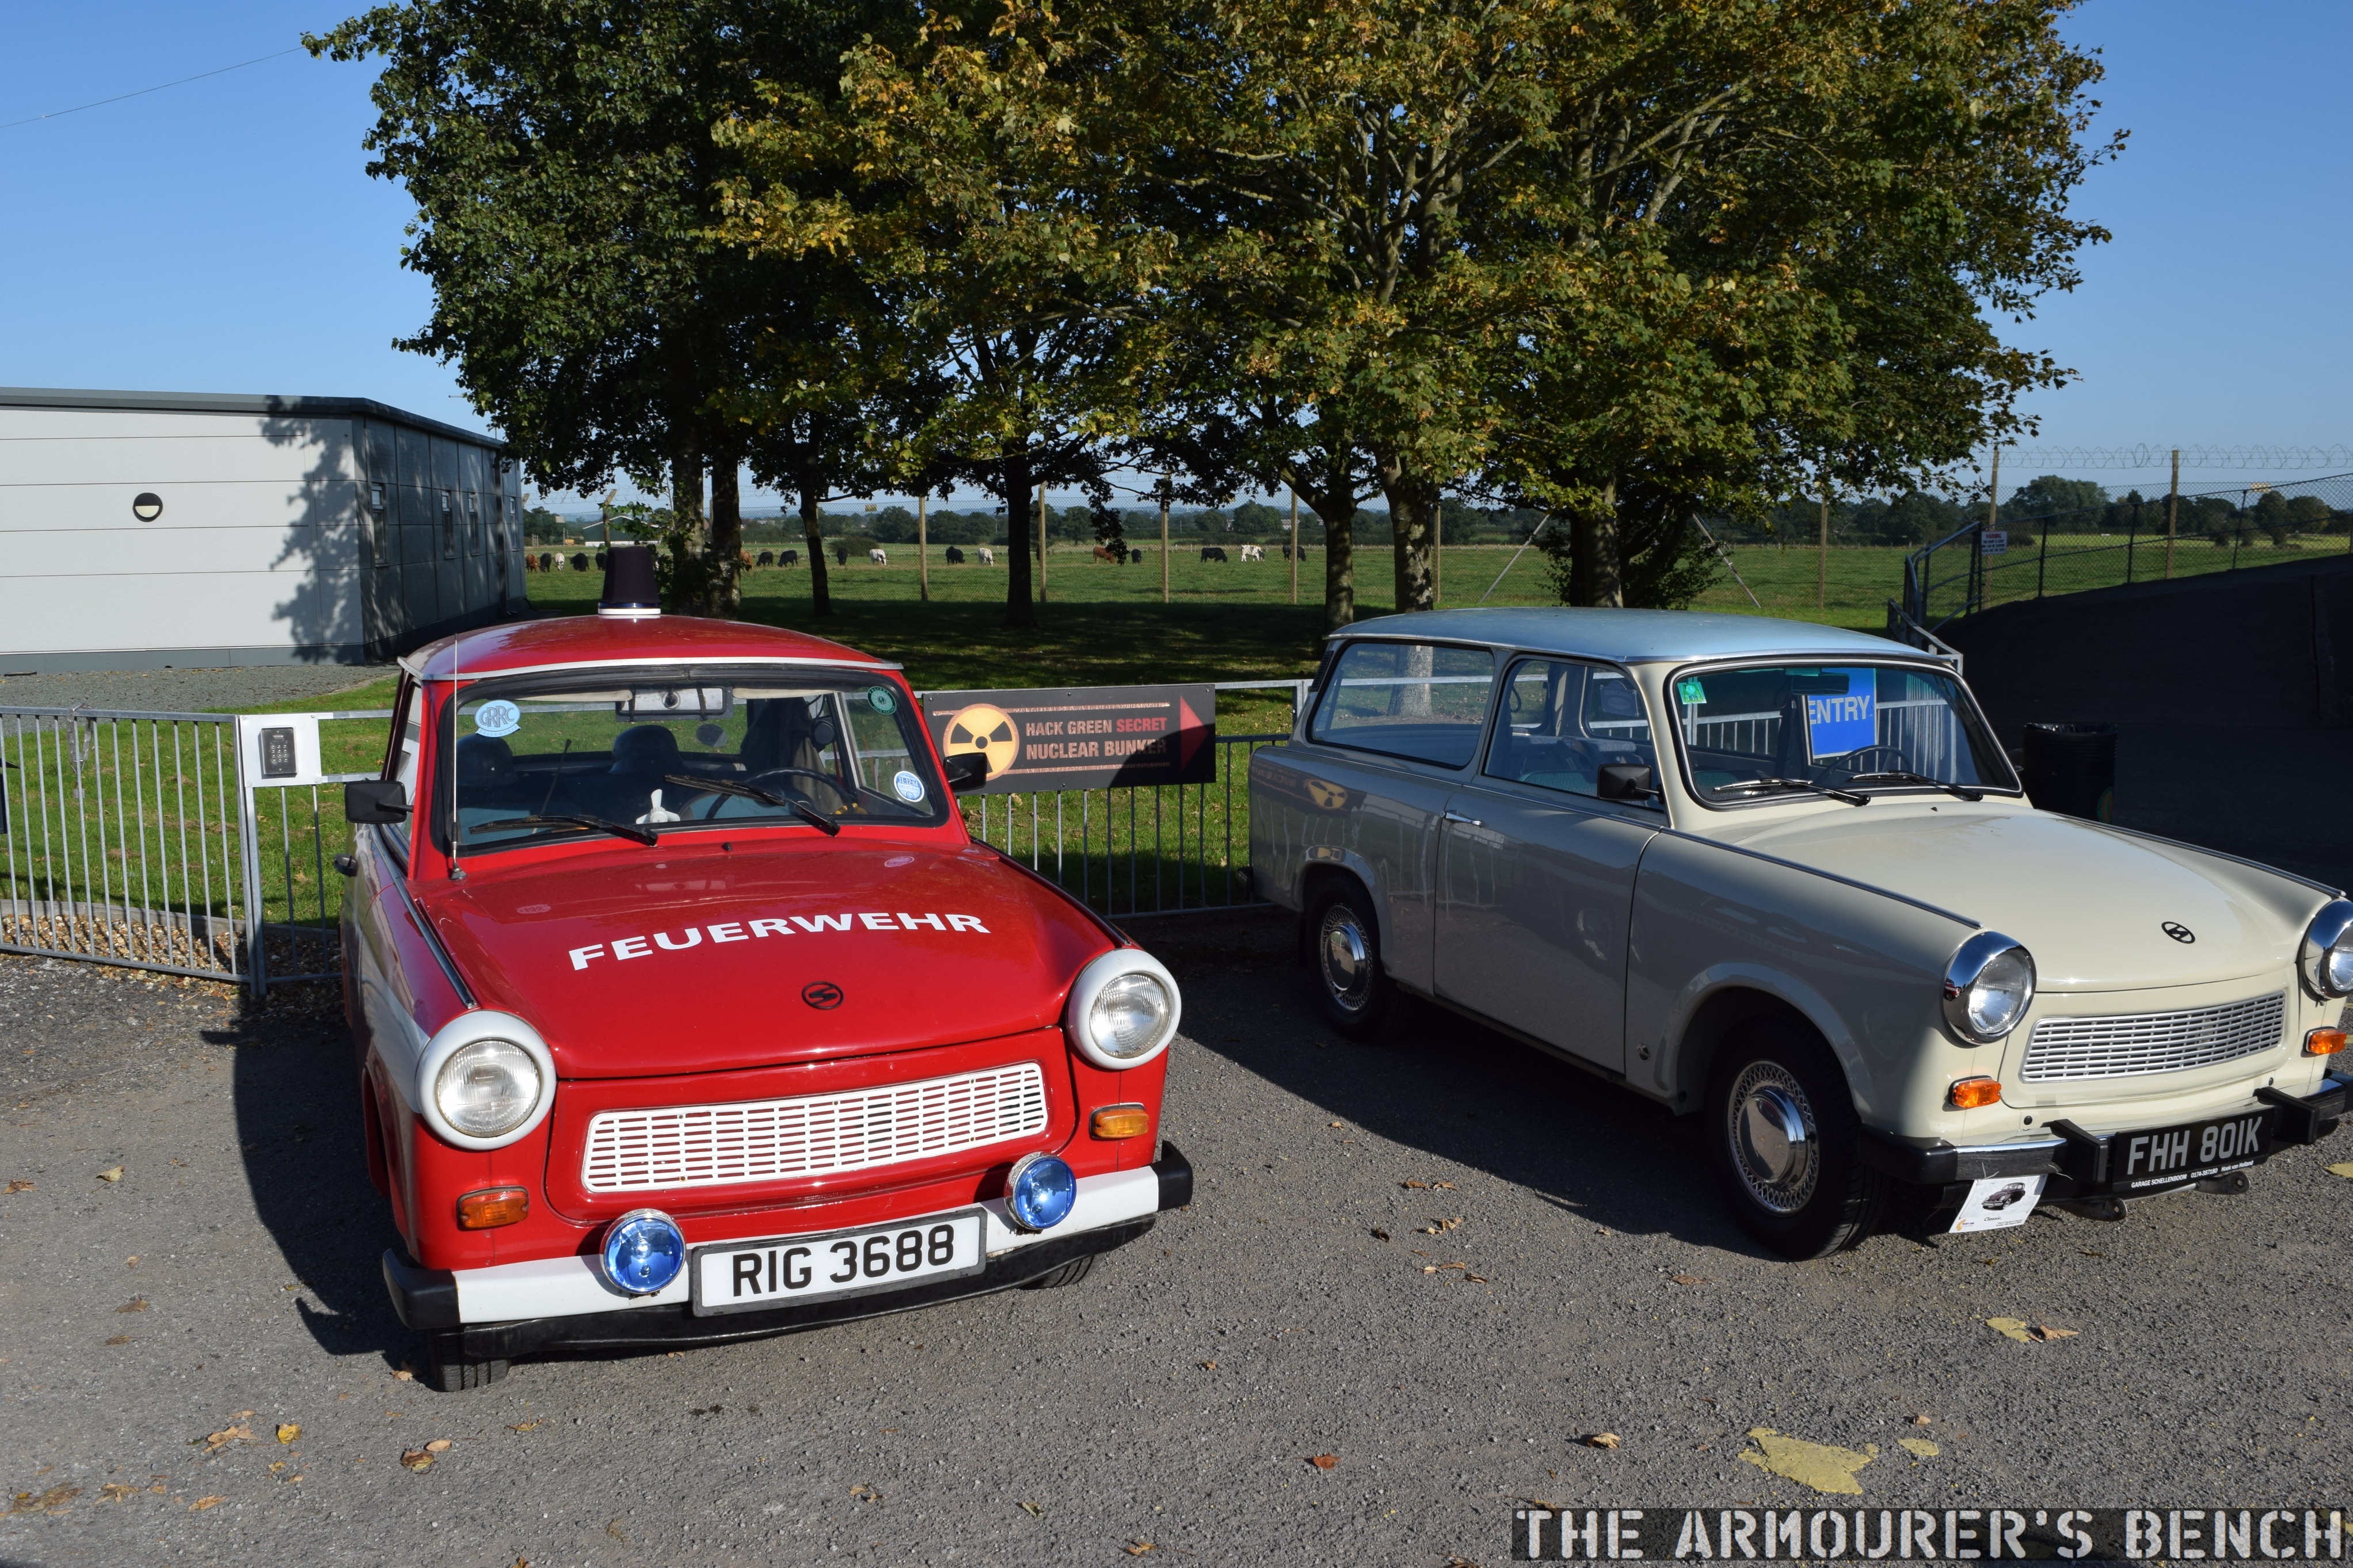
A pair of East German Trabants (Matthew Moss)
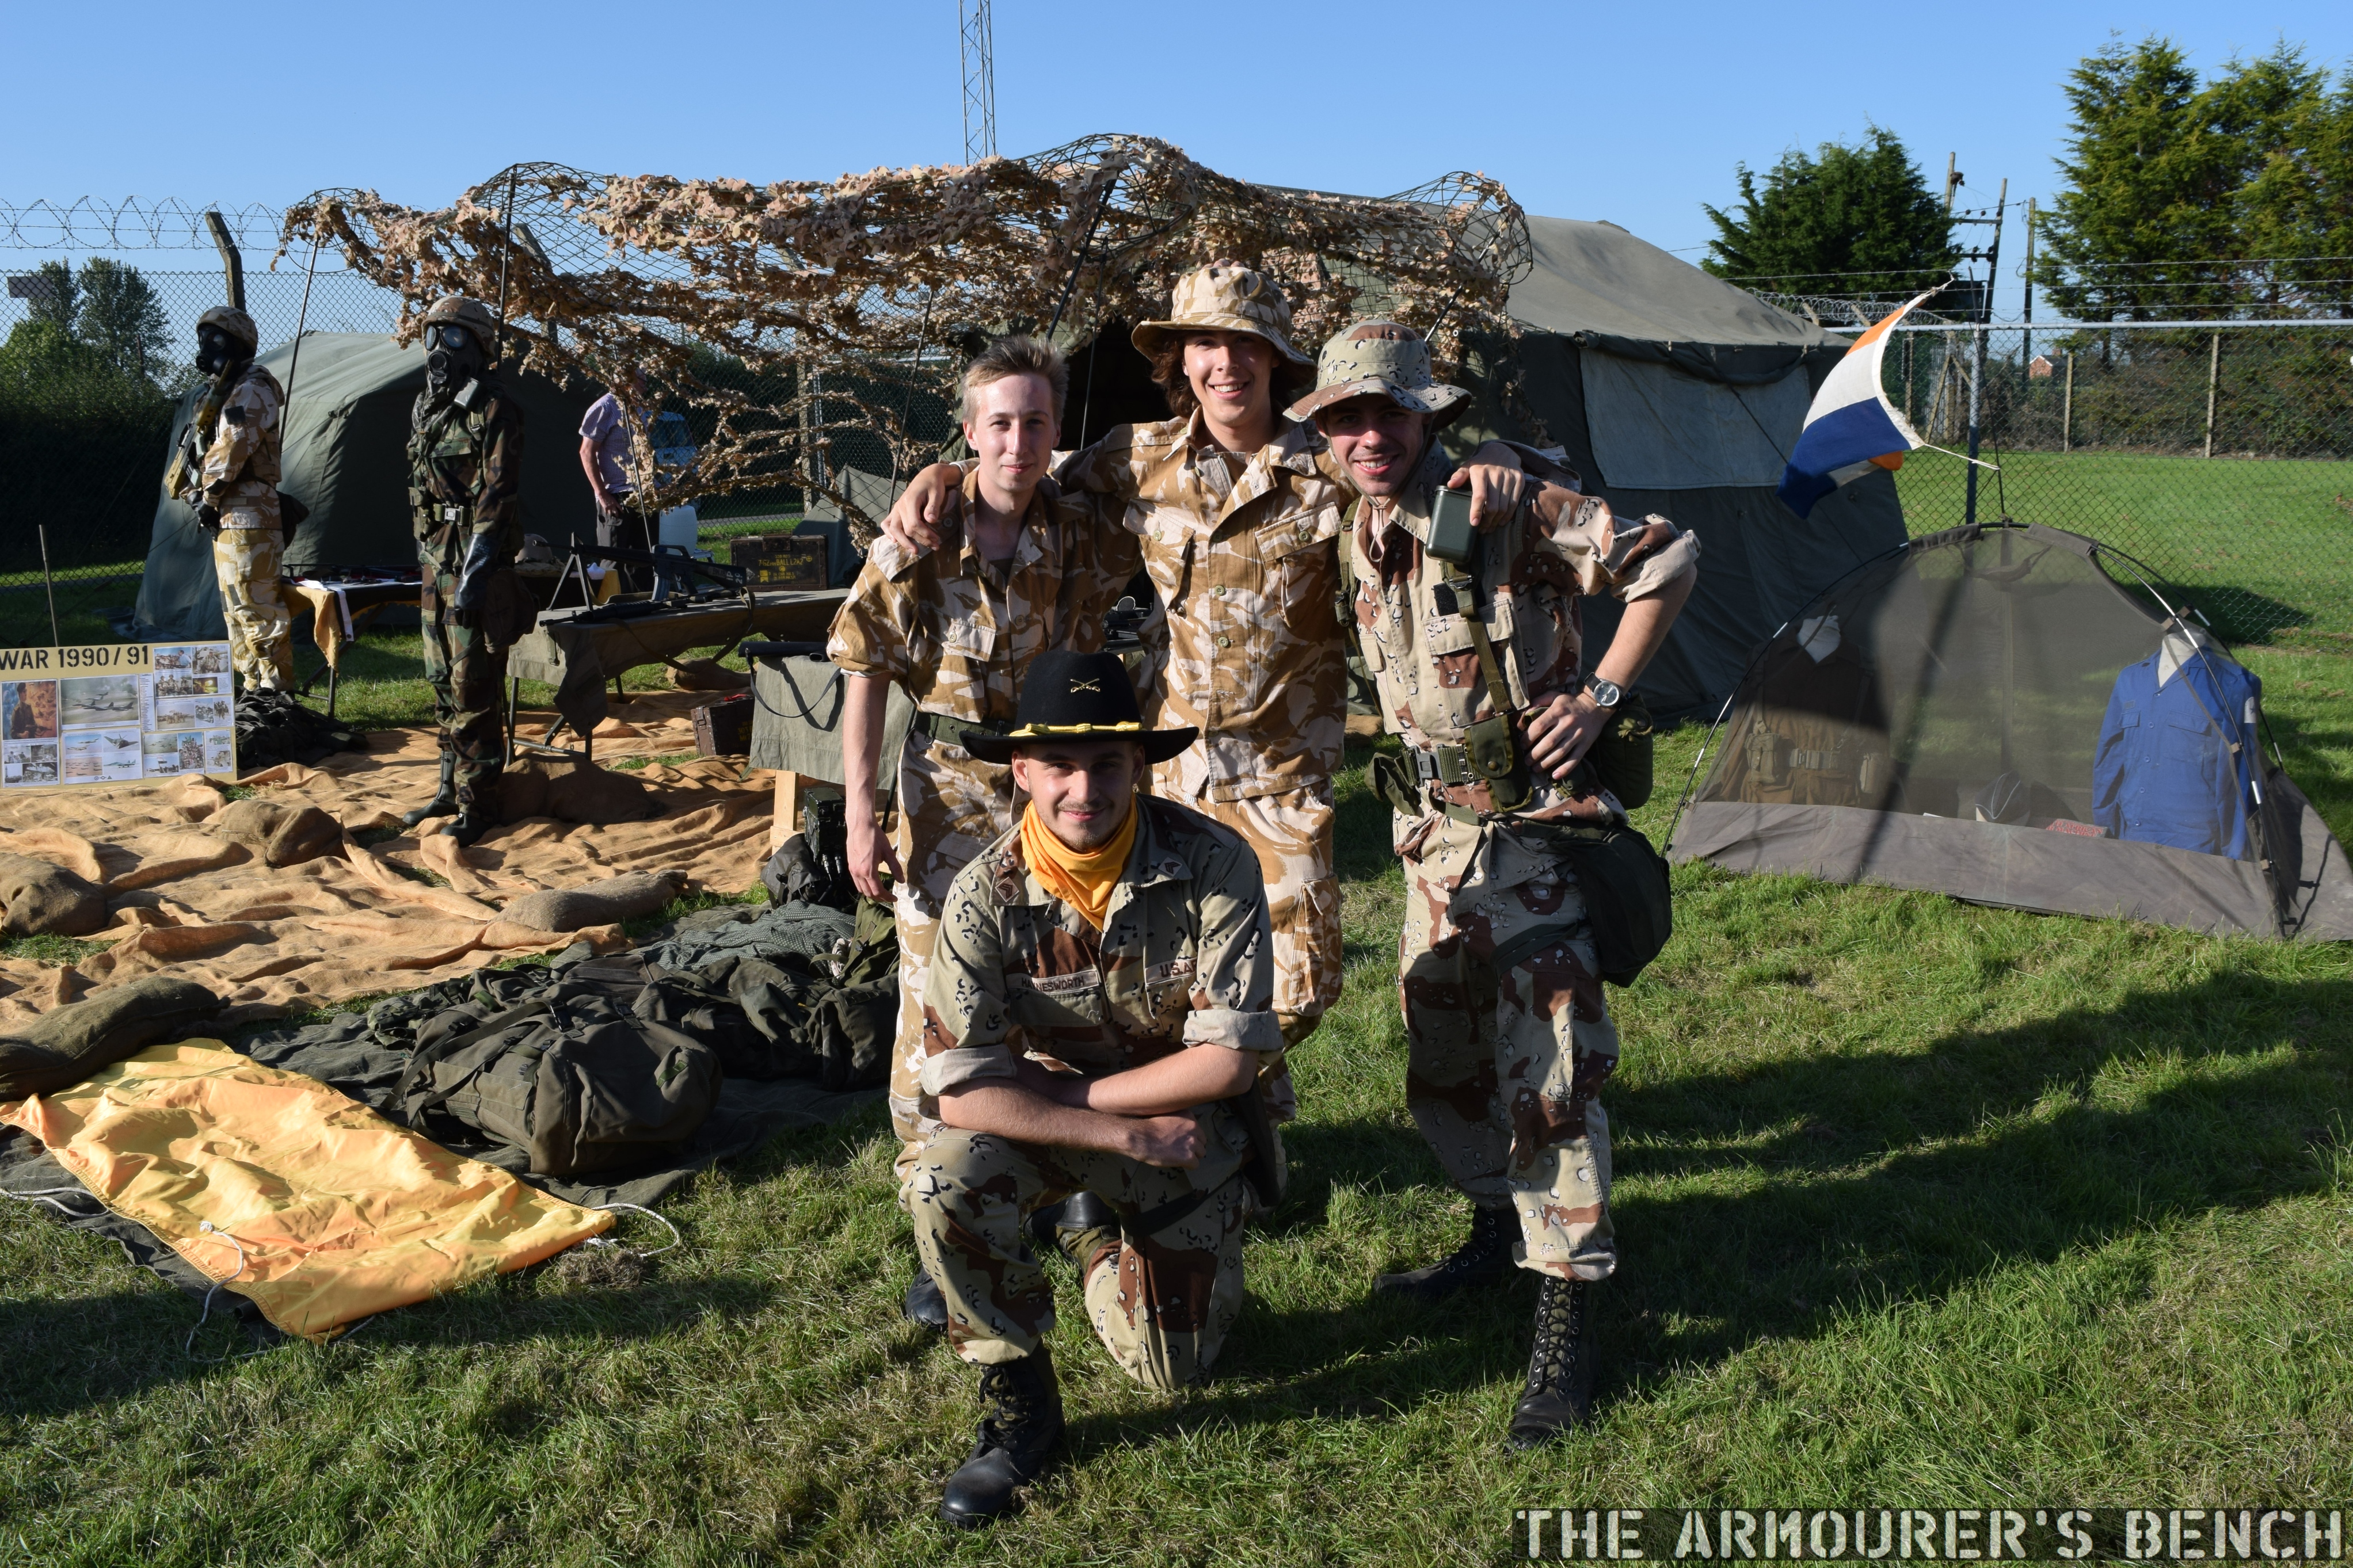
Some of the local lads from a Gulf War reenactment group (Matthew Moss)
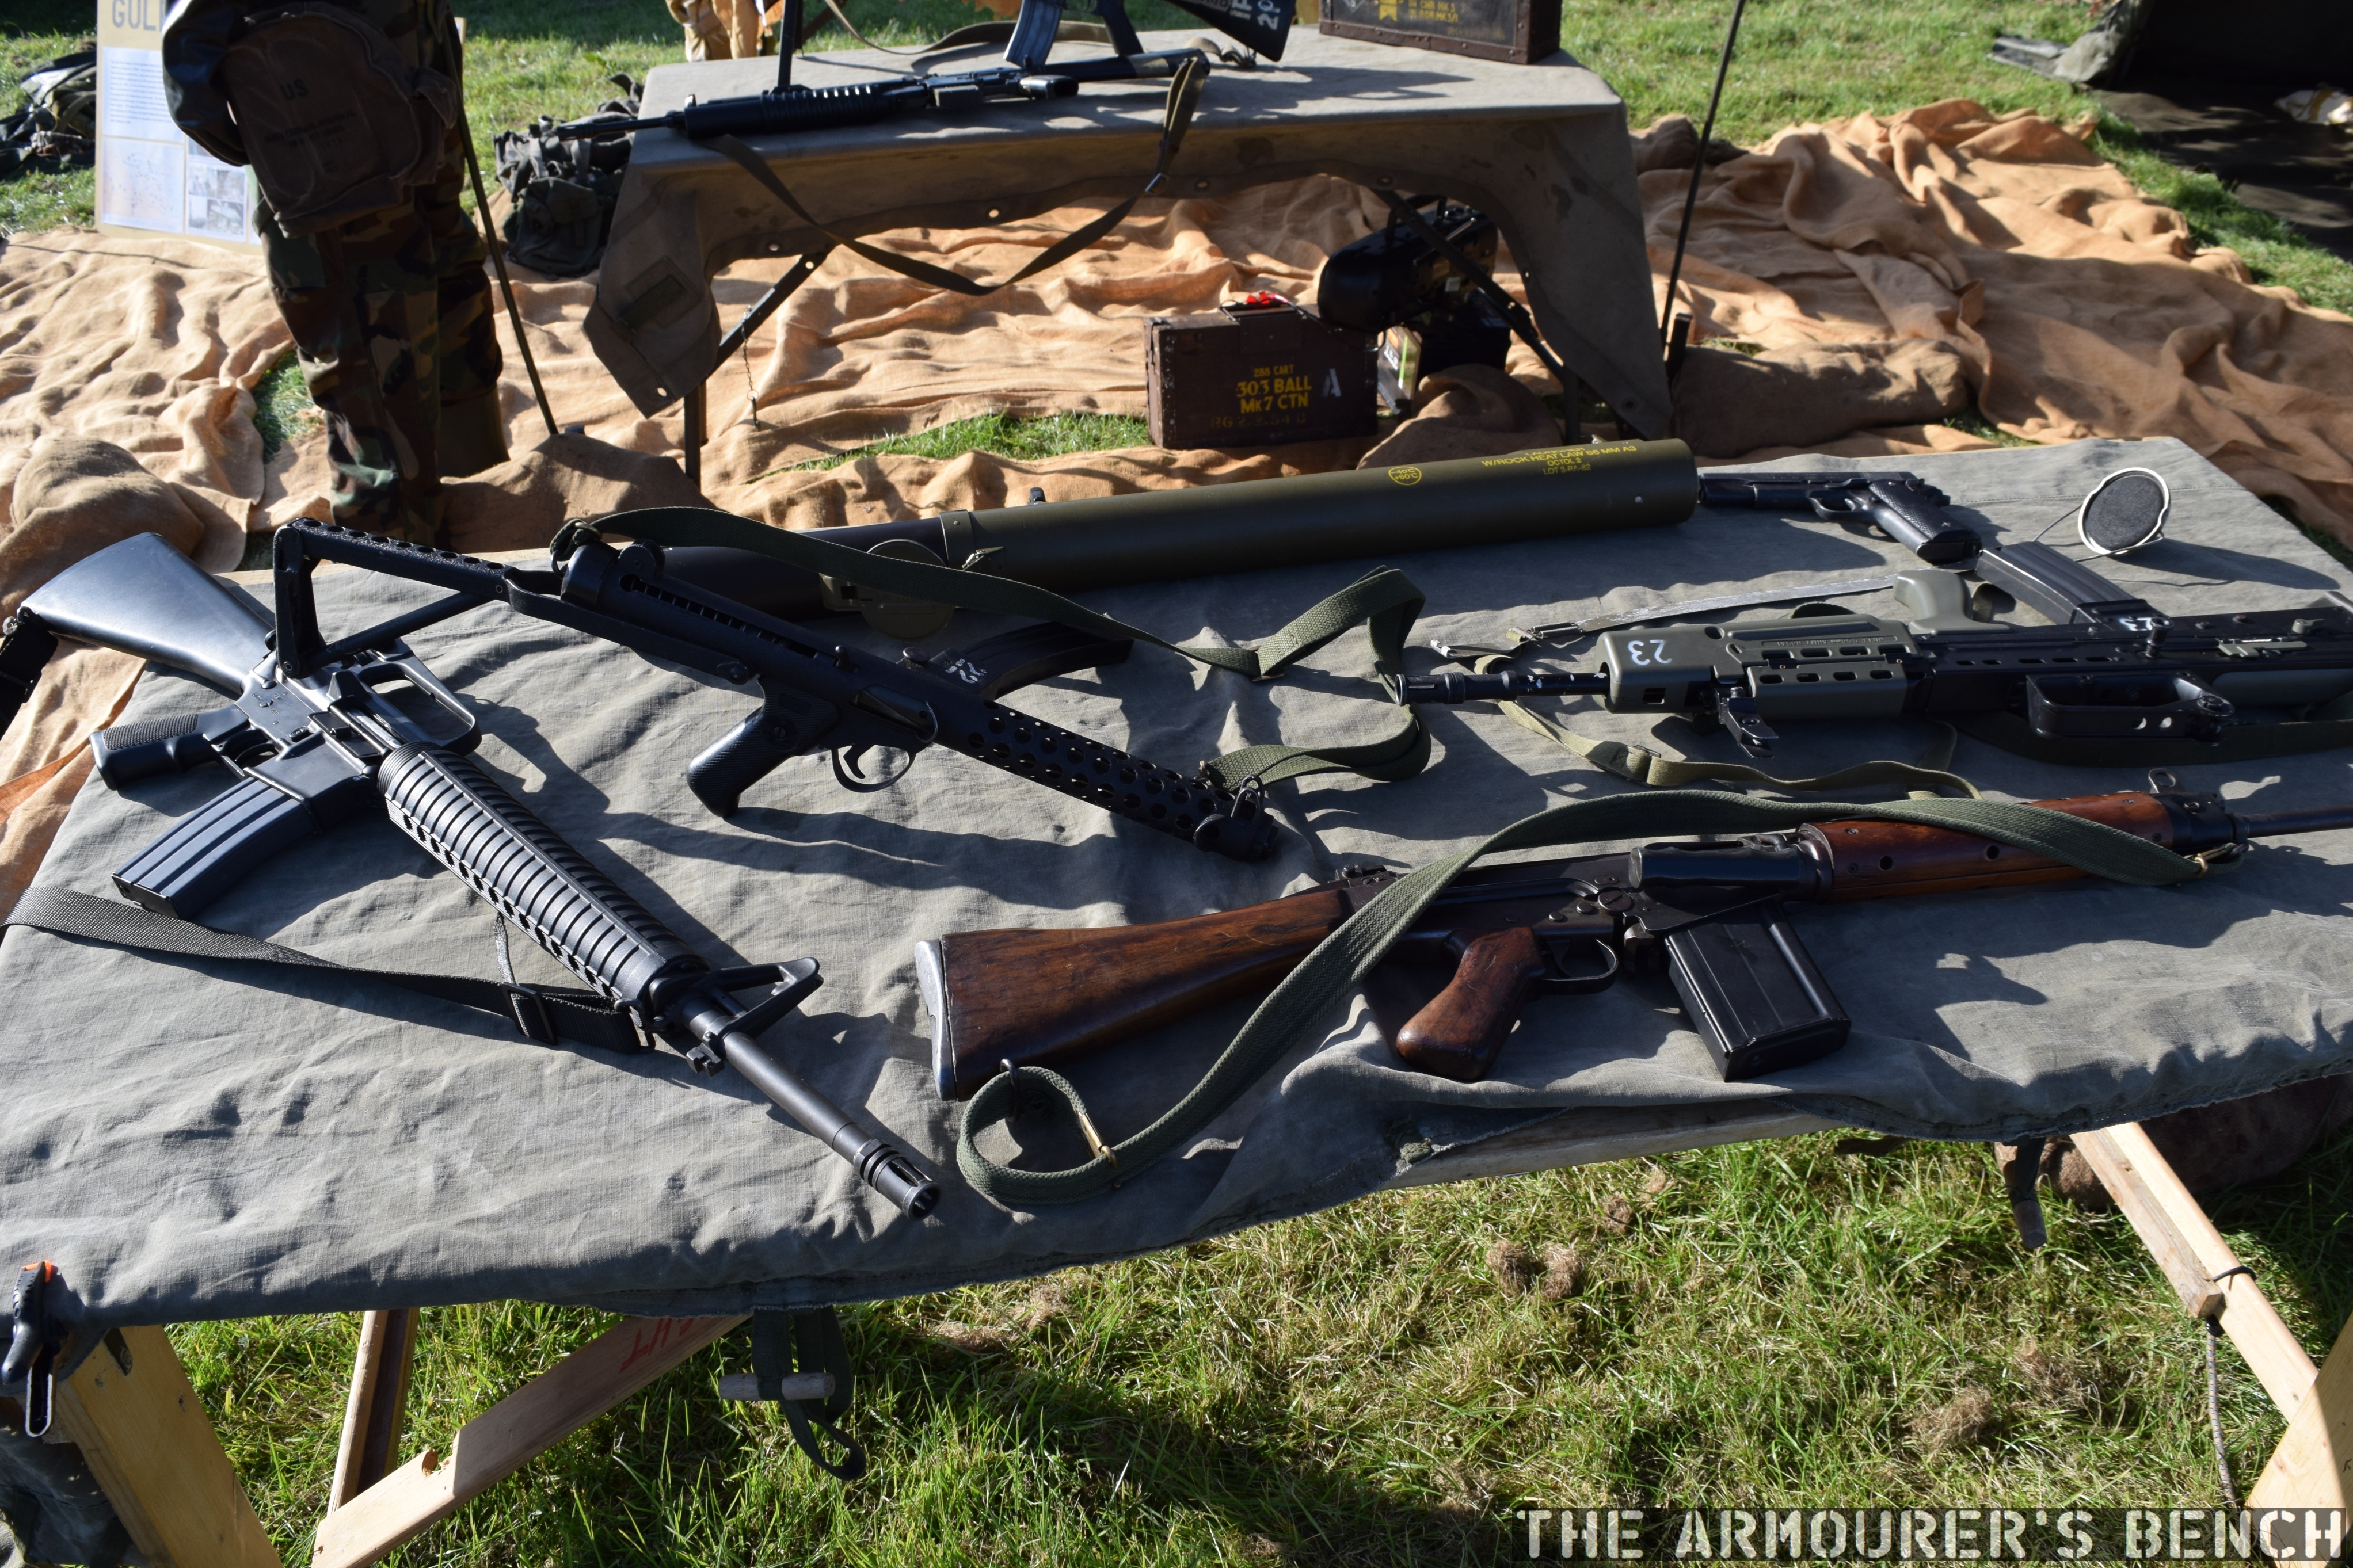
Some deactivated weapons from the Gulf War display (Matthew Moss)
If you’d like a copy of the book you can contact Richard directly (for a signed copy) here. Alternatively, you can purchase the book directly from the publisher Helion Books.
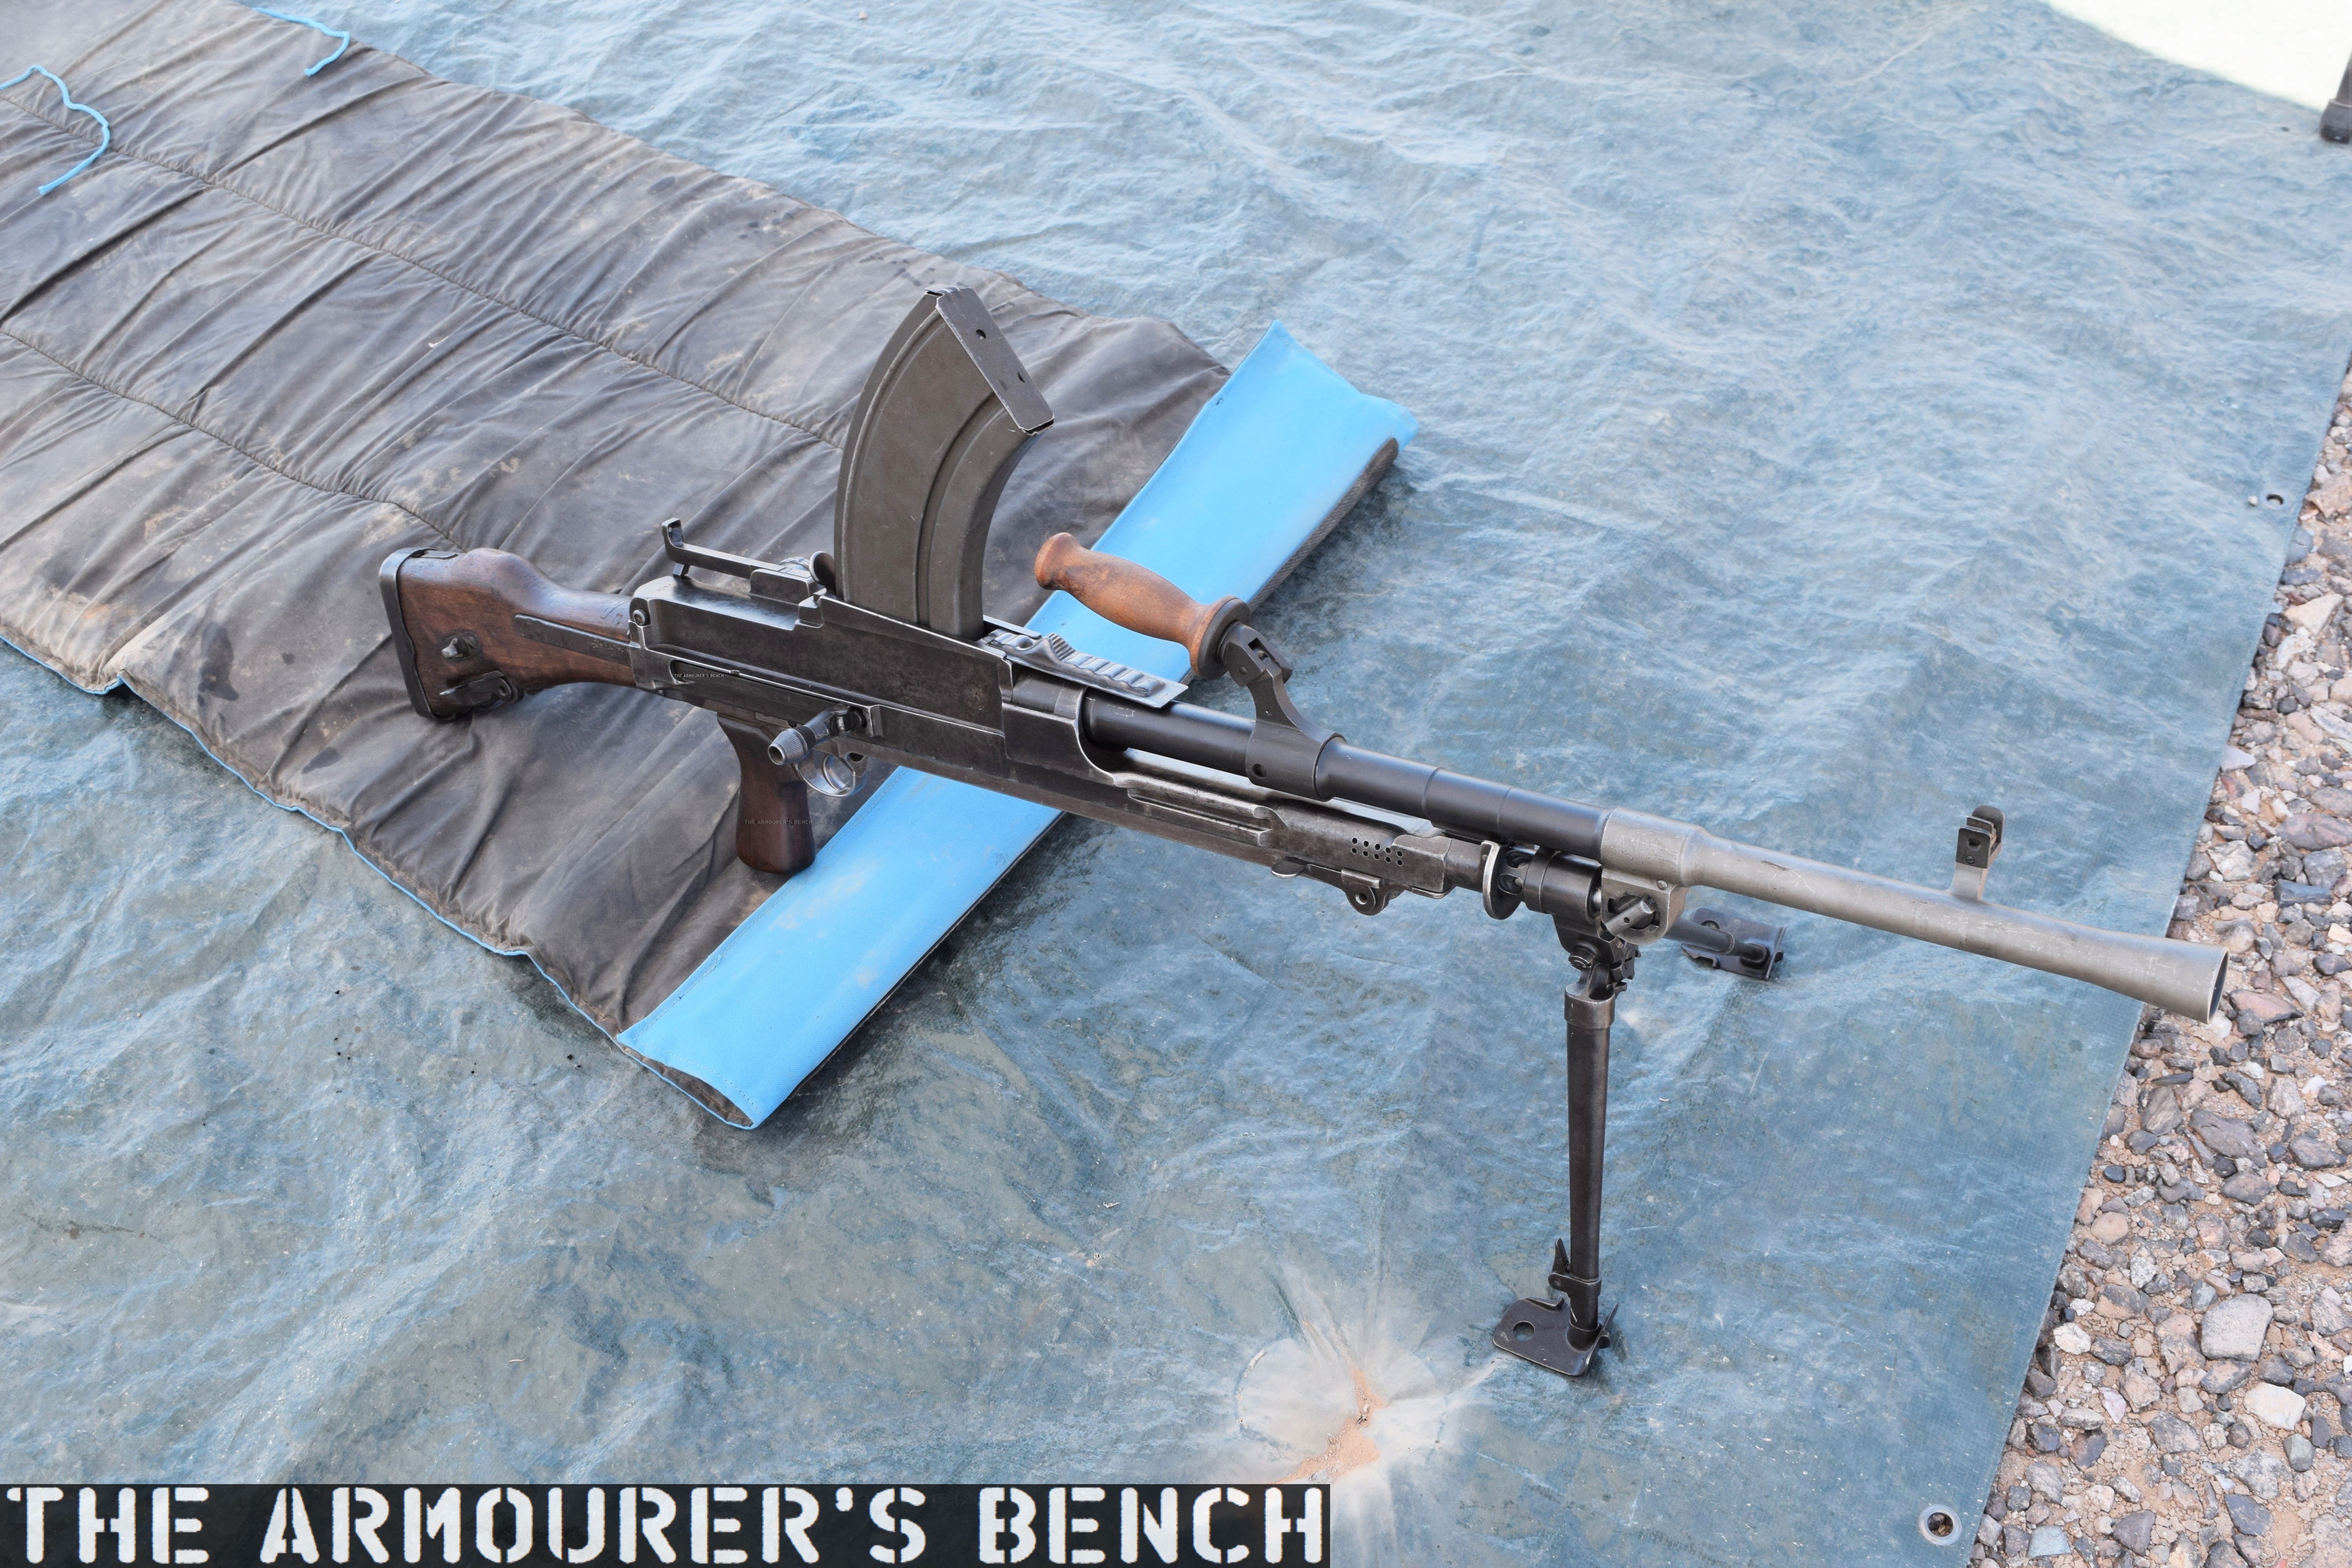
Introduce in British service in 1938, the Bren remained in use into the 1990s. Based upon the Czechoslovakian series of ZB light machine guns, its name comes from an amalgamation of its origins: BR for Brno, the factory in Czechoslovakia, and EN for RSAF Enfield where it had been adapted for British service and was to be produced.
The Bren is chambered in .303, is gas operated and fires from an open bolt. It feeds from a top-mounted 30 round box magazine, as such the sights are offset to the left meaning the Bren can only be fired from the right shoulder – which as a lefty, I quickly realised.
Bren Mk1(Modified) (Matthew Moss)
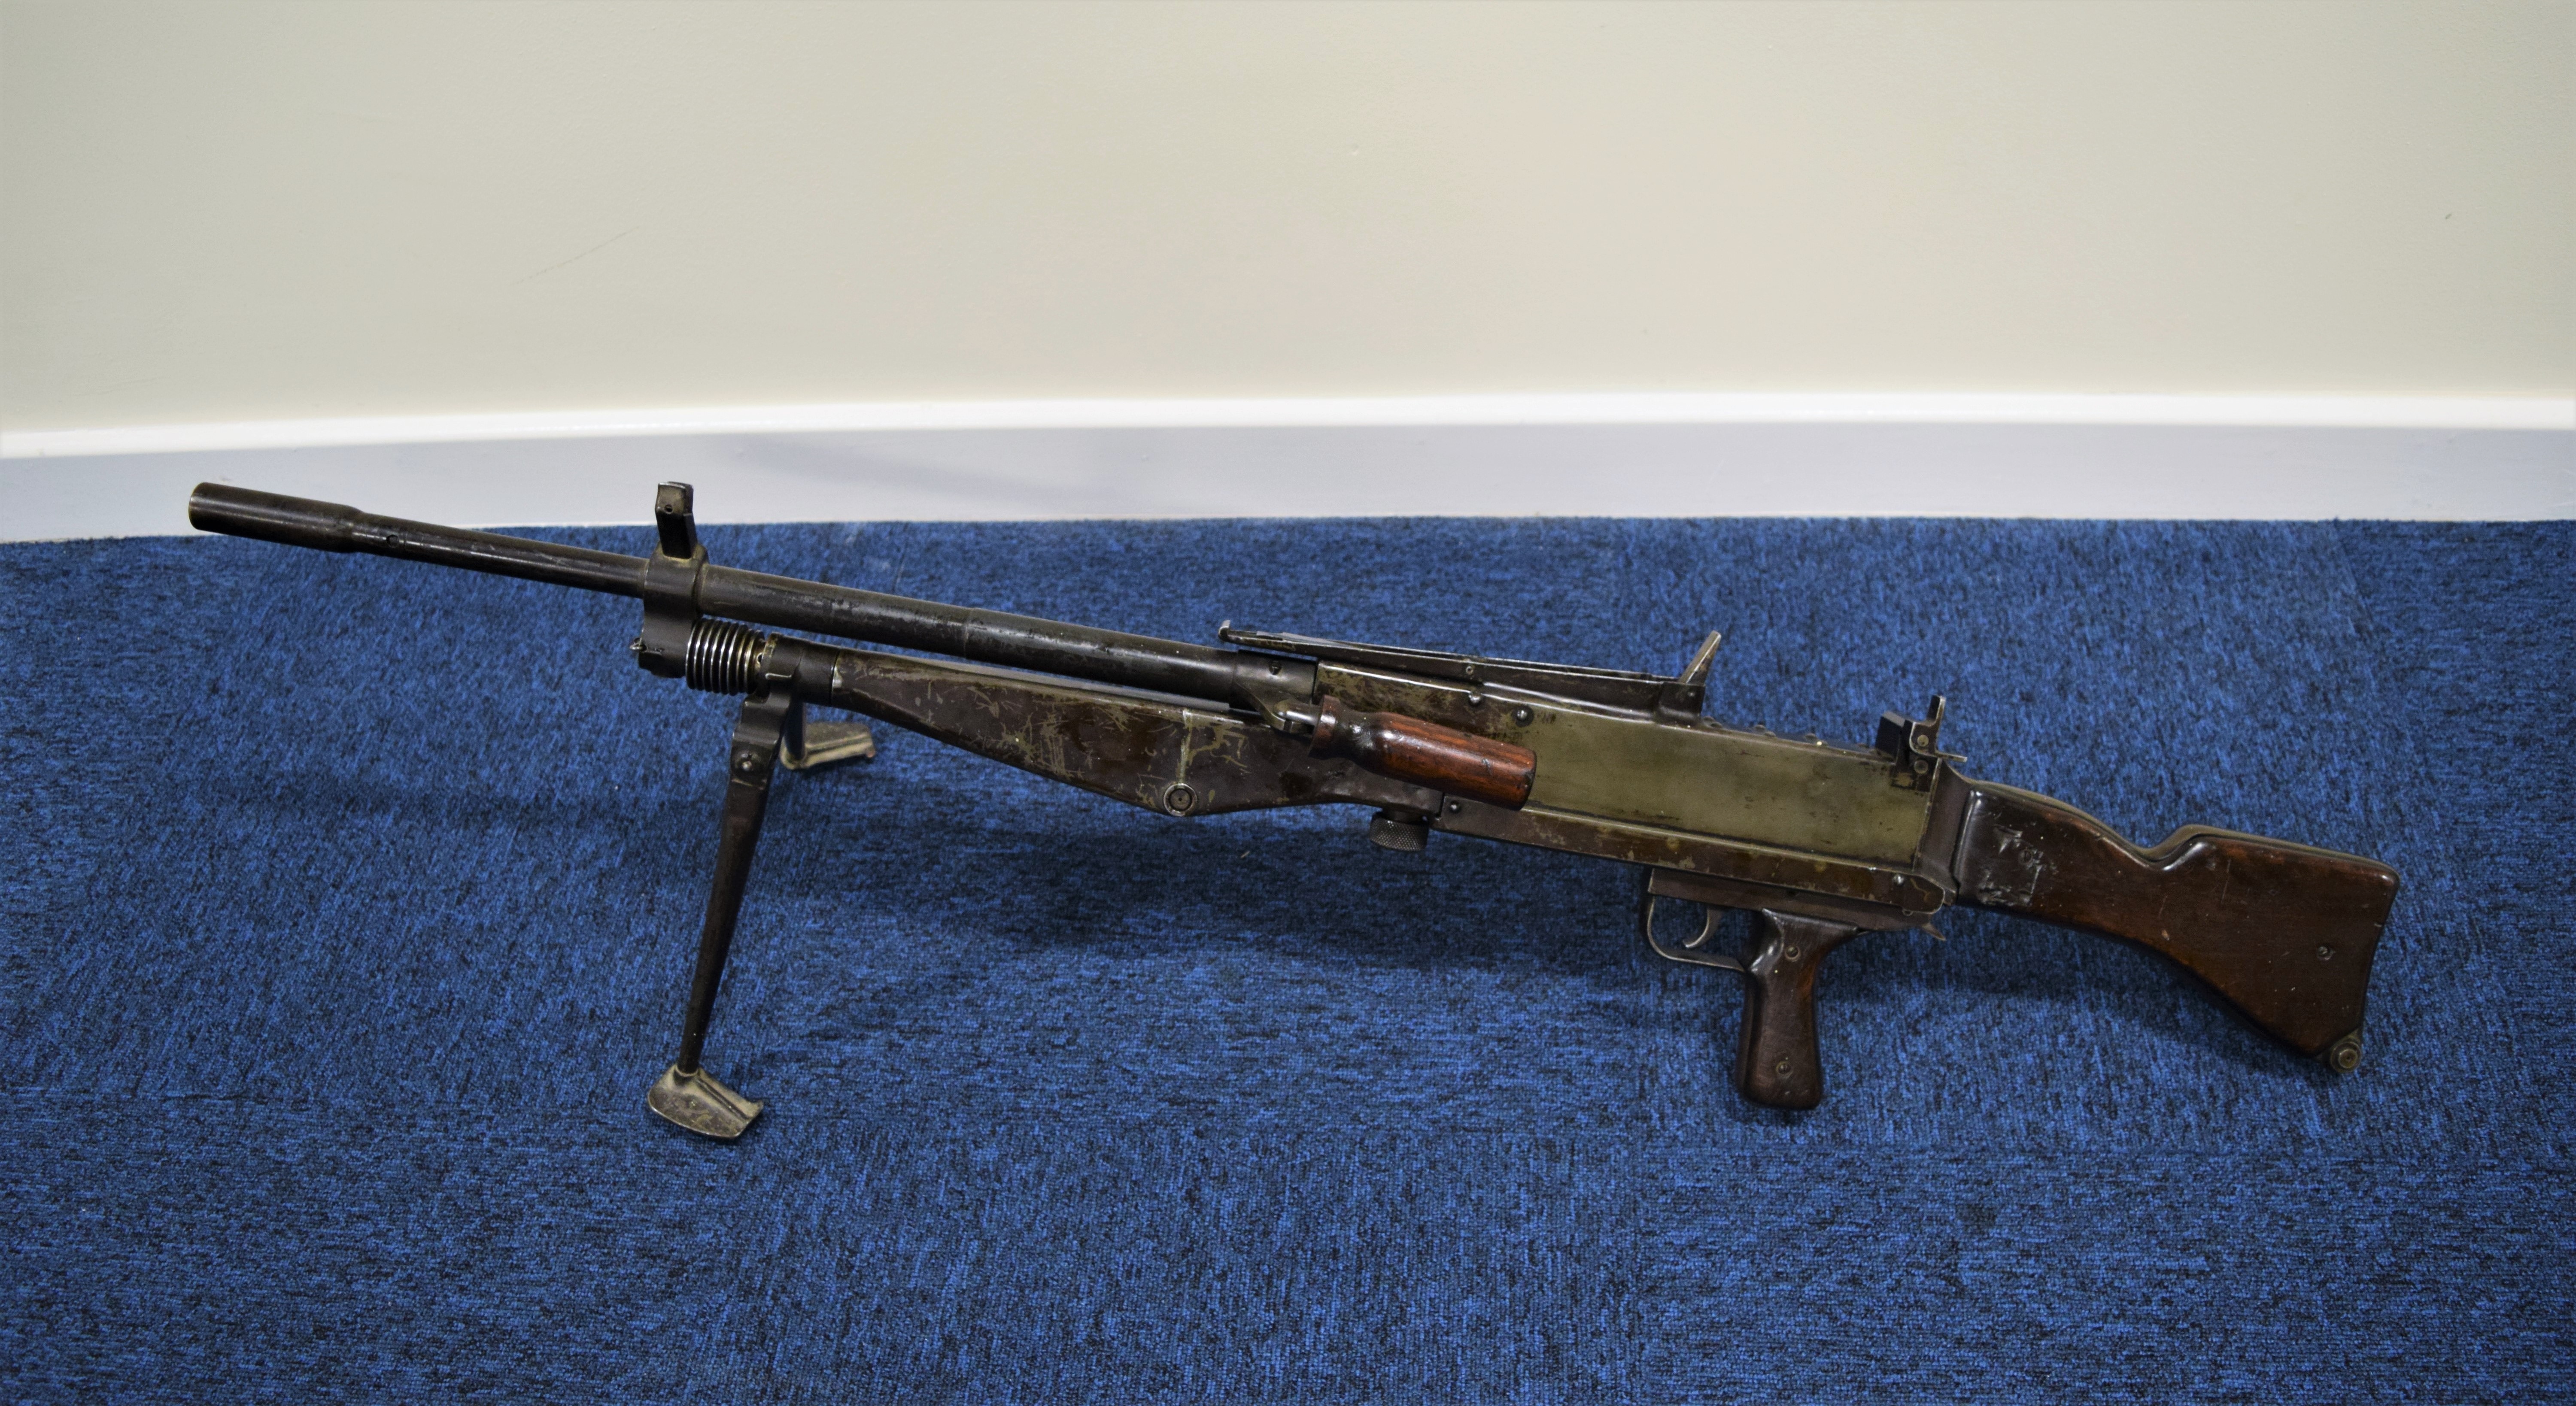
This example does not have the scope mounting dovetail machined into the left side of its receiver, or the folding grip and the hinged shoulder rest indicating that it is a Mk1 (Modified) ‘Pattern A’ gun, which was introduced after the evacuation of Dunkirk, the British Expeditionary Force lost most of the 30,000 Brens that had been taken to France. Only around 2,000 remained in inventory in the summer of 1940, so increasing production was essential, this model and the even more simplified MkII were introduced. While at the same time the BESAL light machine gun was developed as an emergency alternative by BSA – check out our earlier video on the BESAL here.
The BSA-developed BESAL light machine gun (Matthew Moss)
As a Mk1, the gun has the original profile buttstock, with the fitting for a rear folding grip and tripod attachment point as well as a buttcap. It also has the drum rear sight rather than the later ladder sight of the Mk2 & 3. It also had a folding cocking handle and this Mk1(M) gun also has the earlier pattern height adjustable, rather than fixed, bipod legs. This gun is marked ‘MK1, with an E within a D, 1942’ indicating it was made at RSAF Enfield.
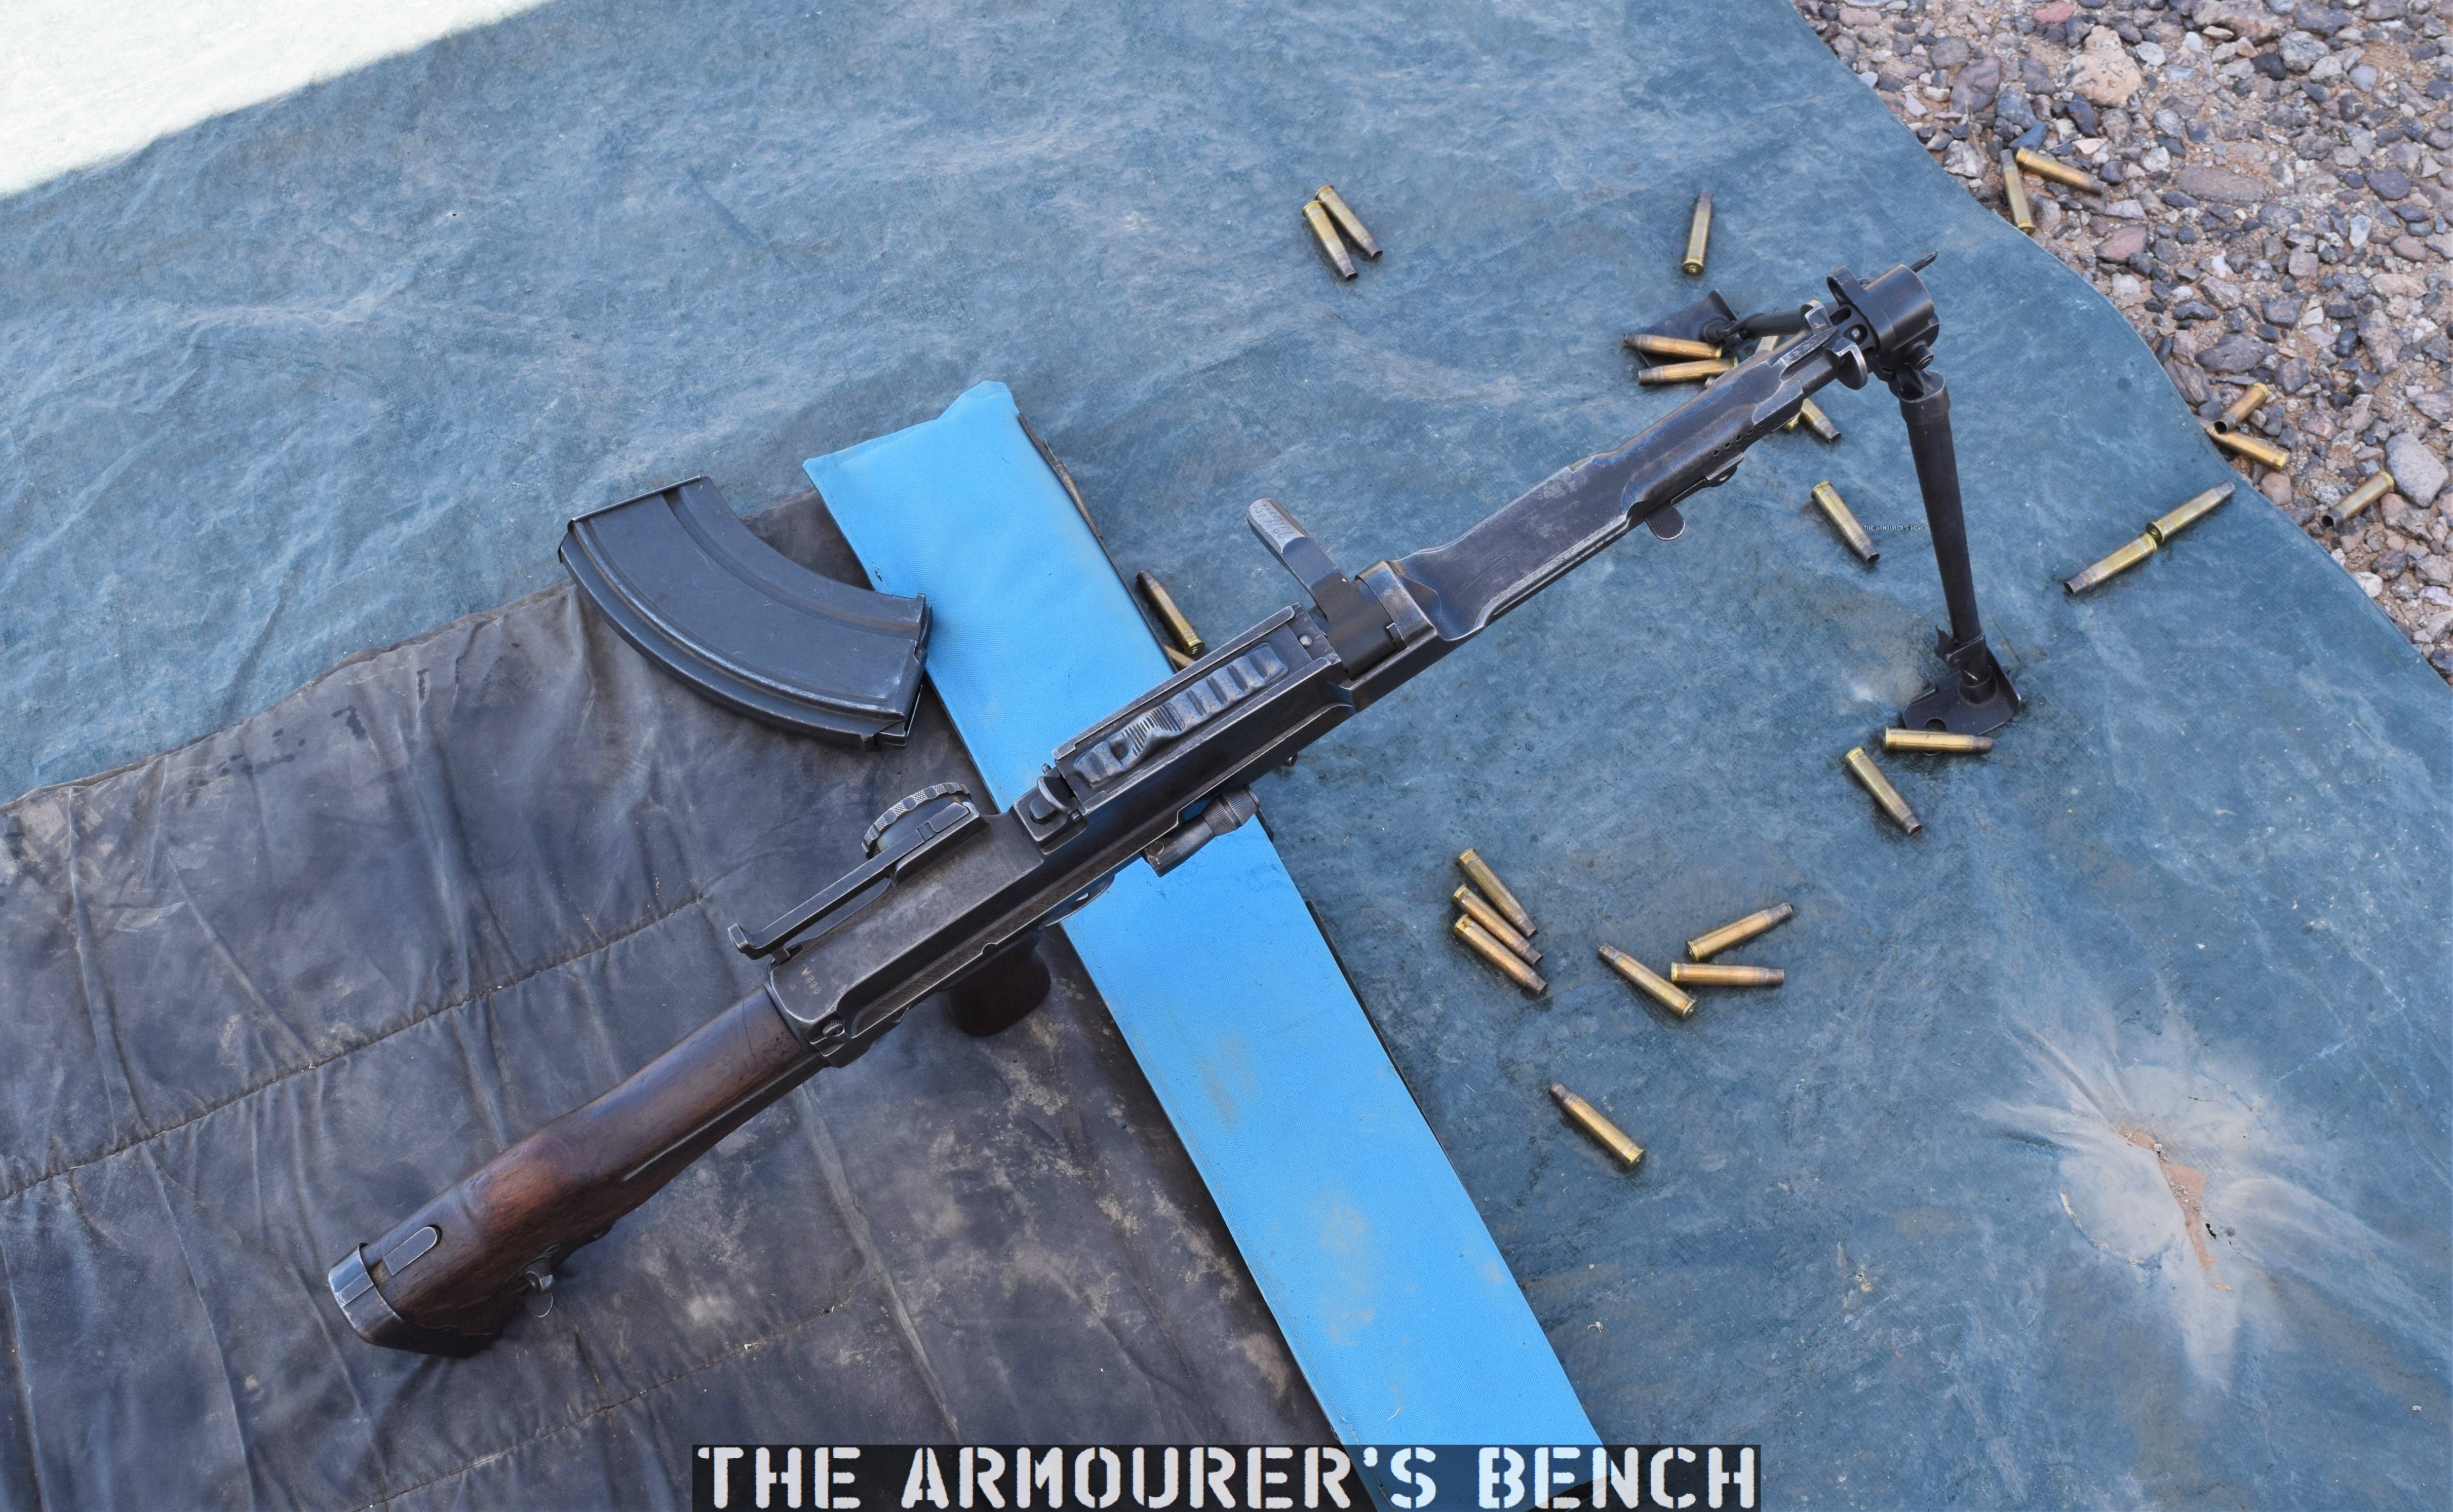
Bren Mk1(Modified) with magazine off and dust cover closed, note the drum sight but lack of receiver cut for optic (Matthew Moss)
The Bren’s relatively slow rate of fire (of around 500 rounds per minute) makes it controllable and very easy to fire single shots while in full auto. The Bren does, however, have a selector on the left side of the gun, just above the trigger guard, which can be set to safe, semi or fully automatic. The Bren has a rocking recoil impulse as its heavy bolt moves back and forth, easily manageable if held tightly into the shoulder with the off-hand holding onto the wrist of the stock. The top-mounted magazine when fully loaded does have a tendency to want to fall to the side but once you’re used to this it’s not really an issue. The legend surrounding the accuracy of the Bren is certainly somewhat valid, at the time it was recognised as an accurate weapon and I found it accurate from my short time behind the trigger. I found the Mk1’s rear sight aperture and drum adjustment easy to use.
Spent cases eject out of the bottom of the receiver, the weapon had a sliding dust cover for when the magazine was removed and the charging handle is non reciprocating and folds forward.
Bren Mk1(Modified) with magazine off, dust cover closed and barrel removed (Matthew Moss)
The Bren has a quick change barrel system. To remove the barrel the release catch in front of the magazine was rotated upwards to unlock and then the barrel was rotated 90 degrees clockwise by bringing the carrying handle up to the 12 o’clock position and then sliding it forward.
We’ll have a more in-depth look at the Bren and its Czech predecessors in the future. My thanks to my friend Chuck over at Gunlab for letting me put some rounds through his Bren, I got a real kick out of it!
The British Army entered the First World War with very few mortars, and certainly none at the battalion level. As the stalemate of trench warfare set in and the effectiveness of enemy mortars became clear it was decided that trench mortars of various sizes would be needed.
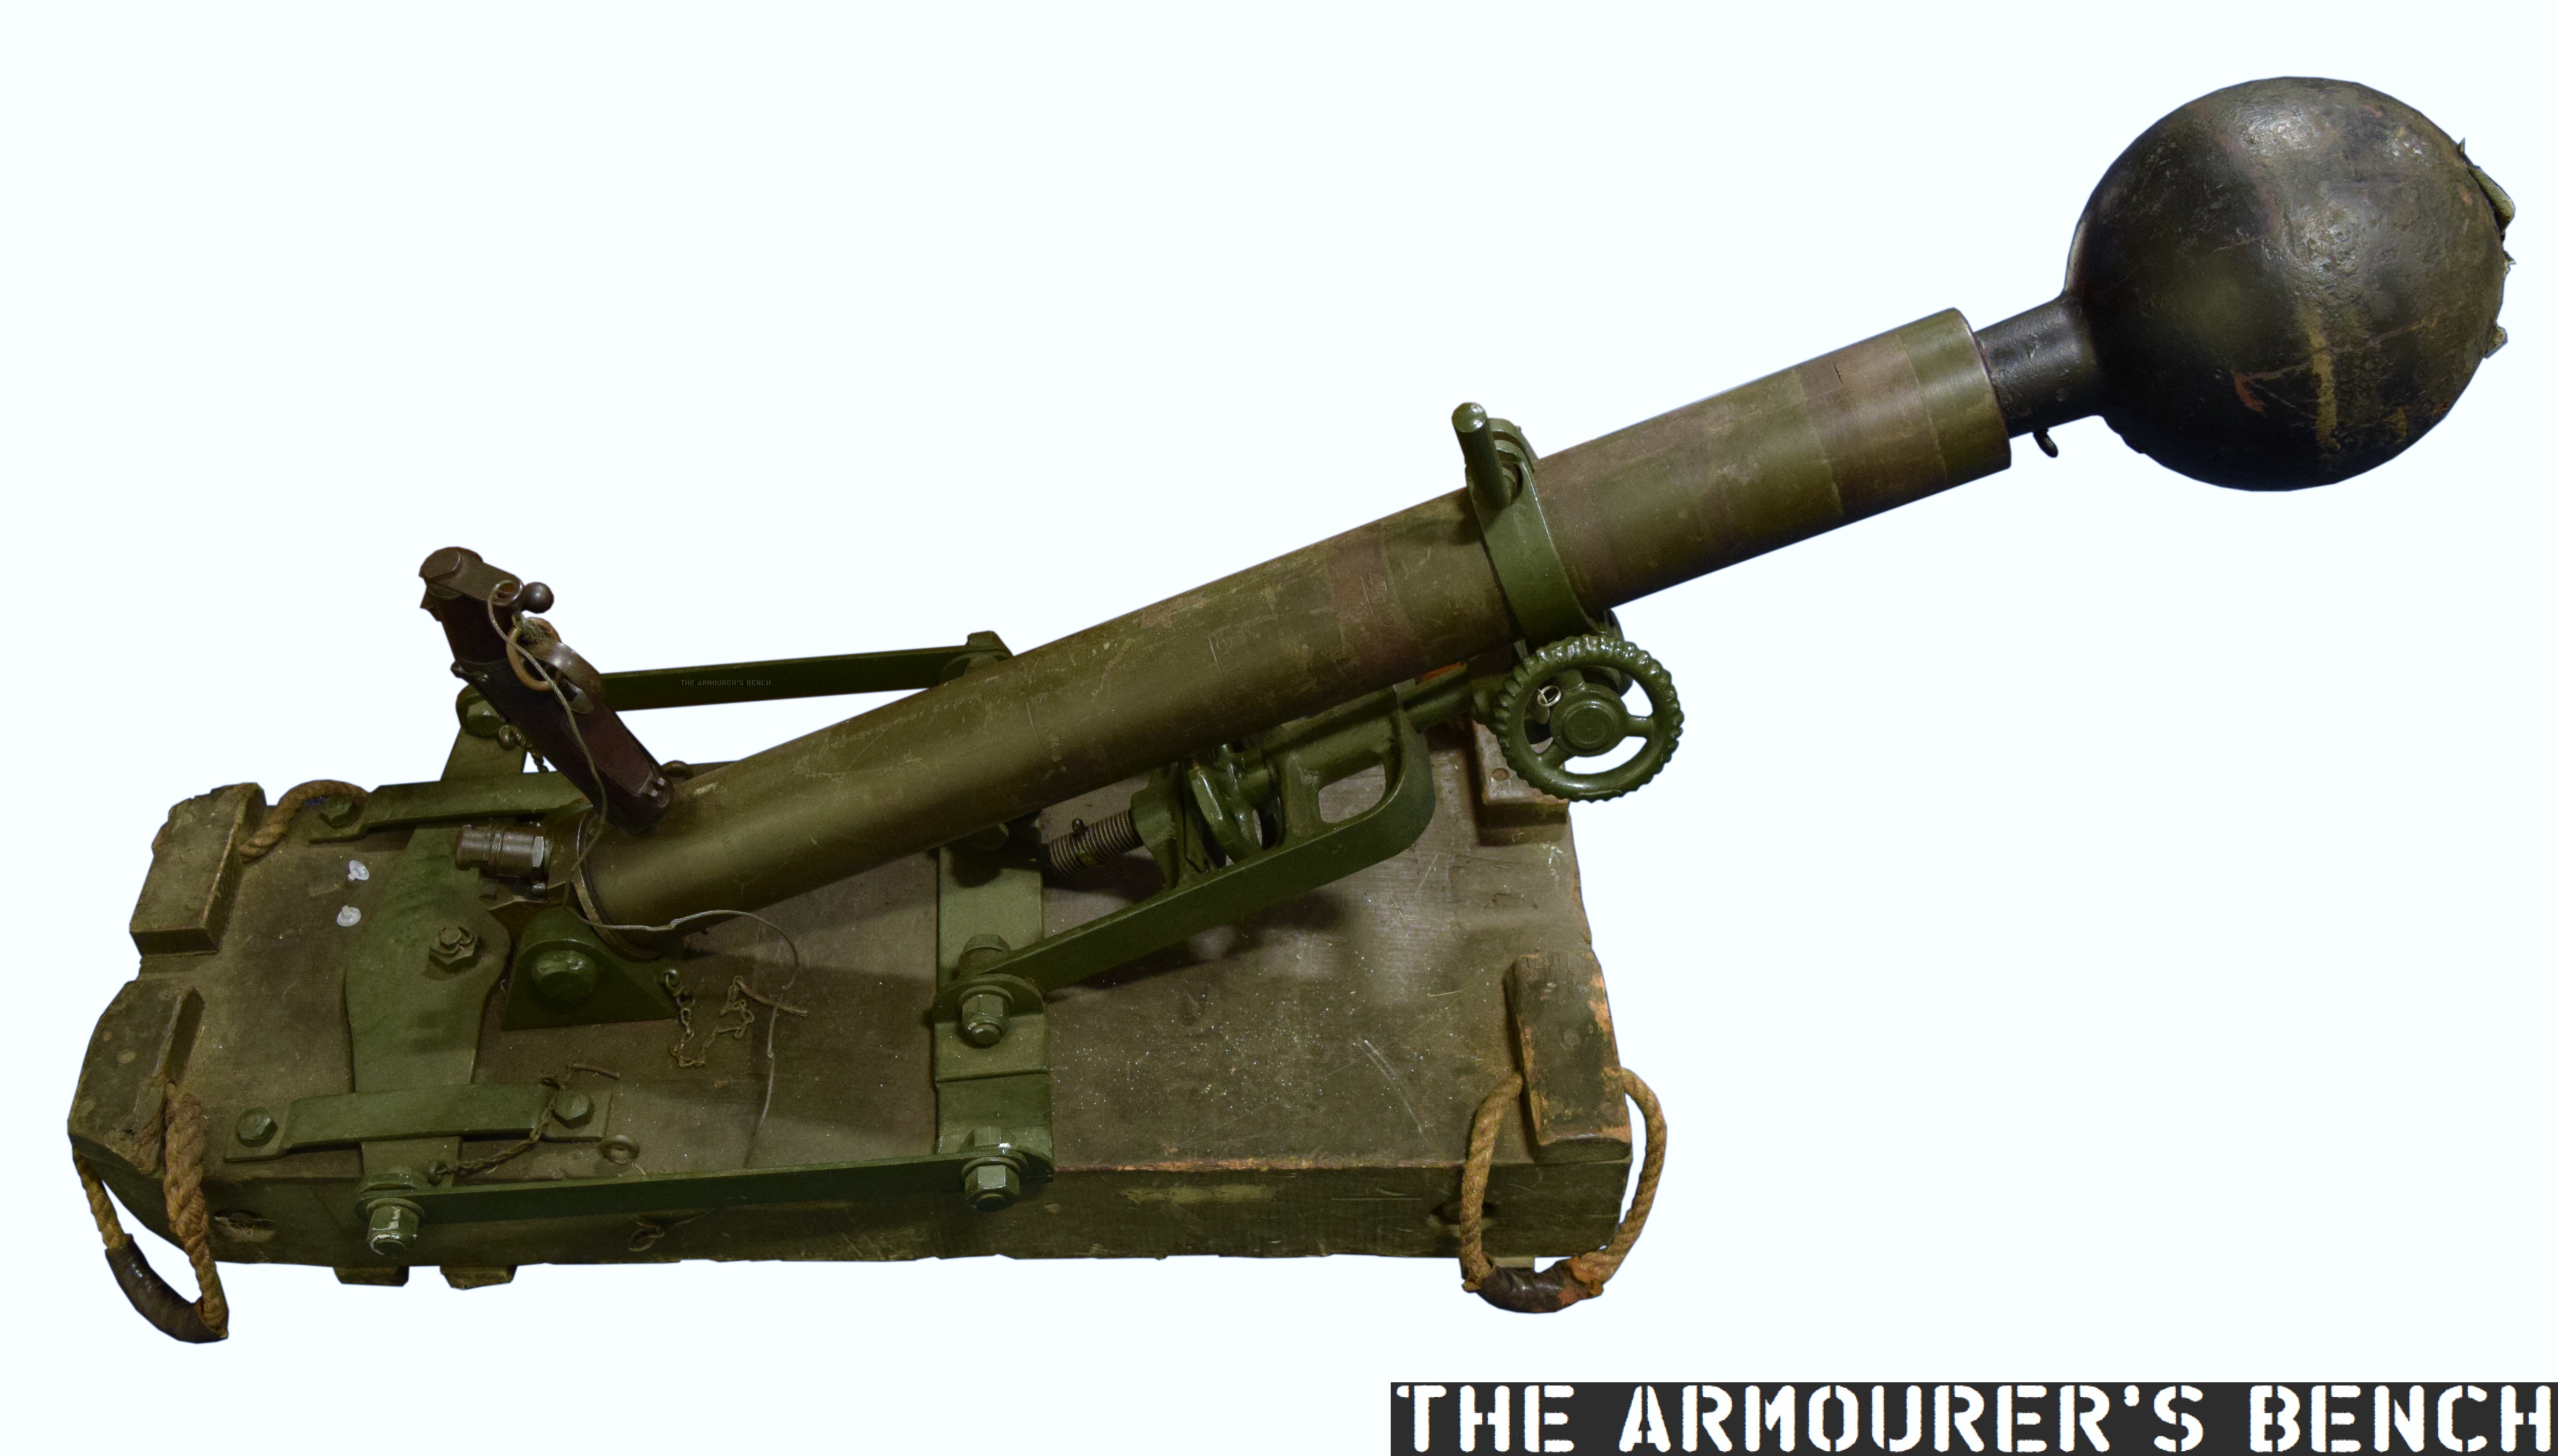
Nicknamed ‘plum pudding’ or ‘toffee apple’ mortars after their projectile’s characteristic shape, the 2 inch Medium Mortar or 2 inch Trench Howitzer, was one of Britain’s first effective light trench mortars to be introduced.
Right-side view of the 2in Trench Mortar (Matthew Moss)
Trench mortars were the army’s most forward artillery, right up on the front line. These short range weapons were able to throw large, high explosive projectiles, short distances across No Man’s Land at the enemy trench system opposite. The 2 inch mortar was considered accurate out to 350 yards with a maximum effective range out to just under 600 yards.
Introduced in 1915, the 2 inch mortar was originally crewed by men taken from the battalion it was stationed with, along with some specialists from the Royal Artillery. However, with the introduction of the 3 inch Stokes mortar which was operated by the infantry themselves the 2 inch mortars became the sole responsibility of the Royal Field Artillery.
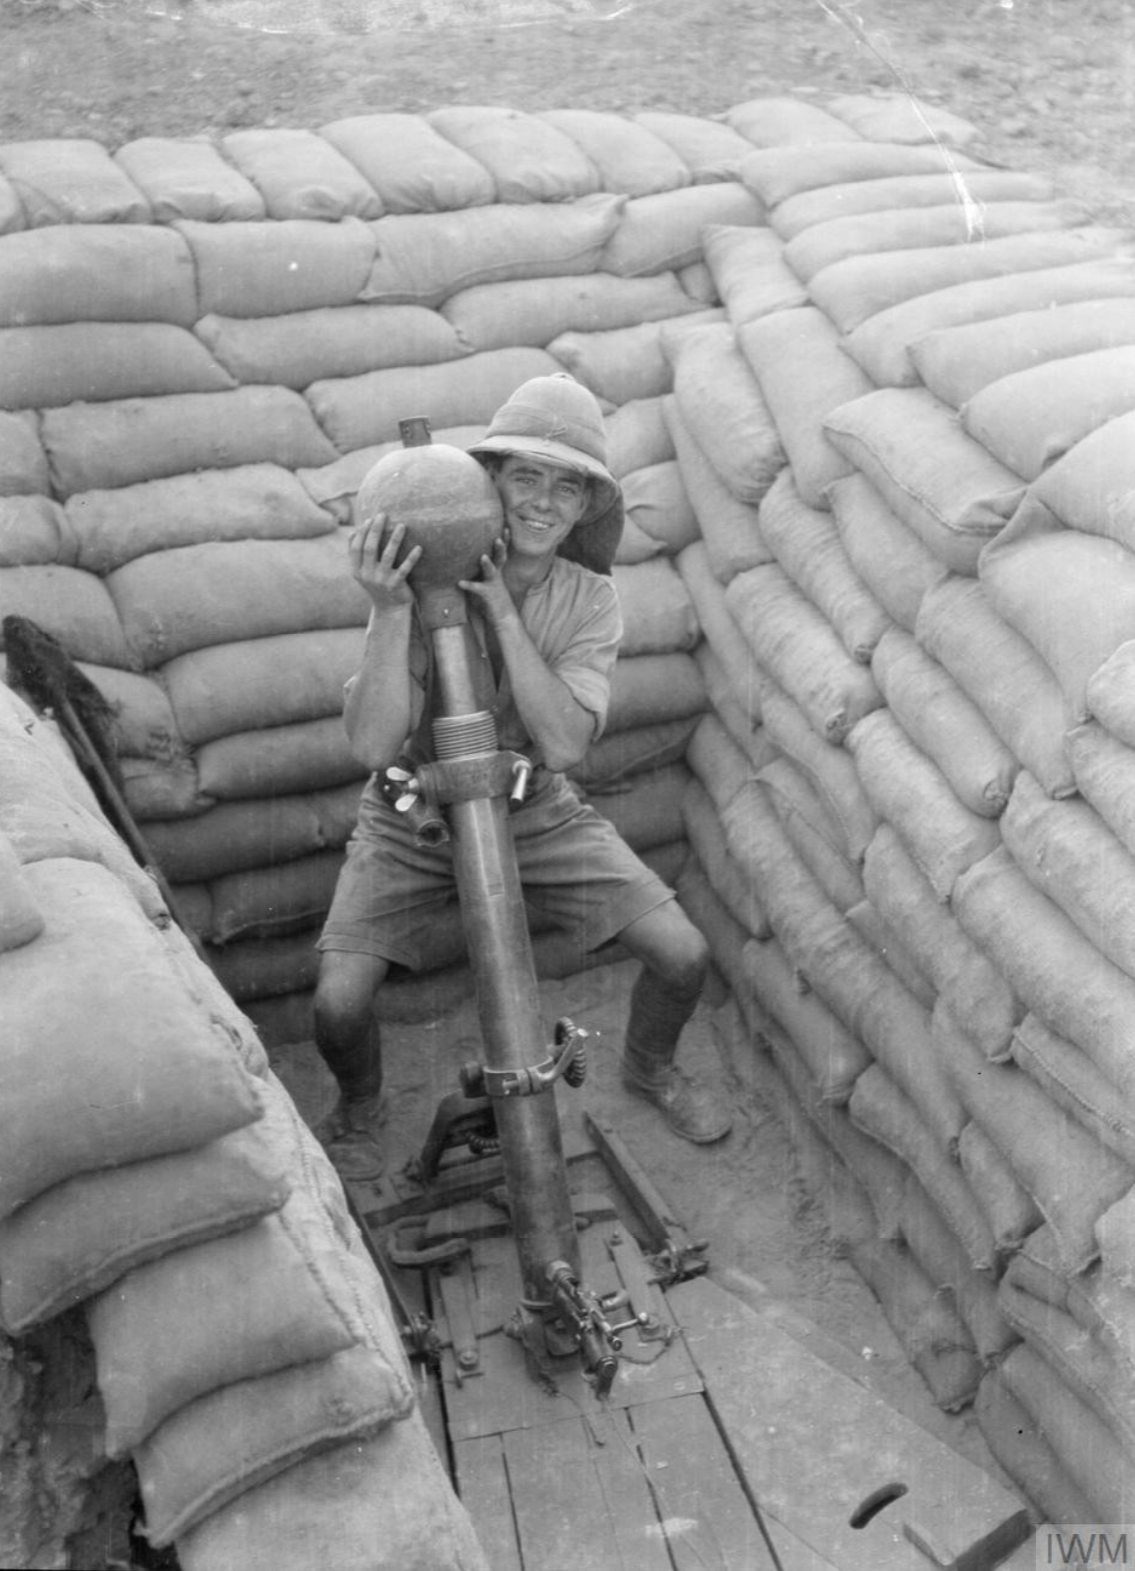
A young gunner loads a 2in spigot mortar bomb into his mortar (Imperial War Museum)
Mortar positions were often in secondary trenches just behind the infantry’s frontline. This was to help protect the infantry from potential counter-battery fire. The trench mortars were often deployed to sectors to provide counter battery fire against German minenwerfers or in the run up to an offensive or local action. A British Army report on artillery use, drawn up in February 1917, noted that “Owing to their liability to be destroyed by hostile artillery fire it may often be advisable to defer opening fire with these mortars till the last day of bombardment.” The mortars were also tasked with keeping gaps made in the wire clear and with supporting any feint attacks made by infantry during gaps in the bombardment running up to a larger offensive.
Llewelyn Wyn Griffith, a captain with the 15th Royal Welch Fusiliers and later a novelist, recalled in his war memoir:
“At night a trench mortar officer set his guns in a derelict trench about twenty yards behind the line and carried up his ammunition, heavy globes of iron with a little cylindrical projection like a broken handle. In the morning I moved the men from the bays between the trench mortars and their target, to lighten the risk of loss from retaliatory fire.”
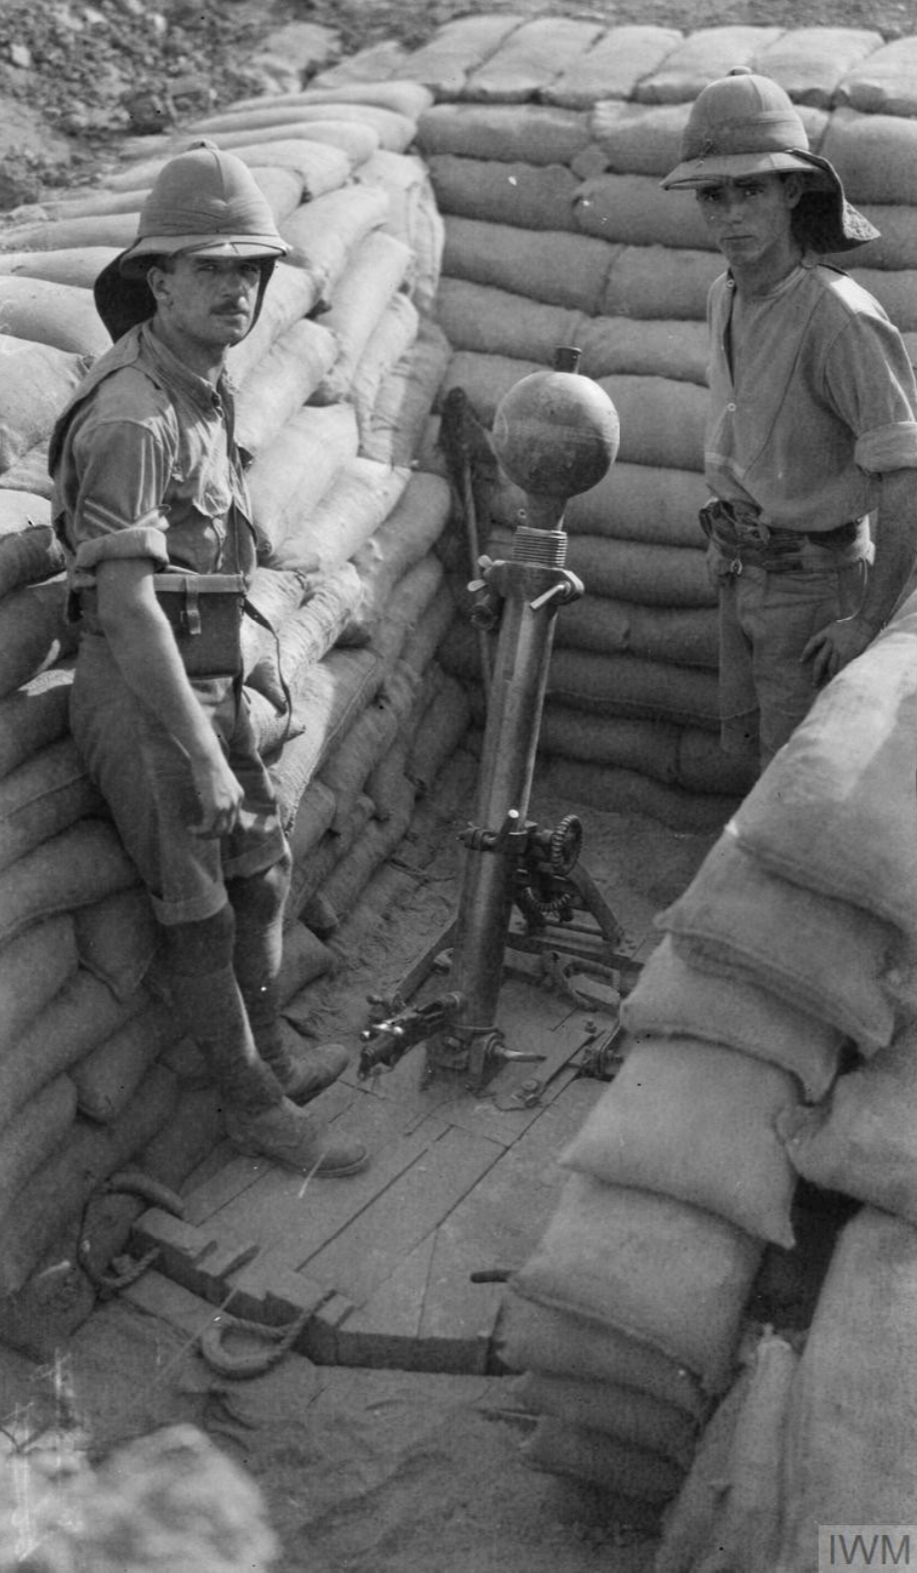
Sometimes the width of No Man’s Land required saps to be cut extending out from the frontline so the mortar rounds didn’t fall short. The 50 lb lollipop-like projectile had a maximum effective range of 570 yards (depending on the size of cordite charge used), and could create a crater 5 feet deep and 14 feet wide. The ideal mortar position was a 6 feet wide by 9 feet deep sandbagged pit with the weapon’s heavy wooden bed at the bottom and room for the crew to load the mortar.
A British 2in Mortar position in Mesopotamia, note the ignitor’s breech is open (Imperial War Museum)
Crews could manage to fire approximately once every two minutes. Much slower than the lighter 3 inch Stokes Mortar and but faster than the heavy 9.45 inch Heavy Mortar. The mortar comprising of just its tube, bed, stand and ignition system weighed 320 lbs (145kg), not including the accompanying tools and the Temple silencer system which could be fitted (which weighed 47 lbs or 21 kg alone).
Typically manned by a 5 man mortar crew comprising of an NCO, gunners, and ammunition bearers. To operate the 2 inch mortar a cordite charge was first placed down the tube, the projectile’s shaft was then inserted on top of the charge, the projectile’s fuse was set and checked and a new blank cartridge chambered in the ignition system. The crew then got clear of the weapon and pulled the lanyard to fire the mortar. To reload the crew ran a clearing stick down the tube and then repeated the loading process.
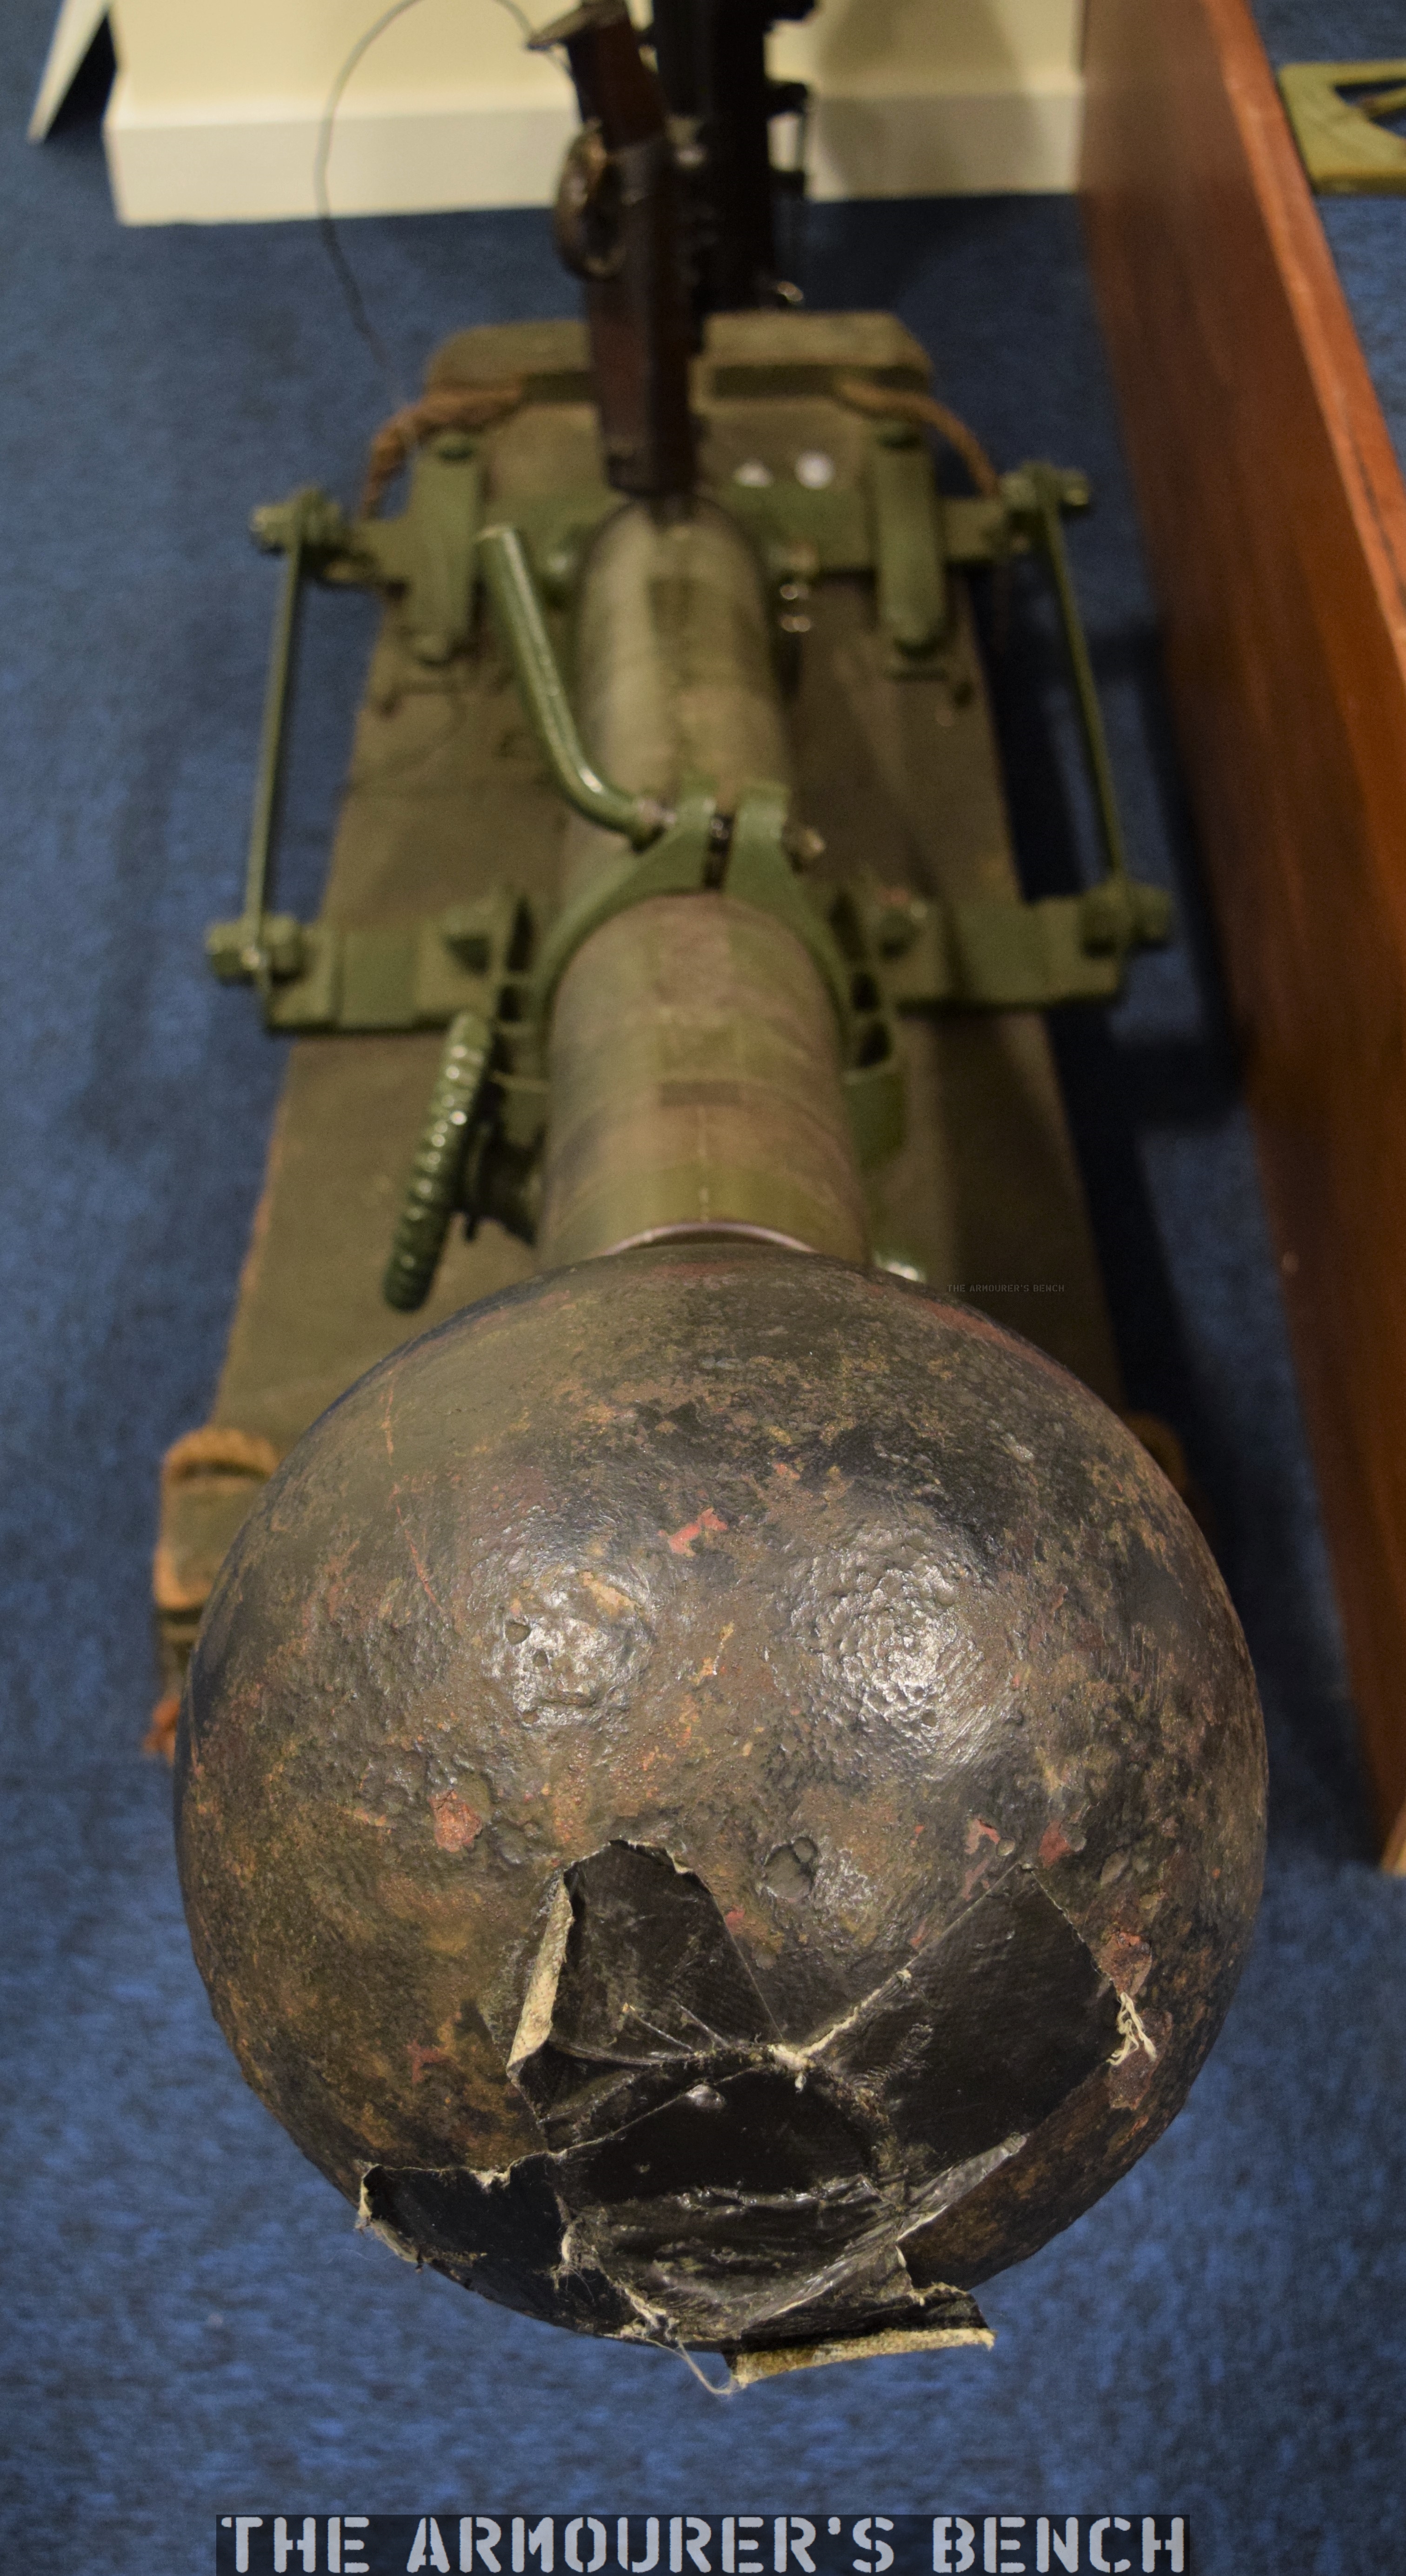
The business end, a view down the length of the mortar (Matthew Moss)
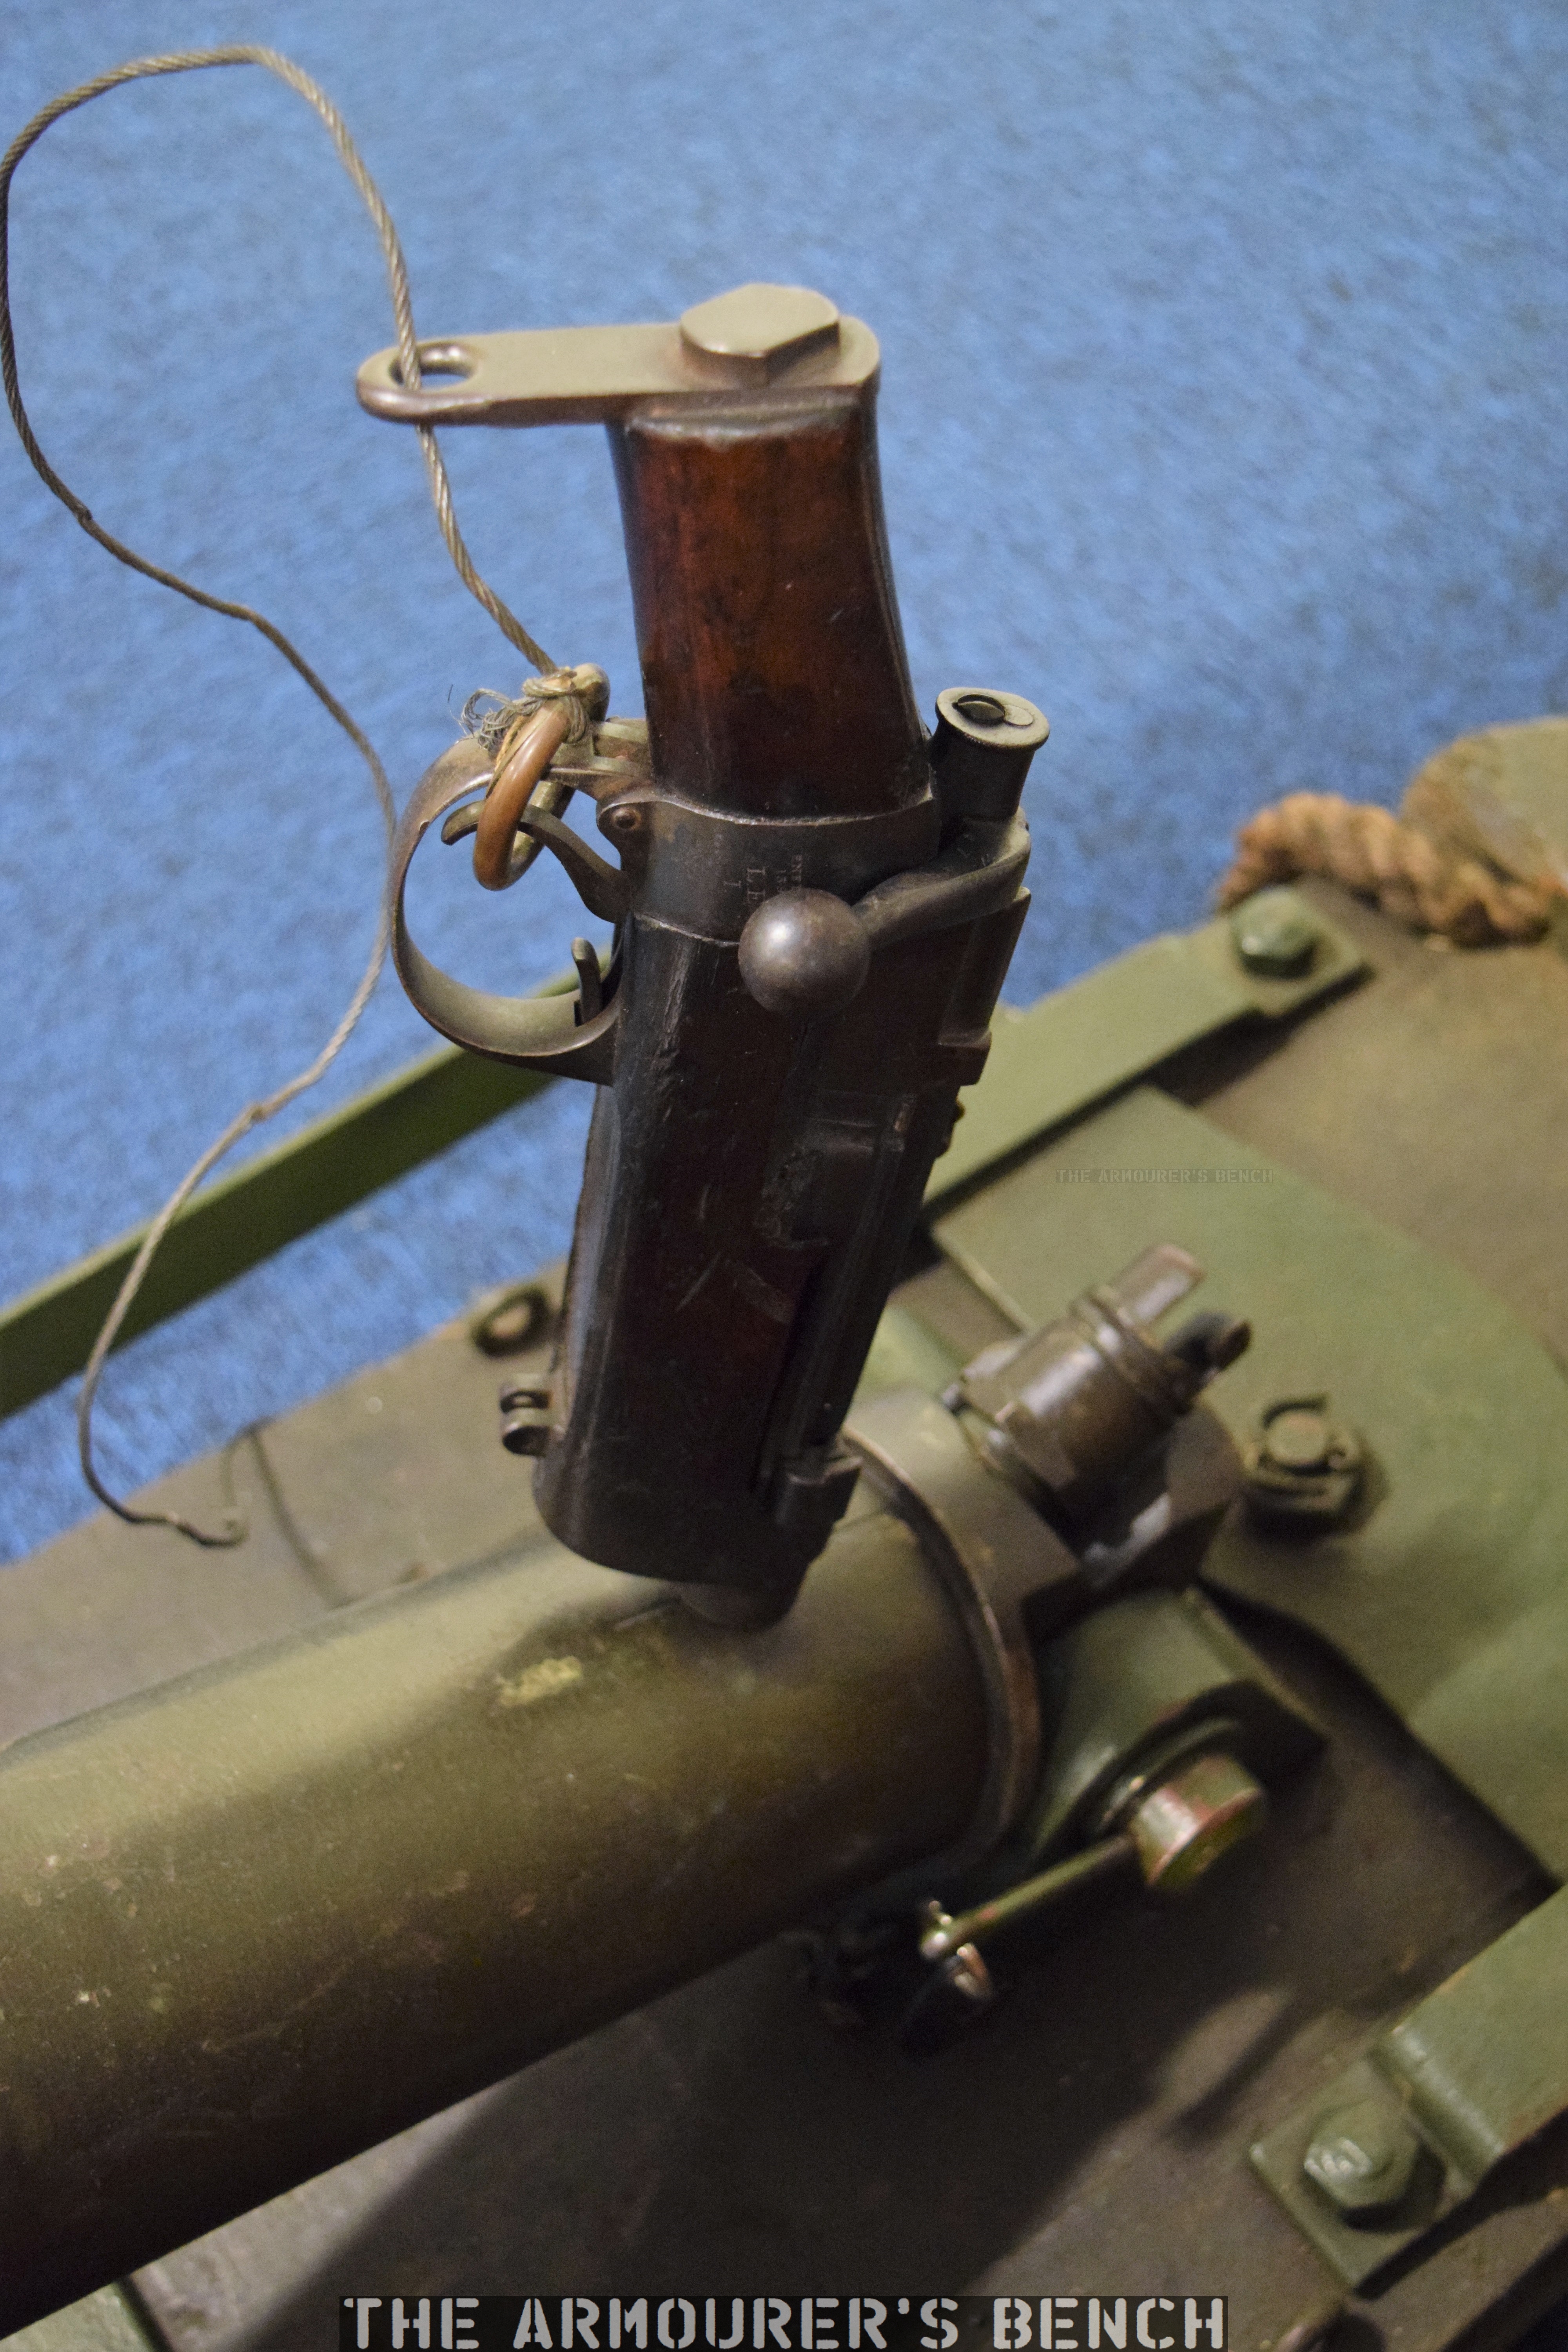
Interestingly, the 2 inch Medium Mortar, like the larger 9.45 inch Heavy Mortar used a cut-down rifle, which screwed into the ‘breech’ end of the mortar tube. This particular mortar has an 1894-dated cut down Lee-Enfield MkI as its ignition system, the cutdown rifle has a wooden insert in its magazine well but it still has its rear volley sight attached. This reusable system replaced the T-tube Friction ignitor, which was in high demand by Britain’s bigger guns. The Lee-Enfield-based system enabled the cordite propellant charges to be ignited by a blank .303 round instead. The rifle’s trigger was pulled with a lanyard from nearby cover. These cutdown ignitor rifle are sometimes confused for Obrez-style Lee-Enfields.
A close up look at the 2in Mortar’s SMLE ignitor (Matthew Moss)
The weight of the cordite charge used dictated the range while a variety of different fuses were used with the projectiles, these screwed into the nose of the bomb. The sphere was about 9.3 inches in diameter with a 2 inch thread for the fuse at its head and a cup for the 22 inch long, 2 inch thick solid cast iron stick or spigot at its base. The sphere was filled with high explosive (Amatol or Ammonal). The high explosive bombs were painted white with a green or pink stripe around their middle.
They were often deployed in batteries of four with three Royal Field Artillery medium mortar batteries attached to each division. The mortars were predominantly tasked with cutting enemy barbed wire and destroying enemy trenches and forward positions, such a machine gun nests.
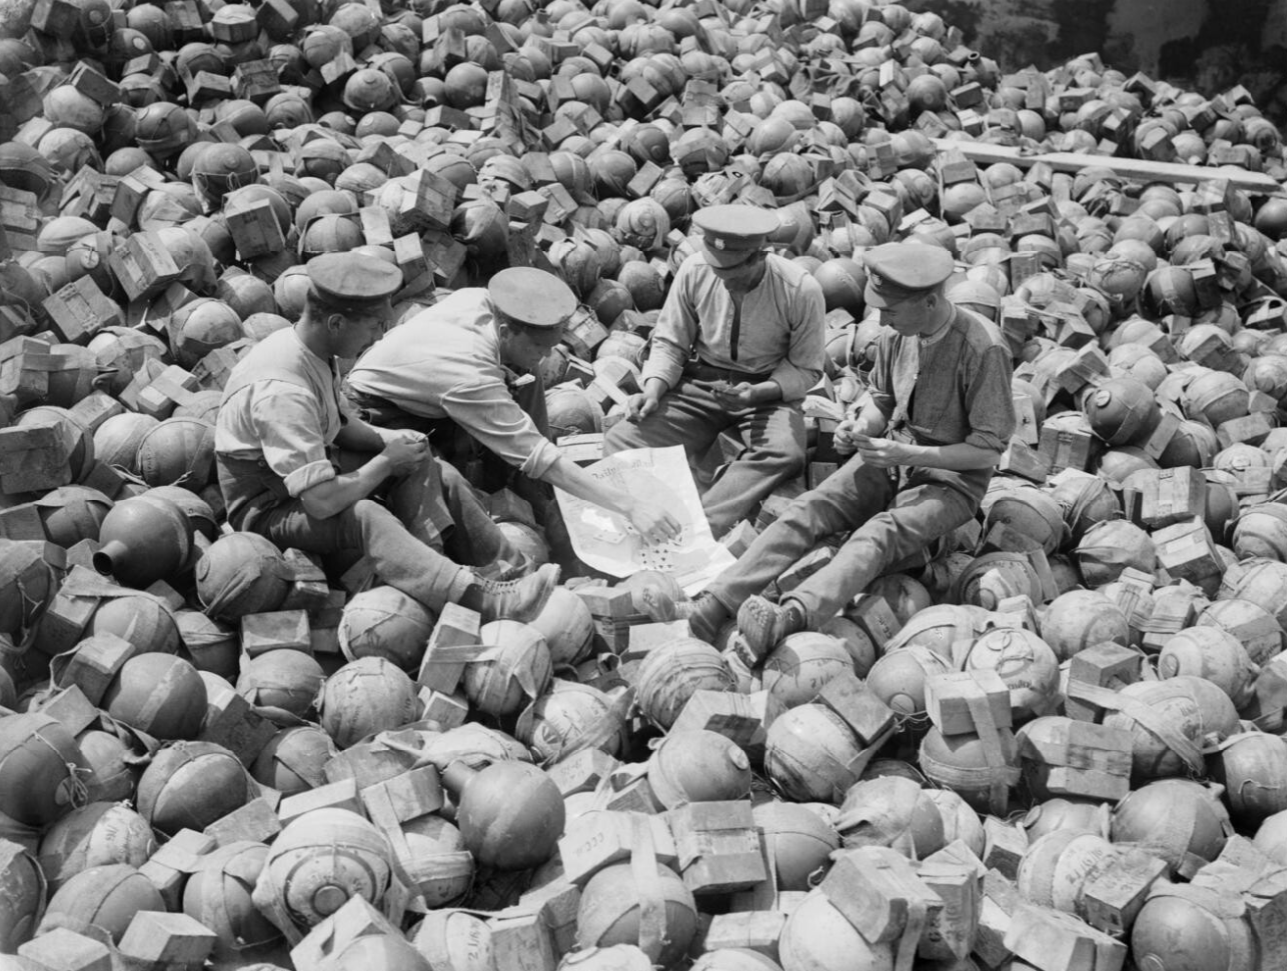
Men of the Royal Army Ordnance Corps playing cards on a dump of trench mortar ammunition during Battle of the Somme (Imperial War Museum)
Captain Griffith described a battery of 2 inch mortars opening fire on enemy lines:
“A pop, and then a black ball went soaring up, spinning round as it went through the air slowly; more pops and more queer birds against the sky. A stutter of terrific detonations seems to shake the air and the ground, sandbags and bits of timber sailed up slowly and then fell in a calm deliberate way. In the silence that followed the explosions, an angry voice called out in English across No Man’s Land, ‘YOU BLOODY WELSH MURDERERS.’
The 2 inch medium mortar entered service in spring 1915 and remained in use into 1917 with British and Empire troops. It was used on the Western Front and in Mesopotamia. Over 800 were ordered initially with 675,000 bombs, many of the mortars were made in railway and agricultural machinery workshops, allowing larger factories to focus on more complex weapons. The 2 inch mortar was superseded by the larger bore Newton 6 inch mortar later in the war. Some of the remaining 2 inch projectiles were re-purposed as makeshift anti-tank mines, buried in no man’s land in anticipation of possible German tank attacks.
If you enjoyed the video and this article please consider supporting our work here.
In February 1855, London gunmaker Frederic Prince patented an intriguing breech-loading system. Prince offered his rifle to the Board of Ordnance for testing where it outshot the then-standard Enfield 1853 Pattern rifle musket during trials at the School of Musketry at Hythe in 1855. However, the Ordnance Department refused to consider adopting the new breechloading system believing it to be too complex and expensive to manufacture. It would be another nine years before the British Army took breechloading seriously.
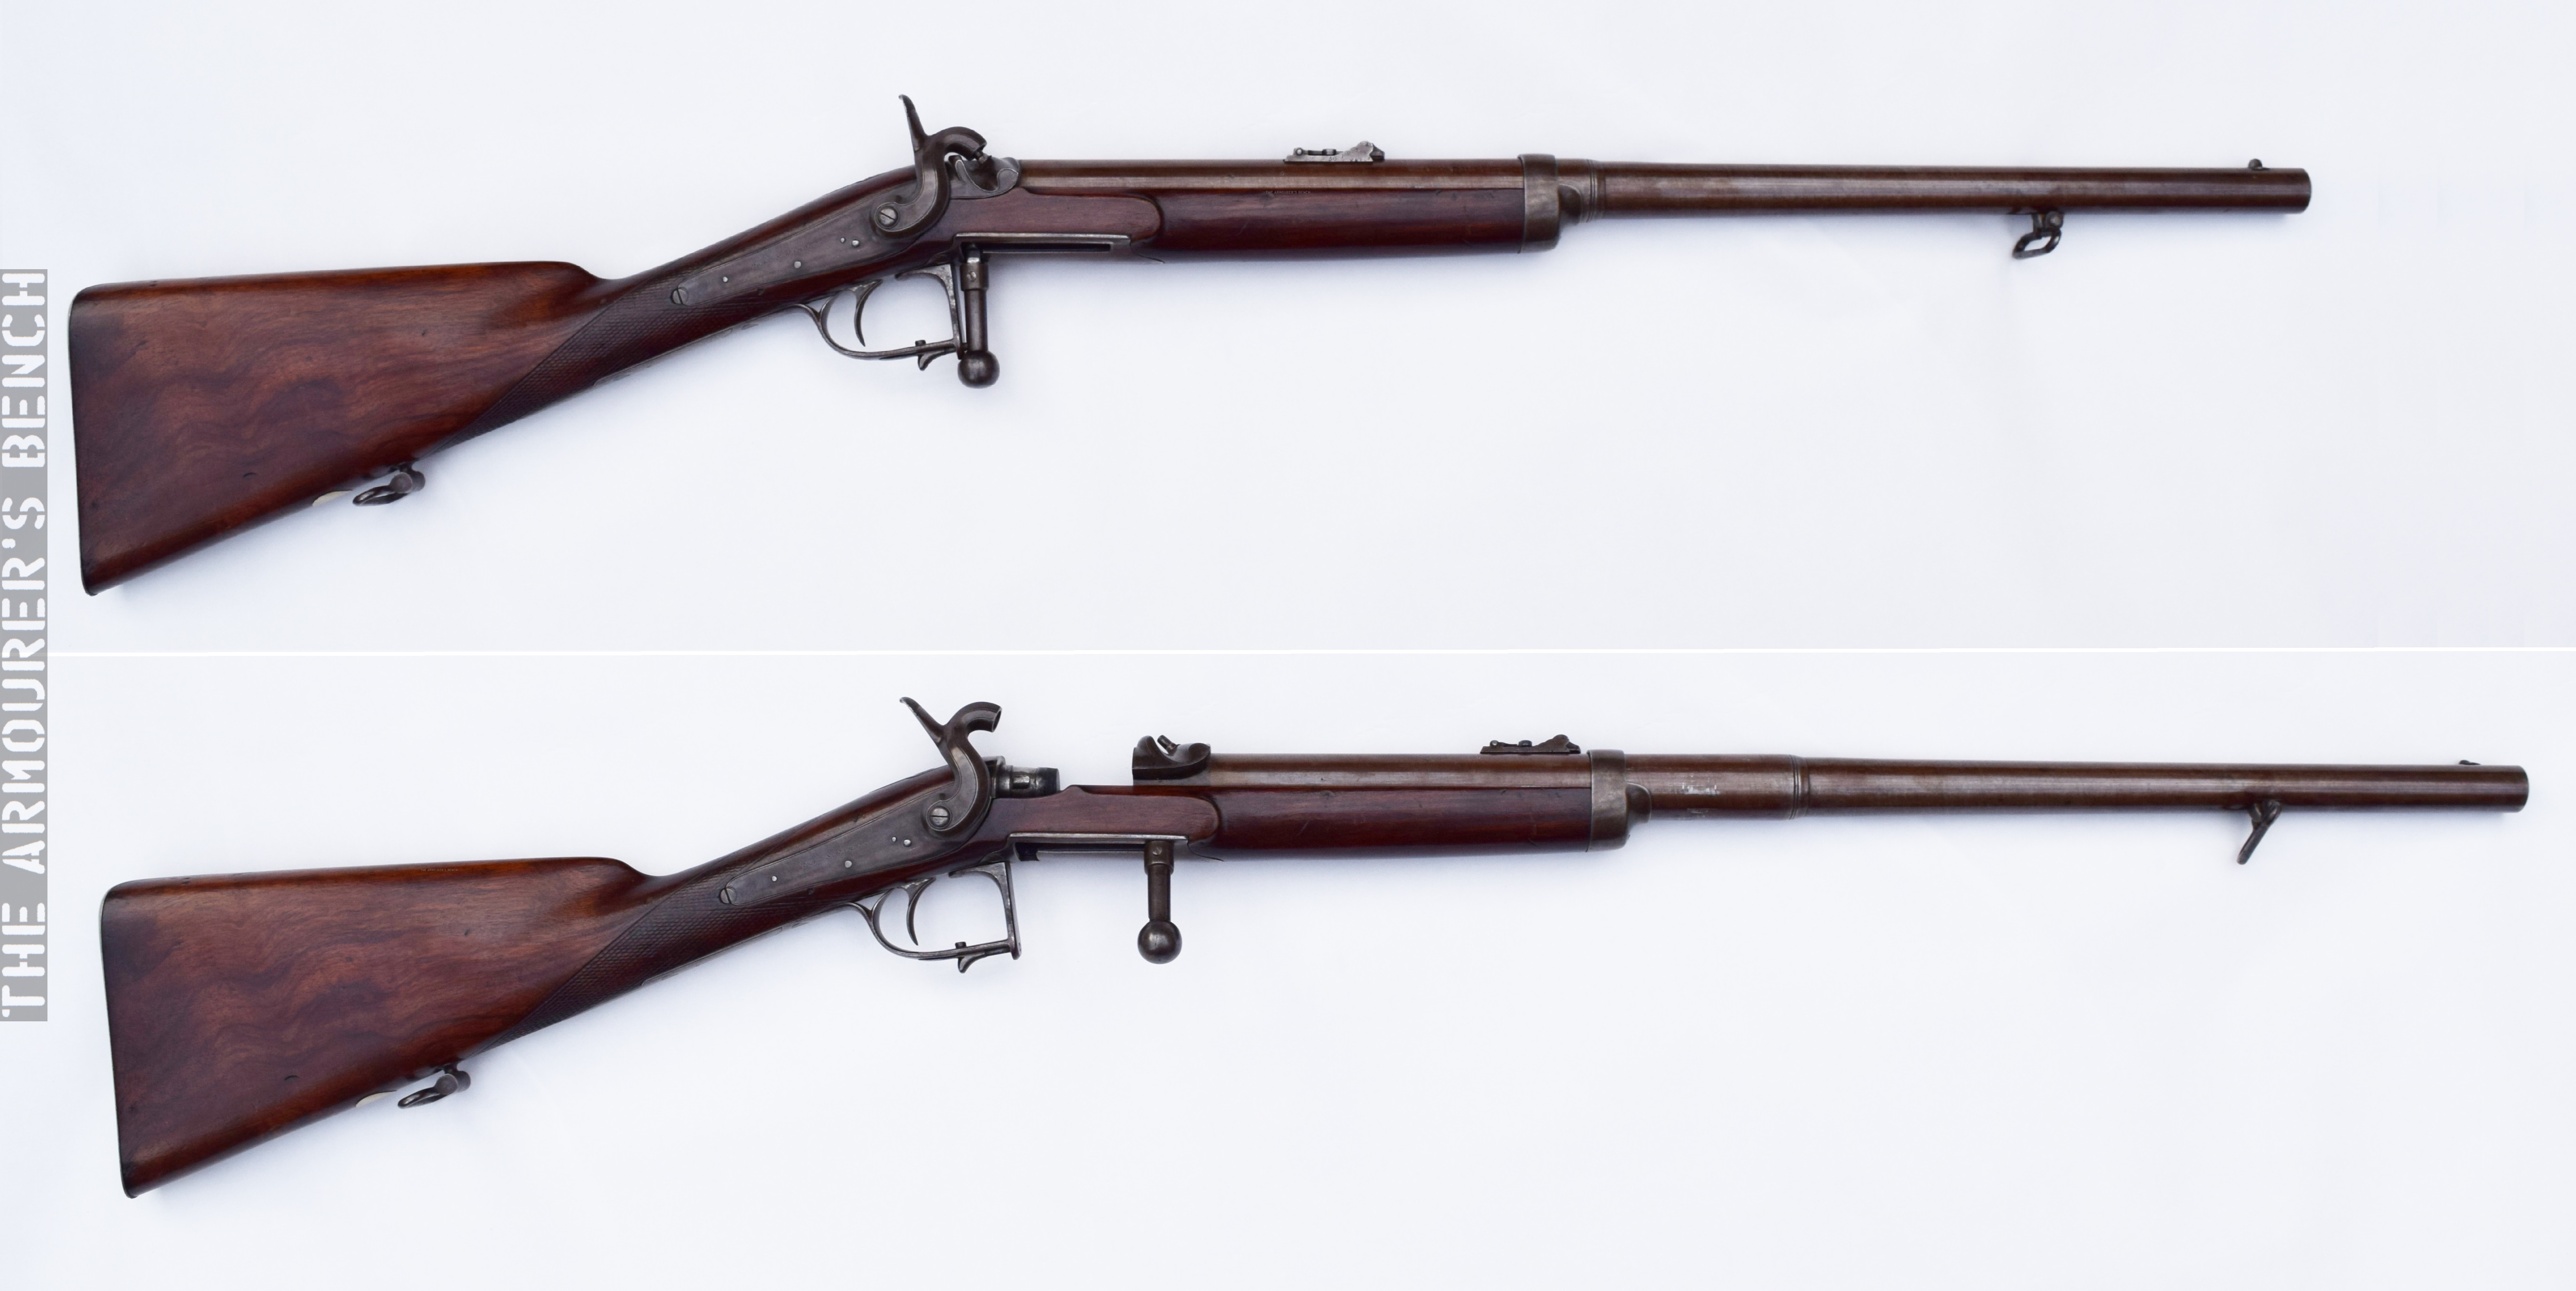
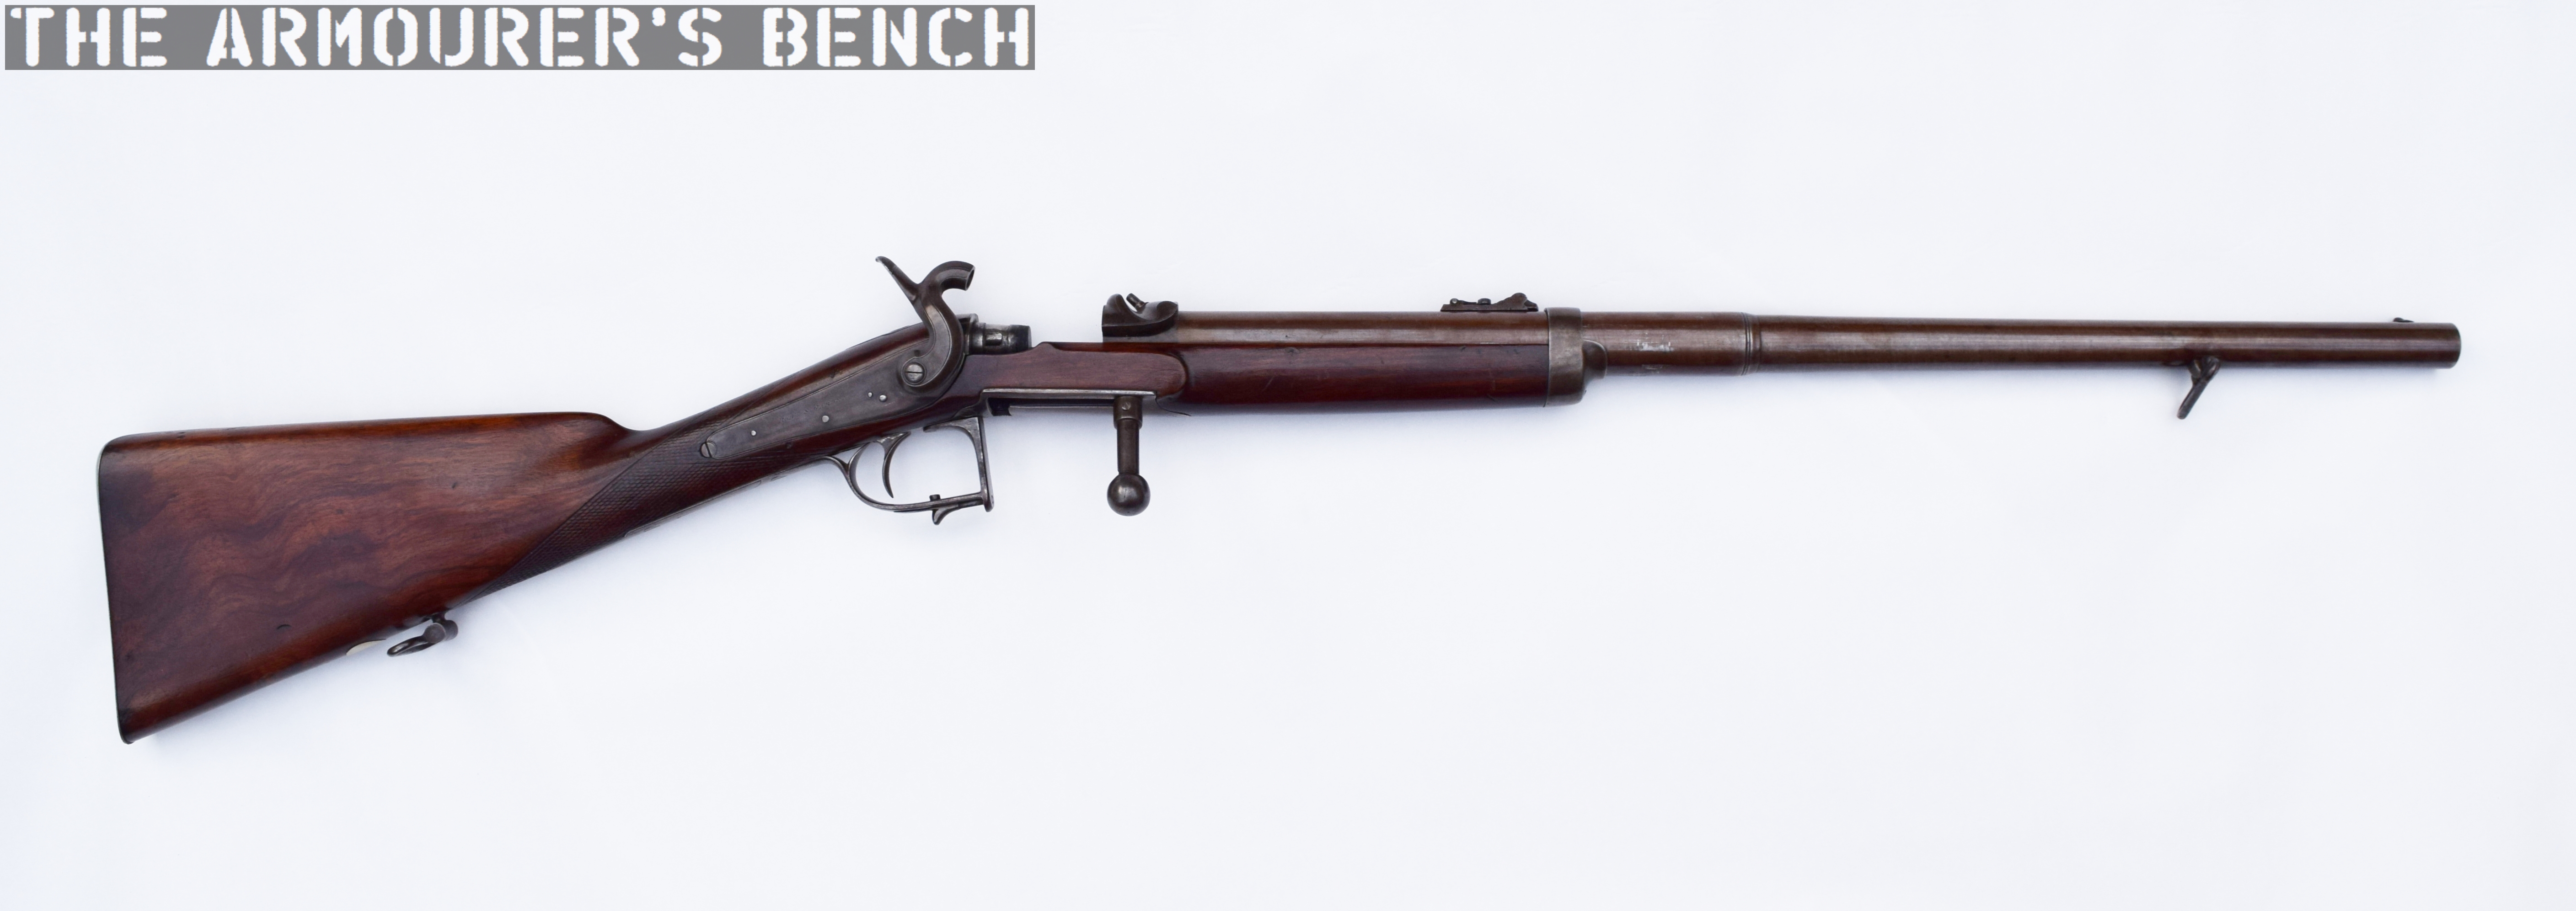
Prince’s Breechloader, with its action closed and open (Matthew Moss)
Prince’s system used a sliding barrel to open up the breech to allow the loading of a paper cartridge, once the breech was closed the percussion lock was then capped. Once the hammer was brought back to full cock the rifle was ready to fire. In order to load the rifle the weapon was placed on half cock, the ‘bolt handle’ was then unlocked by pulling back the locking piece which protruded from the base of the trigger guard. The bolt handle was then turned slightly to the right disengaging the two lugs, which locked the breech, and then the bolt could be pushed down a short ‘L’ shaped channel. This pushed the barrel assembly forward several inches, opening the breech and allowing the rifleman to load a paper cartridge.
Right side view of Prince’s action (Matthew Moss)
Once loaded the bolt handle was pulled rearward again, and turned to the left again to re-engage the locking lugs. The bolt locking piece was then pushed back into a recess in the bolt handle to secure it. The bolt handle, along with the lugs inside the receiver, act to keep the breech block locked during firing.
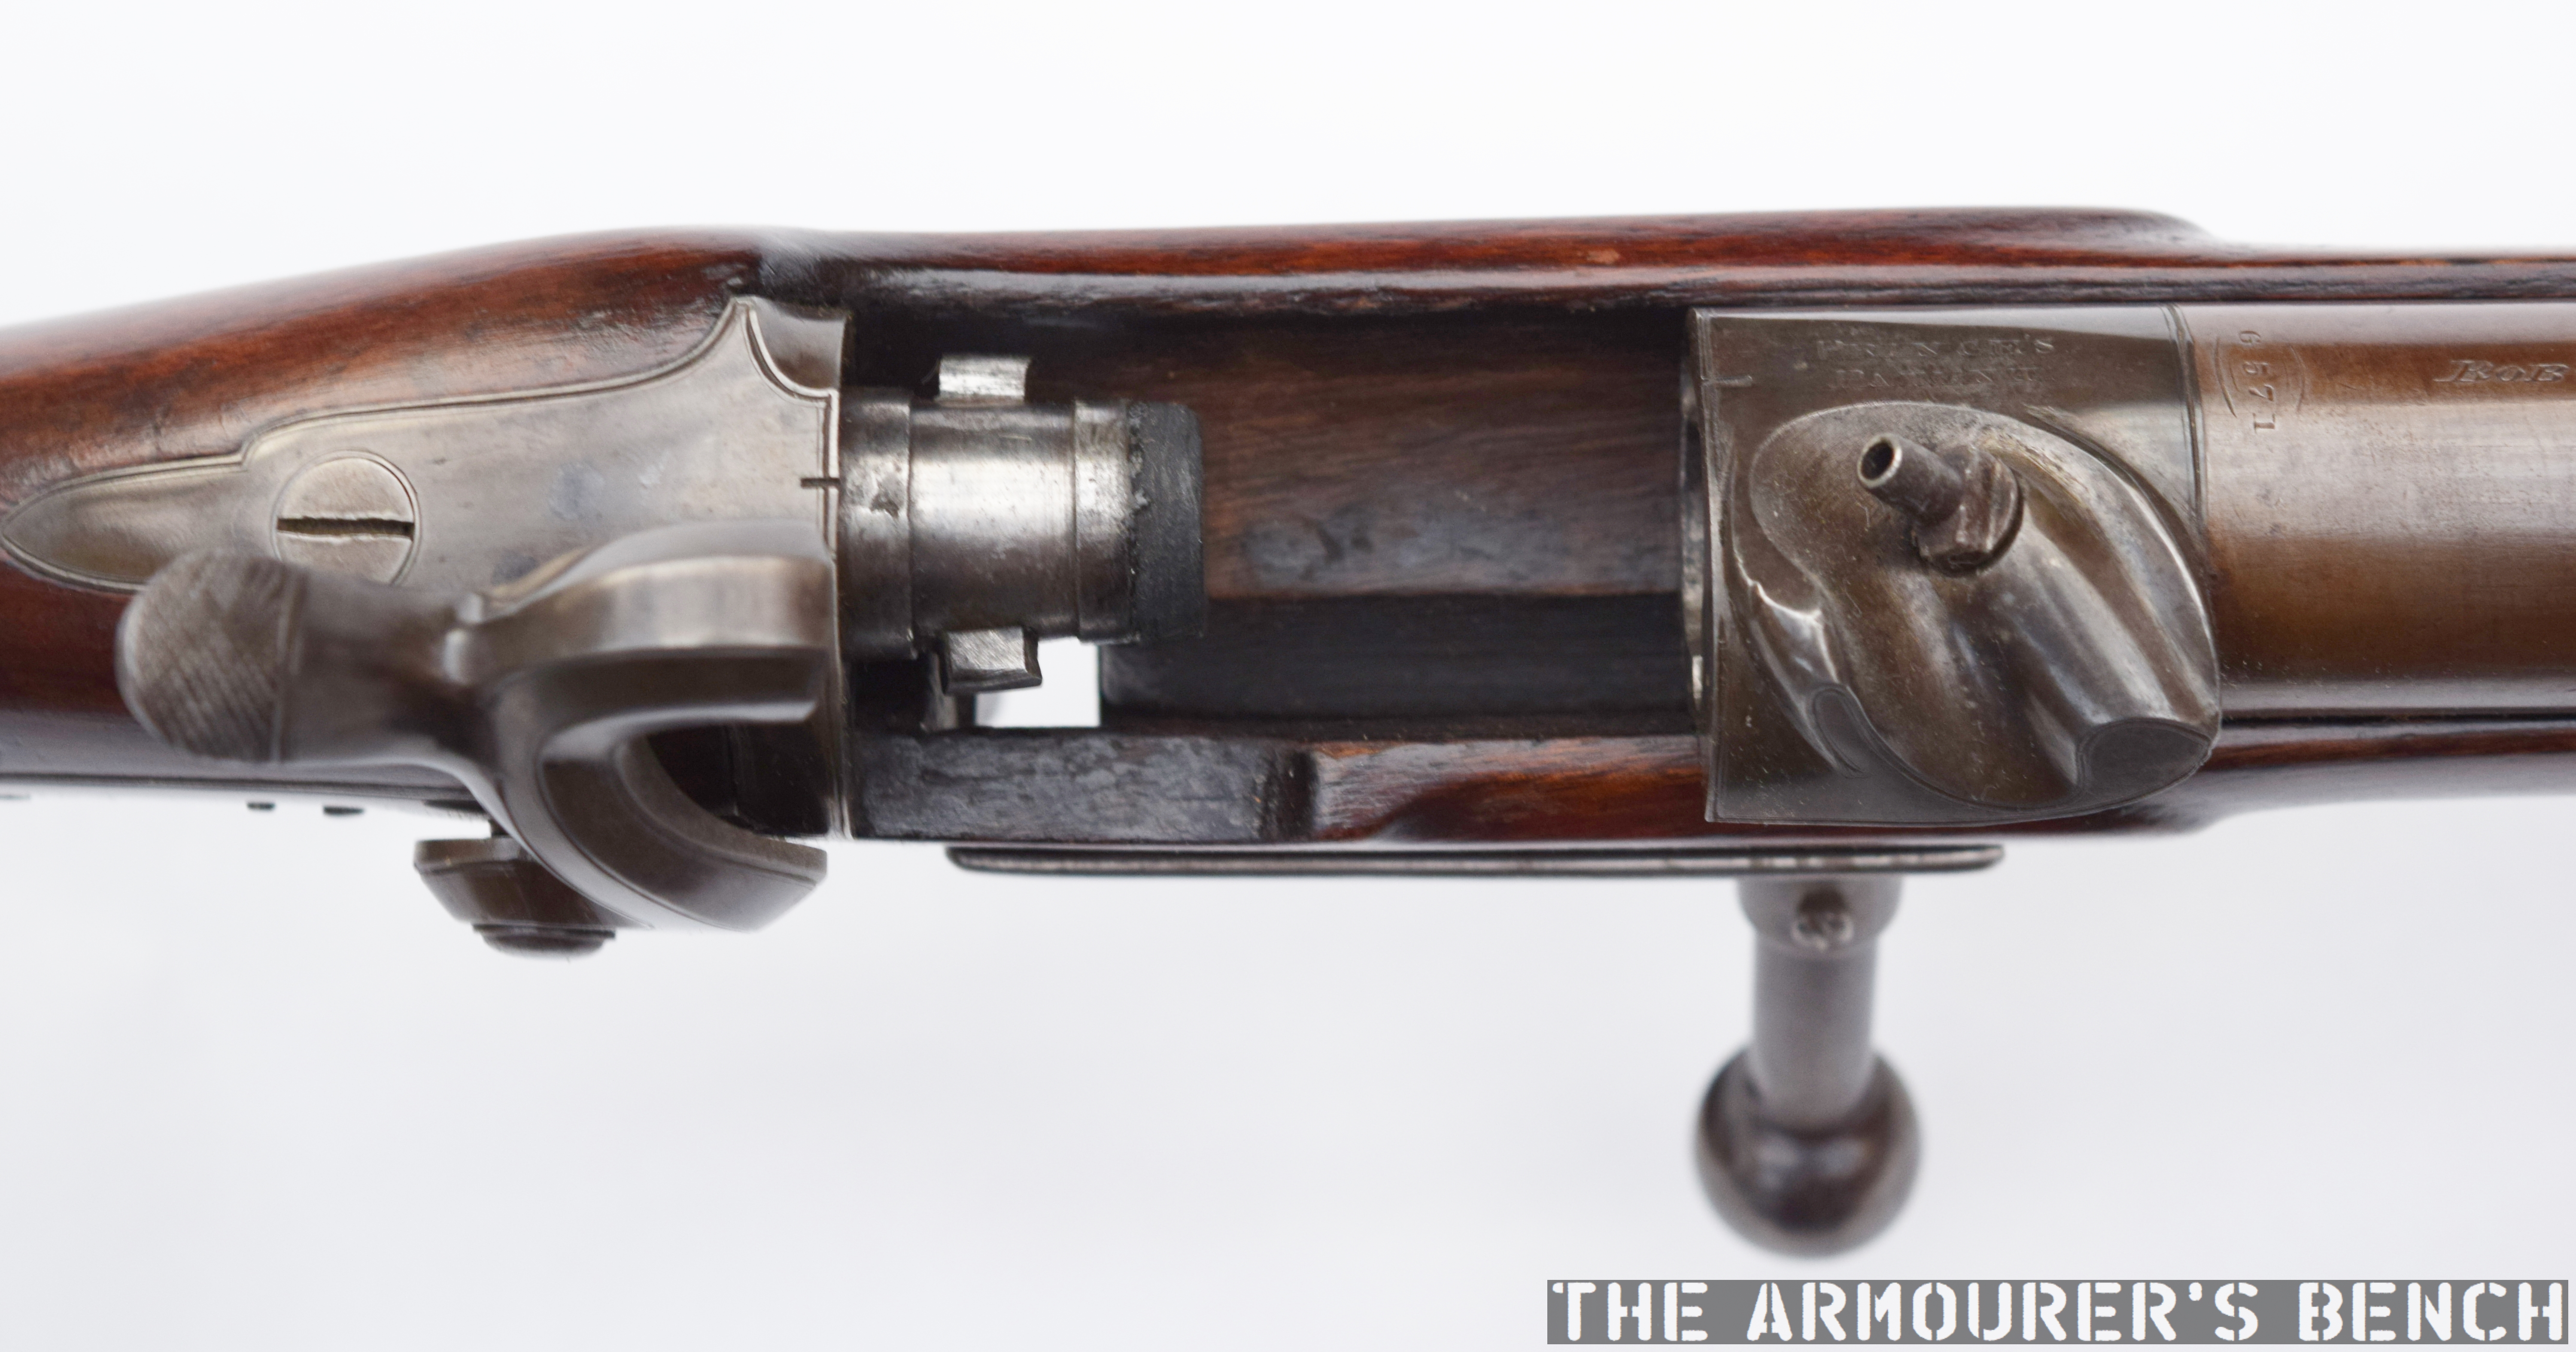
View of the inside of the action with the barrel pushed forward, note the pair of locking lugs and the rubber seal on the breech plug (Matthew Moss)
Hans Busk, the prominent Victorian rifle proponent, described Prince’s action, in his book The Rifle, and How to Use It (1861) as: “one of the simplest and handiest breechloading rifles that has yet been tried.”
Prince’s patent for the system was granted on the 21st February 1855. Between 1854 and 1859, Frederic Prince patented no less than eight improvements to small arms ranging from actions to manufacturing processes and even improvements in metallurgy. Prince was a gunmaker working in London, for a time in partnership with William Green with premises on New Bond Street.
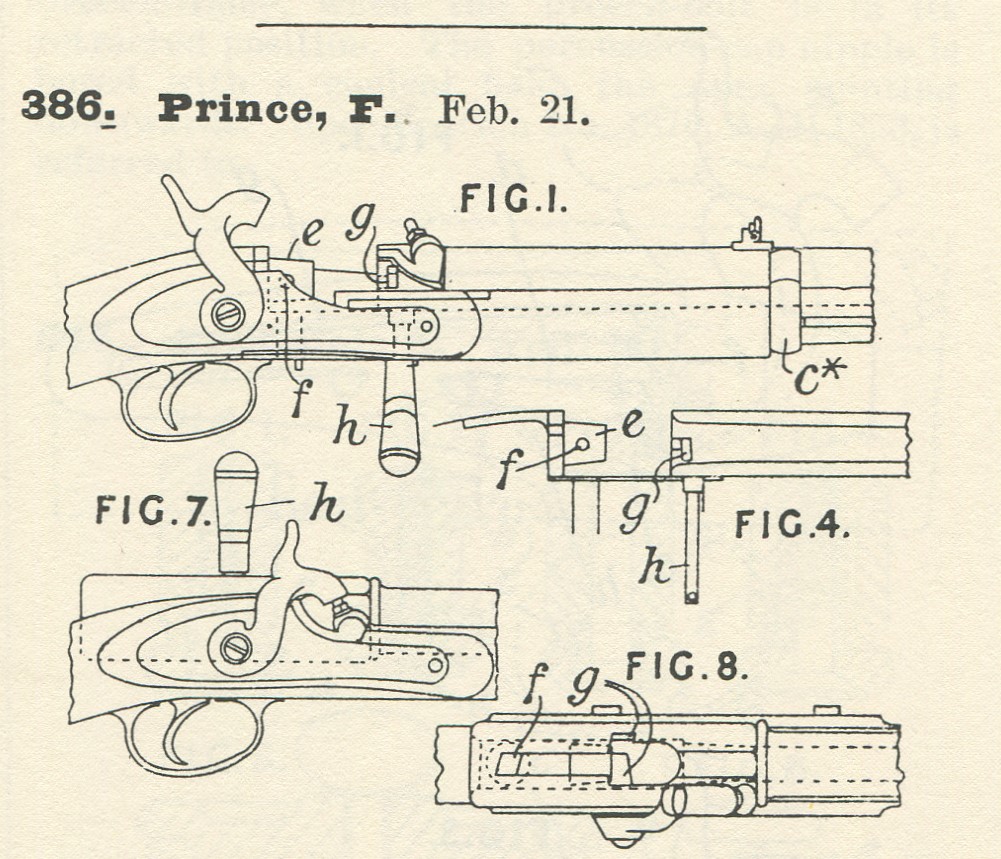
Prince’s 1855 patent for his action (courtesy of Research Press)
One of the key elements to Prince’s system was his self-contained paper cartridge, protected by two patents dating from January 1855 (#33 and #173). Prince’s cartridges were relatively conventional in their design; made up of a paper tube with a wad between the bullet and powder. The paper was treated with a mixture of sulphuric and nitric acids, the process toughened the paper but also, according to Busk, caused it “to be entirely consumed in the barrel”, in theory leaving no debris behind, once it was ignited by the flash of the percussion cap. This had the result of greatly speeding up loading, in a similar way to the cartridges used by the continental needle guns but not going so far as to include the primer inside the cartridge.
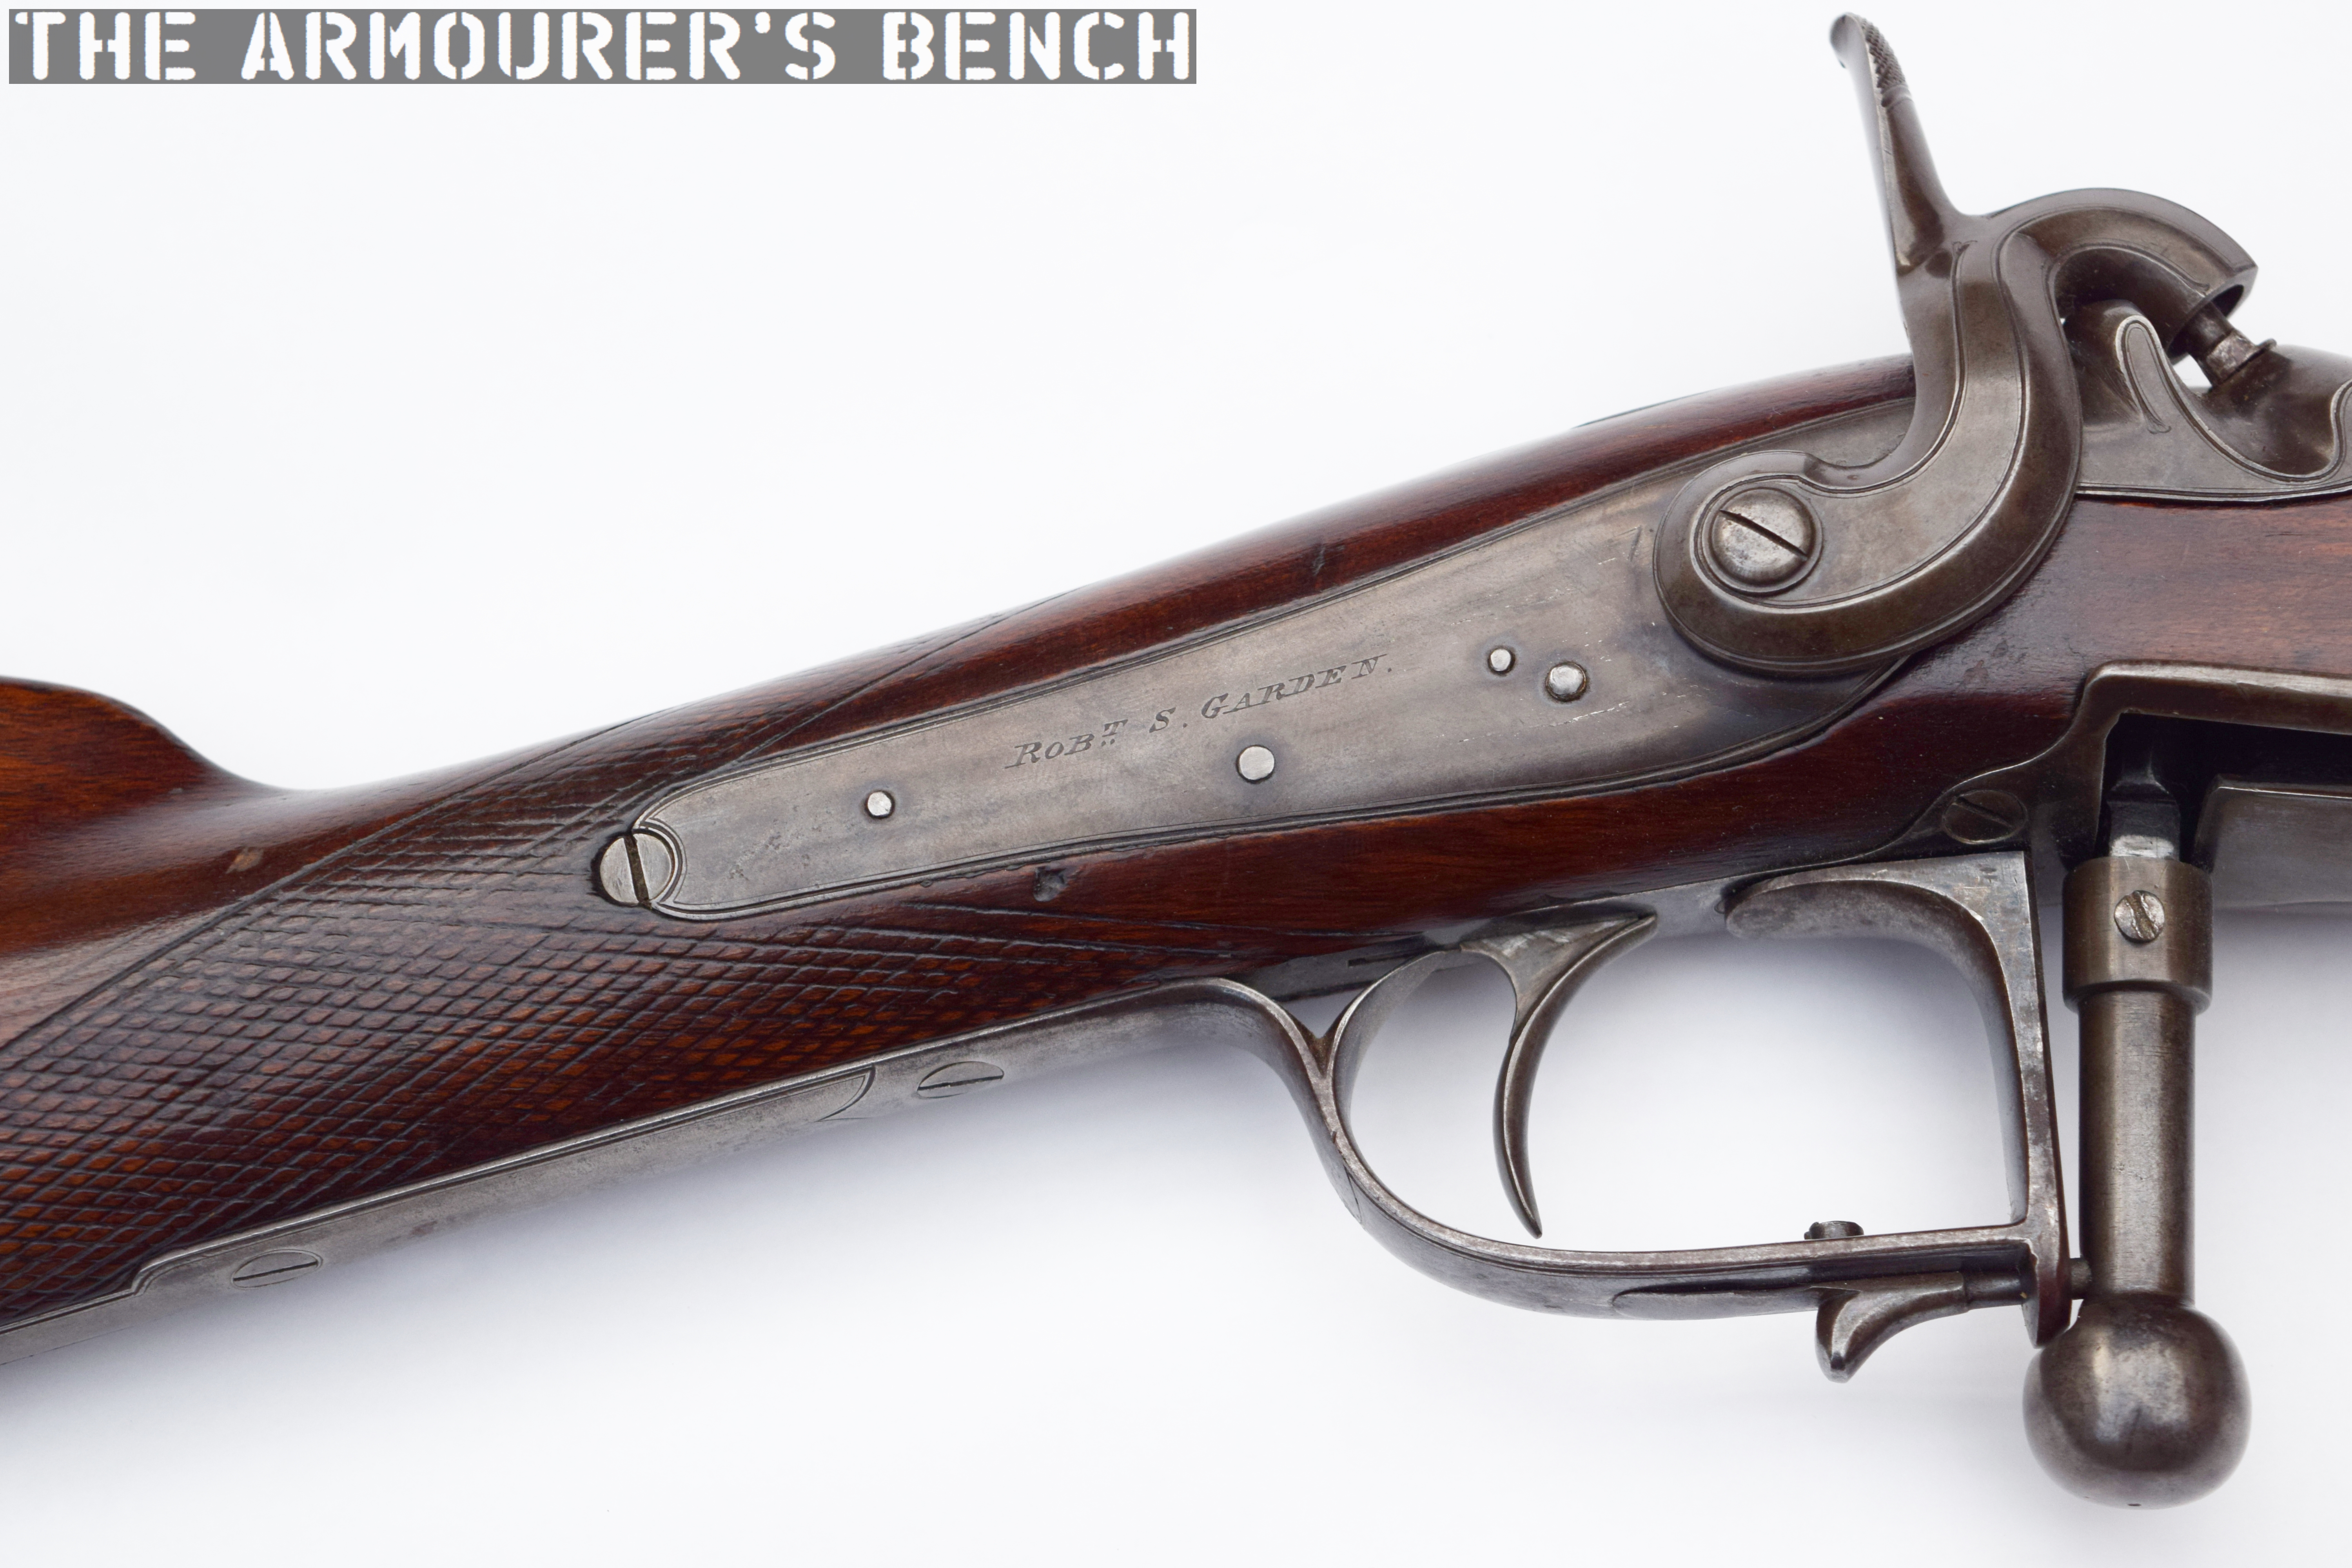
Prince’s breechloaders used a back action, here we can see Robert S. Garden’s makers mark on the lock plate (Matthew Moss)
Prince’s February 1855 patent describes a conical plug at the rear of the breech with a pair of locking lugs which locked into the walls of the breech. The patent also mentions the possible use of rubber gas seals to obturate during firing and prevent gases being vented. A subsequent patent (#3036 22nd December 1856) protected the concept of having a hollow, concave plug which could either be circular or hexagonal.
In his book Busk recounts that during the trials at the British Army’s School of Musketry at Hythe, Prince’s rifle was reportedly able to fire six rounds in just 46 seconds and a total of 120 rounds were fired in just 18 minutes by Prince himself. On another occasion, using a small bore version of the rifle, Prince was able to demonstrate how accurate his rifle was putting 16 rounds onto a small piece of notepaper, a grouping of 1 ¾ inches, at a range of 100 yards during a demonstration at the Victoria Regimental Practice Ground. The trials at Hythe saw it fired against the Enfield Pattern 1853 rifle musket where it put 48 out of 50 rounds on target at 300 yards compared to the Enfield’s 47.
view of the Prince’s breech, note the two cuts either side of the chamber to lock into the locking lugs once the breech is closed (Matthew Moss)
The School of Musketry’s annual report for 1855-56 makes some interesting observations. The report states that testing took place in July 1855 and noted that the Pattern 1853 performed better at 600 yards, no doubt because of its longer barrel, while the Prince “had a slight advantage at the shorter distance”. The report also notes that Prince’s rifle required “a greater angle of elevation than the rifle musket 1853, especially at the longer distances, which proves that the latter has a more horizontal trajectory”, the more parabolic trajectory of the Prince rifle is likely due to its shorter barrel and possibly its five groove rifling. In terms of rate of fire the official report the Pattern 1853 was said to be capable of 35 rounds in fifteen minutes whereas Prince’s rifle managed 72. This casts some doubt on Busk’s account of the trials, which of course may refer to a different test, but it does support the rapidity of Prince’s action. One final interesting observation from the report is that in operating his rifle Prince administered “copious lubrications of saliva” to the action which as a result “worked easily throughout”. The report concludes with the suggestion that Prince’s rifle should “be subjected to a prolonged trial before an opinion can be expressed as to its efficiency for infantry.”
Left side view of Prince’s rifle (Matthew Moss)
While Prince’s rifle performed admirably the War Office refused to order a batch for further testing, perhaps feeling his system was too complex or too expensive to manufacture, or perhaps not robust enough for military service. Another important factor to consider is that in 1855, the British Army had just two years earlier formally adopted the muzzle-loading 1853 Pattern rifle musket and was of course engaged in the Crimean War.
Underside view of the Prince’s bolt and bolt travel track, note the reinforcement around the track to strengthen the stock (Matthew Moss)
Prince’s patent is undeniably an ingenious breech-loading system. It is a testament to the belief in the design that in 1858, three years after it had first been rejected, a group of prominent London gunmakers including Manton, Wilkinson, Samuel Nock, Parker Field, and Tatham petitioned the Department of the Master-General of the Ordnance to reconsider their decision in a testimonial, published in The Field magazine in April 1858, arguing that they wished “to see the most effective weapon in the hands of our soldiers” and describing Prince’s rifle as “the best we have seen”. Several of these gunmakers, including Manton and Wilkinson, went on to produce rifles based on Prince’s system.
A survey of surviving examples of rifles using Prince’s action shows that a large number of contemporary gunmakers made rifles based on his system, although how many exactly were made remained unknown.
The rifles were produced by gunmakers including Prince’s own company – Prince & Green, as well as Wilkinson’s, E.M. Reilly, Robert S. Garden, Manton & Sons and Hollis & Sheath (later Hollis & Sons). According to De Wit Bailey the London Armoury Company also took on a manufacturing license for Prince’s action in 1861, it is unknown if any were ever produced before the company collapsed in 1866.
Right side of the Prince (Matthew Moss)
Many Prince’s patent rifles were made for civilian sporting and target use. The surviving rifles tend to have barrel lengths of between 25 and 31 inches and most have either three or five groove rifling. The rifles were made in various calibres from the British army’s preferred .577 to much smaller rook and rabbit hunting guns in .24 and .37 calibre. Other larger calibres include .500 and .90 inch bores. With the variety of makers the sights, stocks and fittings found on the rifles vary greatly from simple dovetailed leaf rear sights to more complex ladder sights. There is some variation in the shape and orientation of the locking lugs on the breech plug, this may indicate some experimentation by gunmakers to find the most efficient shape and angle. There is also variation in the style of the barrel bands which held the barrel to the stock, most have a single barrel band that loops over the barrel but there are several examples which have bands split in half and do not surround the barrel, one example has a set of two of these. All of the guns, however, have back action locks – in order to leave more room around the breech to ensure strength.
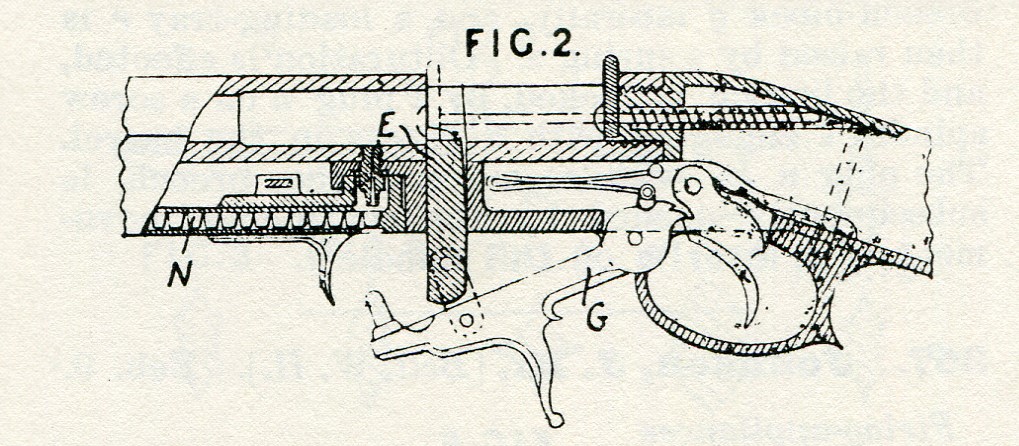
Prince’s later 1859 patent for his under-hammer siding breech action (courtesy of Research Press)
Following the rejection of his system by the military Prince developed another breechloading action, patenting it in January 1859 (#259). The new rifle combined a percussion cap magazine inside the rifle’s stock, below the barrel, with an under-hammer lock which was connected to a vertically sliding breech block. It is unclear if this design was ever produced, tested or sold commercially.
In refusing to adopt Prince’s breech-loading system it can be argued that the British Army passed on an opportunity to leap ahead of its rivals. The system was undoubtedly fast and accurate in action, it is possible the Ordnance Department felt the system was too complex and its sliding barrel was not robust enough for service conditions. However, the Prince rifle was a single victim of a wider trend between 1842 and 1865, the Board of Ordnance and later Ordnance Department examined and trialled dozens of breech-loading rifles during the period but did not feel it necessary to adopt one until they had been overwhelmingly proven in the field.
In early 1864, the armies of Europe were shocked by the decisive victory the Prussian Dreyse needle guns helped to bring about during the Danish-Prussian War. In 1865 the British began to seriously look for a breech-loading replacement of their Enfield 1853 Pattern rifle muskets. Following trials of various submitted designs Jacob Snider’s cartridge conversion was selected and in September 1866, the Snider rifle was introduced becoming Britain’s first breech-loading service rifle.
If you enjoyed the video and this article please consider supporting our work here.
Bibliography
Patents:
22nd December 1854, Patent #2705
3rd January 1855, Patent #33
23rd January 1855, Patent #173
21st February 1855, Patent #386
16th November 1855, Patent #2590
22nd December 1856, Patent #3036
28th January 1859, Patent #259
15th July 1859, Patent #1679
English Gunmakers: The Birmingham and Provincial Gun Trade in the 18th and 19th Century, D.W. Bailey & D.A Nie (1978)
Guns Dictionary: Guns & Gunmakers, J. Walter (source)
Annual Report on the Instruction & Experiments of the School of Musketry, 1856
Special thanks to our friends at the Hayes Collection for letting us examine their rifle, and thanks to David Minshall over at the Research Press for his help researching the Prince’s various patents.