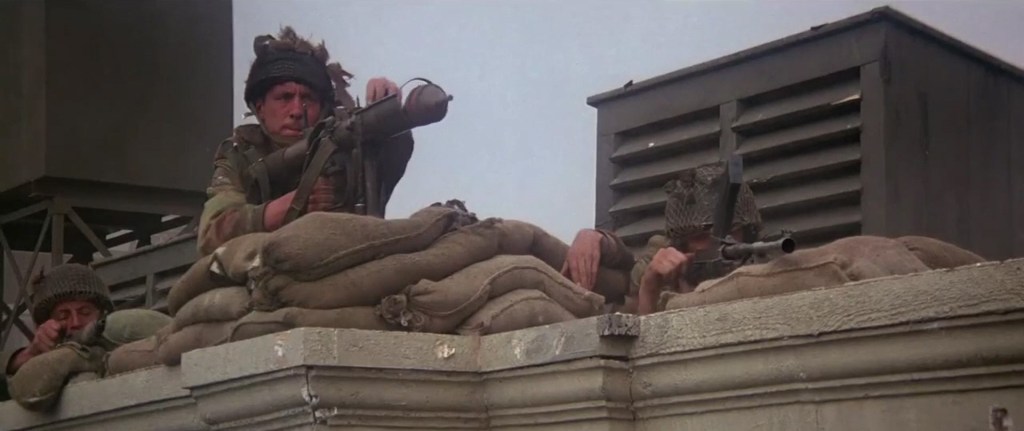
Home Guard Improvised Incendiary Weapon

On the 14th May 1940, the British Government announced the formation of the Local Defence Volunteers. By the summer of 1940 nearly 1.5 million men had volunteered to serve. The force was later renamed the Home Guard in July 1940 but remained under-equipped throughout the summer of 1940. Many of the newly raised militia units had just ‘LDV’ arm bands, some civilian firearms and improvised weapons, as uniforms and service weapons were in short supply.

I recently came across a really interesting piece of footage showing a Hampshire Home Guard unit training with an ‘incendiary weapon’. With few heavy weapons available during 1940, some Home Guard units improvised. This remarkable original colour footage appears to show a reasonably effective incendiary weapon of some sort. But beyond what we can see we know very little about the weapon.

The footage shows a battery of five launchers, each seemingly with a 3 man crew. One man aiming, another loading and another firing. The footage is undated but from their arm bands we can see that the men are Home Guard so definitely post July 1940. The men also appear to be quite well equipped with caps, denim trousers and blouses and belts. No webbing is seen but we can potentially date the footage to between late 1940 and mid-1941.
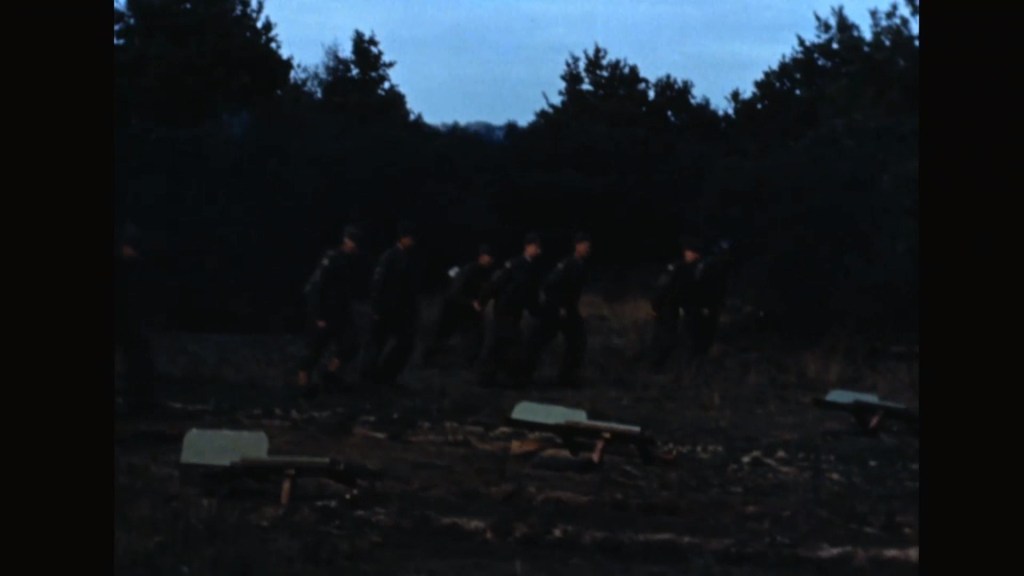
Crews dash to their launchers. Note the rifle stock-shaped pieces to the side of the weapons which appear to have been used to aim the launcher

The incendiary weapon itself is extremely intriguing! I haven’t seen a similar weapon before and I couldn’t find any direct reference to it in the available original documents, newspapers or photos. The footage comes from the Wessex Film and Sound Archive, it is described as showing Home Guard men from Swanmore, a rural village in Hampshire, demonstrating the weapons. Before the incendiary weapon is demonstrated we see a company sized force of Home Guard parading, without rifles or other equipment, and then a single Home Guard member demonstrates loading an SMLE. From the footage we can get an idea of how the weapon would have worked.
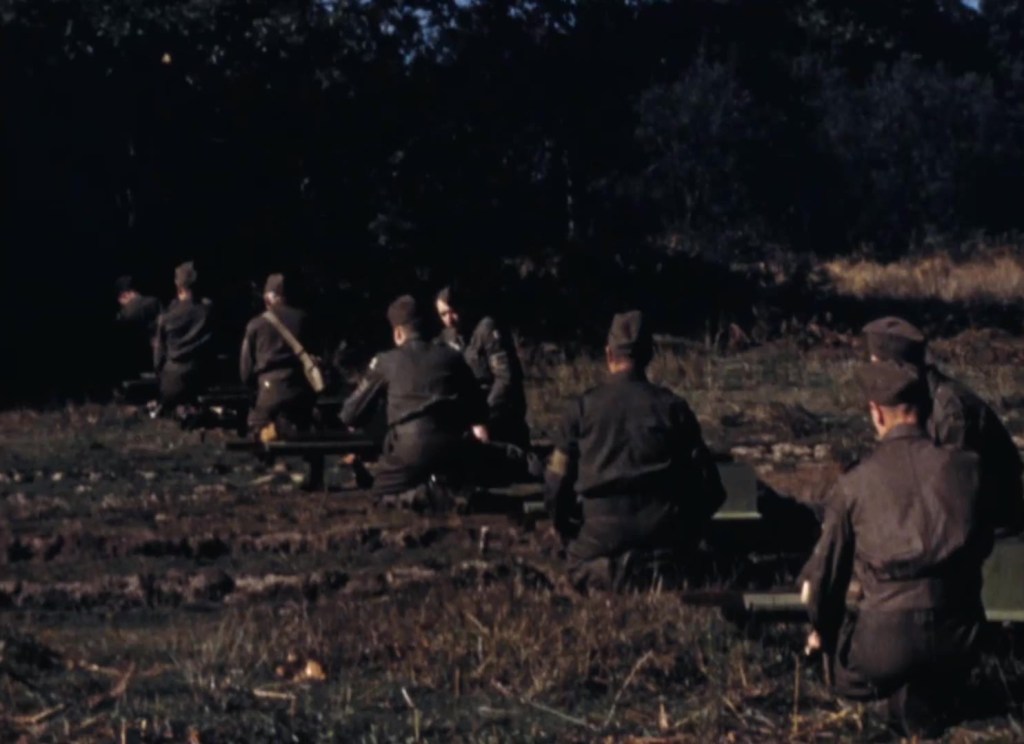
Three-man crews sit by their weapons note the troughs projecting from the front of the launchers

The men run to the launchers, which appear to be made of wooden boards. Beneath them are rifle stock shaped pieces which the man at the rear seems to shoulder – probably to aim the weapon. The other two crew members kneel either side of the launcher. The footage then cuts away to another angle from the other side and shows one of the kneeling men hitting the rear of the projectile with a hammer. Then with a flash and puff of smoke the projectile launches forward. The man who aimed the weapon appears to have moved away, out of shot. Frustratingly the footage is a bit underexposed and quite dark so we can see too much more detail but we can see that the chap with the hammer is definitely hitting the rear of what looks like a length cylinder. The cylinder shoots to the rear while a projectile fires forward and the launcher’s crew look downrange.
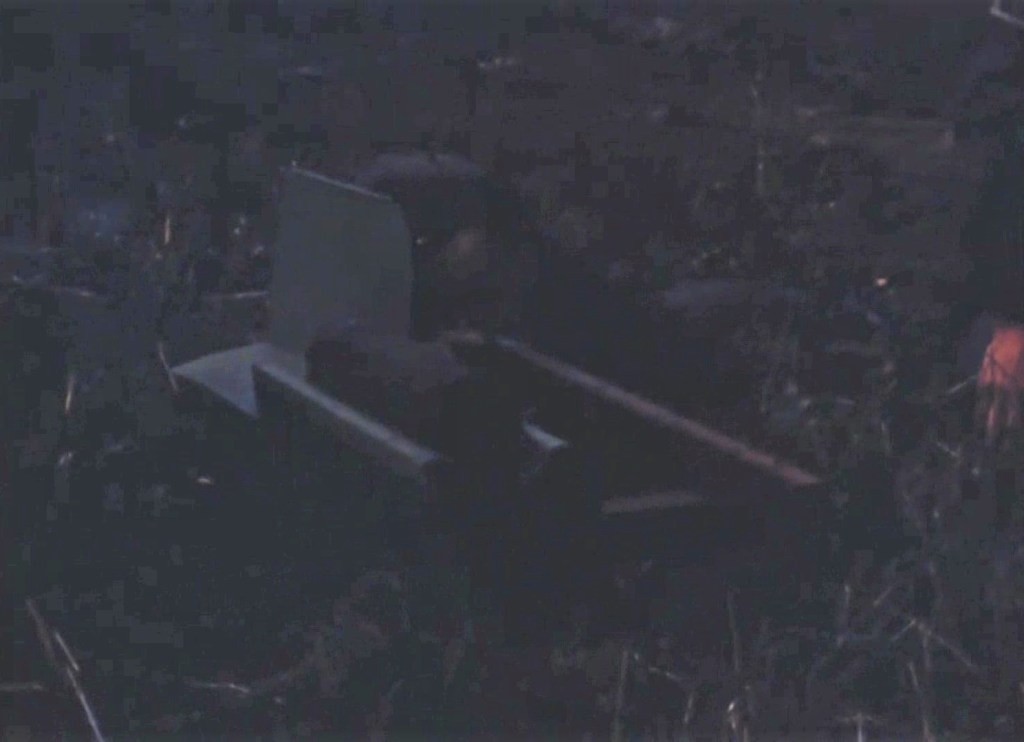
A somewhat low resolution close-up of the launcher. Note the crew member lying behind it aiming it along the wooden piece on the right. The projectile and launch cylinder sit in a trough while behind appears to be a shield to protect the crew member aiming

We then get footage showing what seem to be a series of impacts, likely from the projectile’s fired by the launchers. Then we get another clip of the men running to man the launchers and some more shots of the incendiary weapons exploding. From the available footage its pretty difficult to theorise how the launchers work. They appear to be using an almost proto-recoilless rifle-like principle with the launch cylinder shooting backwards and the projectile leaving the cylinder and firing towards the target. The crew member with a hammer may be hitting a percussion cap to detonate some black powder which projects the incendiary bomb. This system may have been developed to remove the need for a fixed, pressure bearing barrel. Making the weapon much simpler to manufacture.
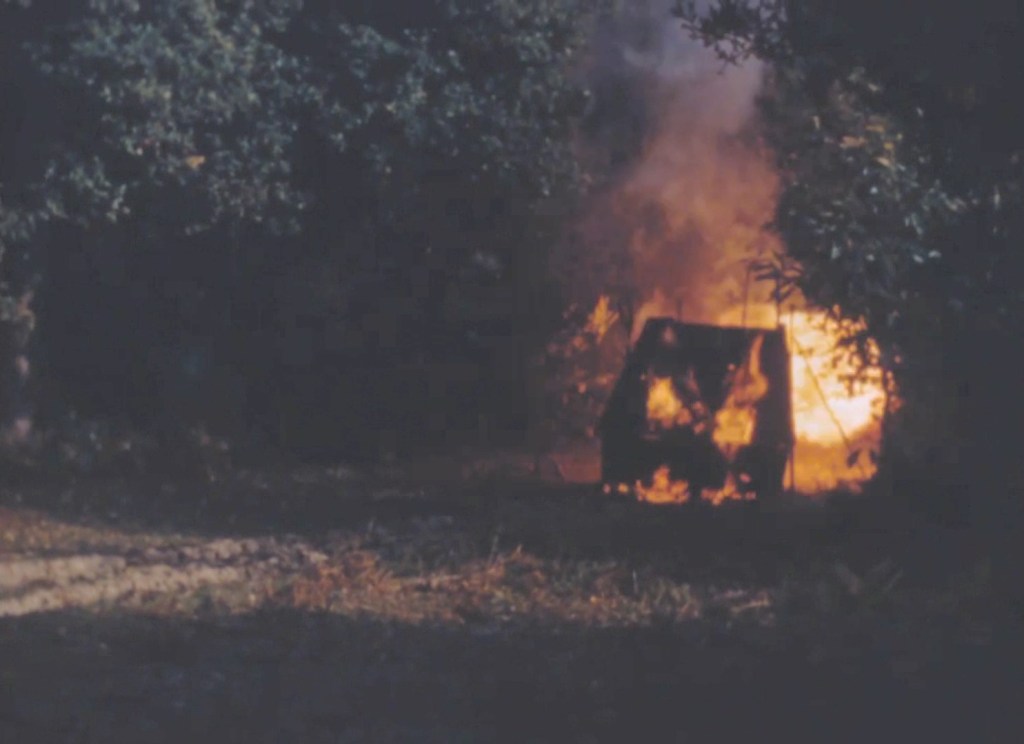
The effect down range – the target well alight

The footage doesn’t give us too much indication of the range of the weapon but it’s distant enough that the men firing the weapon don’t appear to recoil when the projectile hits the target. The incendiary effect downrange is actually quite impressive and a battery of five of the launchers would have been an impressive sight and perhaps quite useful as a road ambush weapon which was something the Home Guard focused heavily on at the time.
It wasn’t until later in 1941 that sub-artillery like the Smith Gun, Northover Projector and the Blacker Bombard began to enter service with the Home Guard. Until then some of the units took it upon themselves to create their own weapons, improvising contraptions like the one featured in this video.

Update 28/07/21:

The weapon somewhat fits the description of the ‘Jones-Wise Projector’ shared by David Lister in his book Forgotten Tanks and Guns. Thanks to BettongMI who brought this to my attention in the comment section of the video. The weapon was apparently developed by a pair of Home Guard officers and while turned down for regular service was used by some elements of the Home Guard in southern England, at least until official sub-artillery began to enter service.


If you enjoyed this video and article please consider supporting our work here. We have some great perks available for Patreon Supporters. You can also support us via one-time donations here. Thank you for your support!


Bibliography

Home Guard and home-movies in Swanmore, Wessex Film and Sound Archive via the BFI, (source)

Britain’s Final Defence: Arming the Home Guard, 1940-1944, D. Clarke (2016)

Forgotten Tanks and Guns of the 1920s, 1930s and 1940s, D. Lister (2018)

‘Paper Tiger’ – PIAT Scene Analysis

We return to the Projector, Infantry, Anti-Tank’s long and storied on-screen career. This time we are examining a scene from ‘Paper Tiger’ (1975). It’s an interesting film, and certainly not one you’d expect a PIAT to pop up in! David Niven plays Mr  Bradbury, a tutor to a young Japanese boy. Bradbury is a Walter Mitty-like character that regales the child with made up tales of his wartime escapades.

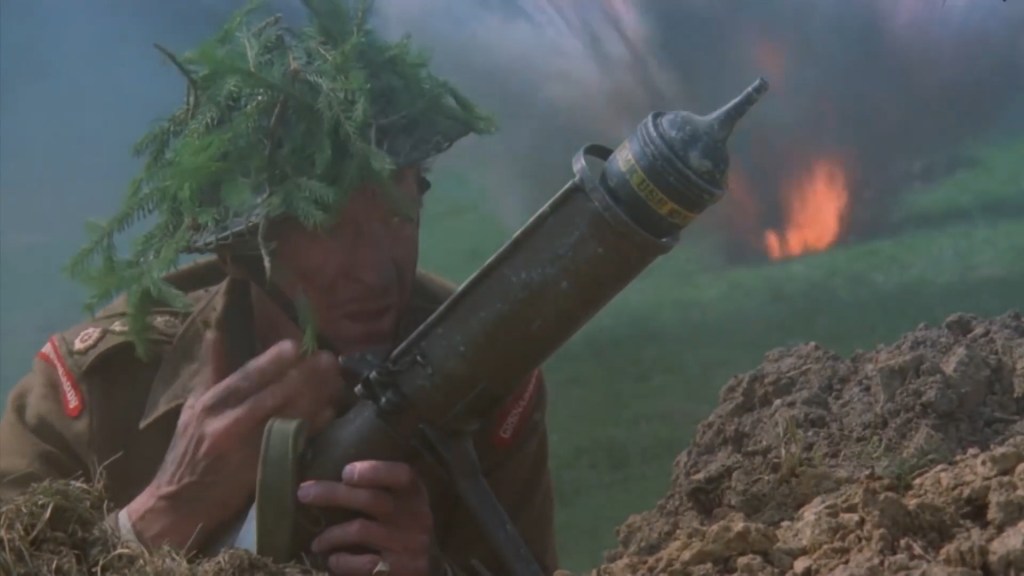
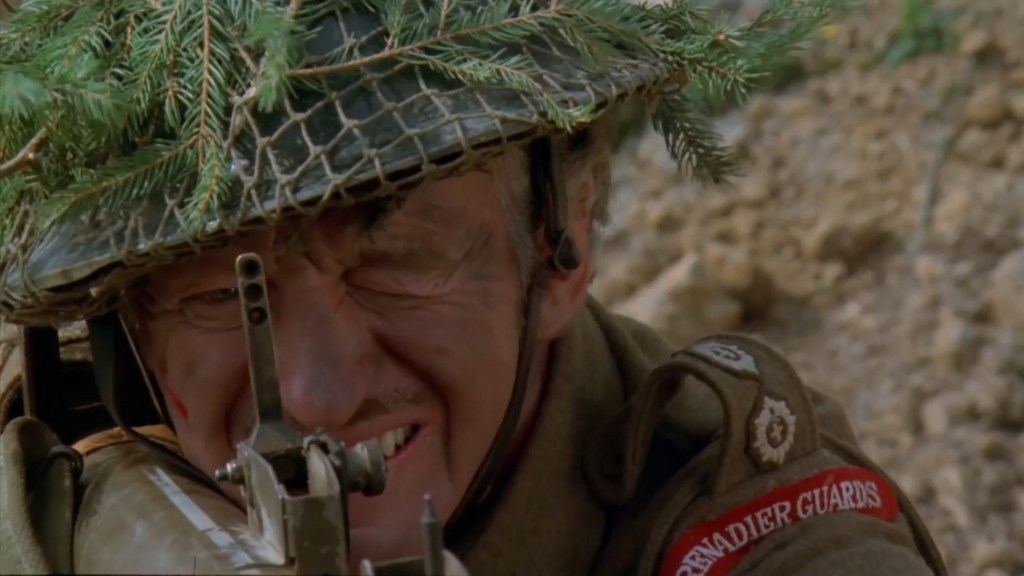
Early in the film Bradbury describes a battle in France in October 1944. Niven’s Character is shown to be a member of the Grenadier Guards and receivers orders to take an enemy pill box. Bradbury describes how he attacked the German position single handed. The sequence begins with what looks like a platoon making a frontal assault. 

Niven receives a call from his commanding officer and then asks his Sgt to hand him ‘the bazooka’. But it’s not a Bazooka he’s handed but a PIAT! Now it’s quite the faux pa’s to call a PIAT a Bazooka but I imagine the script called for one and the film armourer brought along British weapons to fit the action involving the Grenadier Guards. 

Niven’s character then charges across the ground in front of the pillbox. He takes cover in a shell crater and we can see that the bomb loaded into the tray is painted black with a yellow stripe – this denotes that its actually an inert drill round. – If we look closely inside the yellow stripe it also appears to have the words ‘drill use’ written on it. Note how far forward the bomb appears in the bomb support – this suggests that the weapon isn’t cocked and that the bomb has just been slid down onto the spigot to make it look loaded.

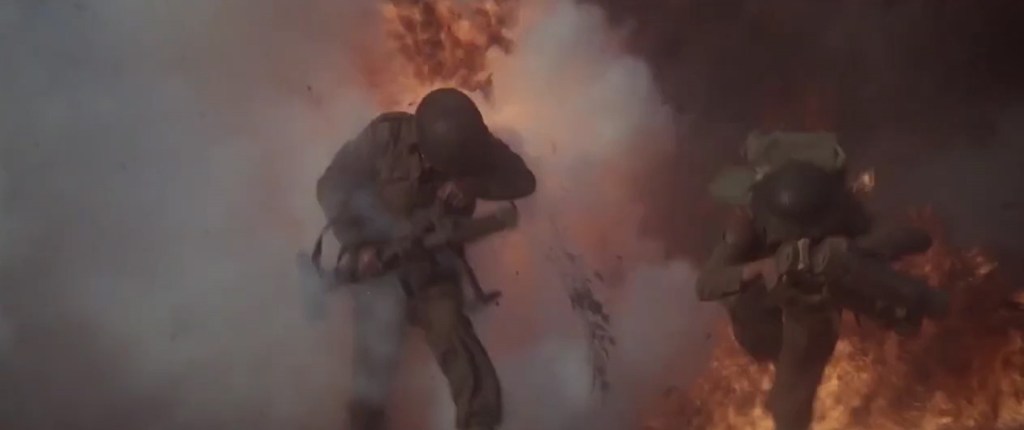
Before he can take on the pillbox a German armoured fighting vehicle (which is actually a disguised American M8 Greyhound) crests the ridge. Niven takes aim with the PIAT and knocks it out. As he aims, we can see the PIAT has the later pattern 3 aperture rear sight rather than the earlier 2 aperture. The apertures are for 50, 80 and 110 yards. The PIAT, however, is missing its webbing butt pad and gaiter cheek rest. But we can see the white indirect aiming line painted along the top of the PIAT for use in the light mortar role! 

As the Greyhounds crew bails out Niven draws his revolver and shoots the crew with a style that pastiches many war films. Leaving his PIAT Niven runs forward and we see that the spigot is forward in the bomb tray – this means he would have had to manually re-cock the weapon before firing again! As he runs we can see he has another PIAT bomb handing from his belt. I’ve never seen any contemporary photos or documents referencing this method of carrying bombs – in reality they would have been carried in a 3-bomb bomb carrier. 

He throws a No. 36 (Mills) grenade into the pillbox with perfect aim. Another funny nod to a common war movie trope! The bunker is knocked out and the enemy surrender en masse. It’s an interesting little scene, Niven as always is great and of course as a veteran of the war and an officer he would have been familiar with the PIAT. 

Check out the rest of our videos looking at on screen PIAT portrayals here.


If you enjoyed this video and article please consider supporting our work here. We have some great perks available for Patreon Supporters. You can also support us via one-time donations here. Thank you for your support!

3D Print A PIAT Round!

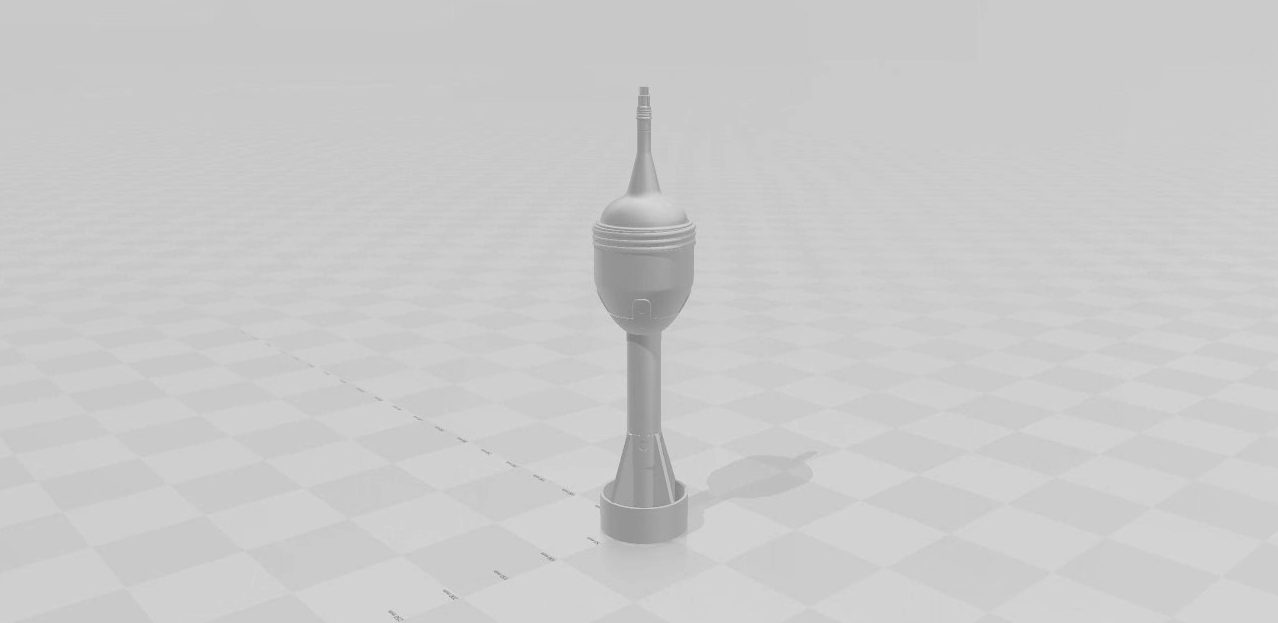
My friend Martin and the guys at Lead, Thread & Bread Reenactment Supplies on Malta have very kindly put together a couple of 3D models of the PIAT bomb and shared them with us. They’re available for TAB Patreon supporters to download here – www.patreon.com/posts/51046435​ This is just an extra thank you perk for your support!

Massive thanks to Martin for offering the 3D model and you should definitely check out Lead, Thread & Bread here – www.facebook.com/LTBmalta/​ & www.lead-thread-bread.com

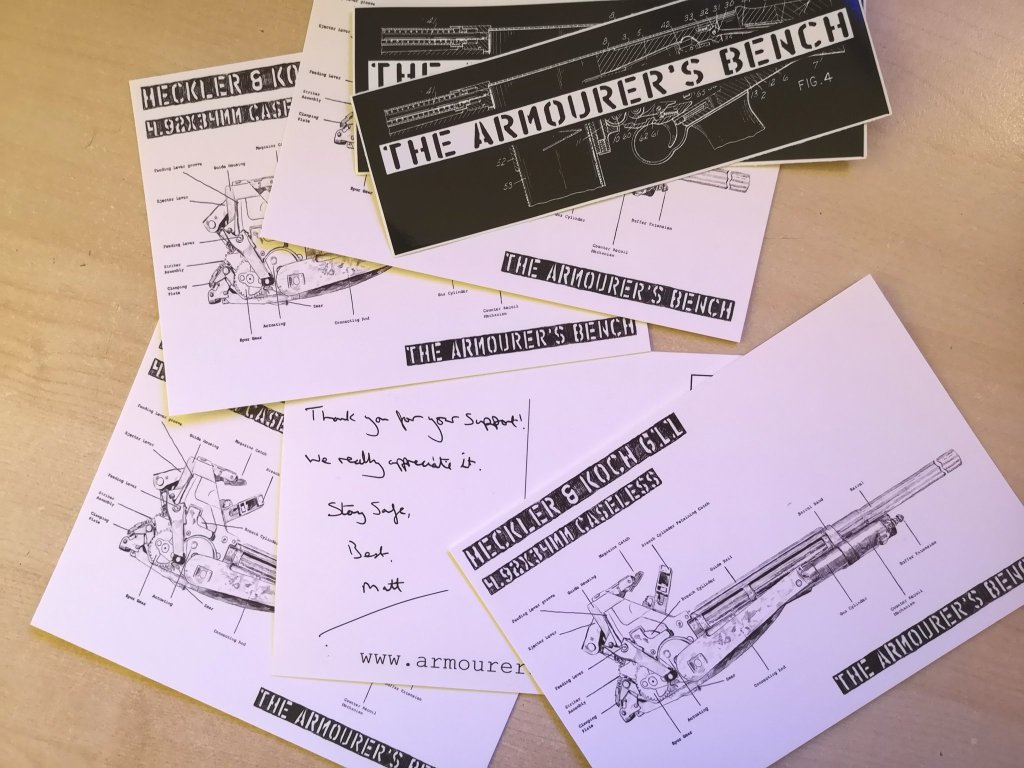
Of course if you don’t have a 3D printer handy, then there are other ‘thank you’ perks available too including personal, handwritten thank you notes on custom illustrated postcards featuring an illustration of the internals of the HK G11 & stickers! Check those out here!

Clement Attlee’s Curious MkII STEN Front Grip

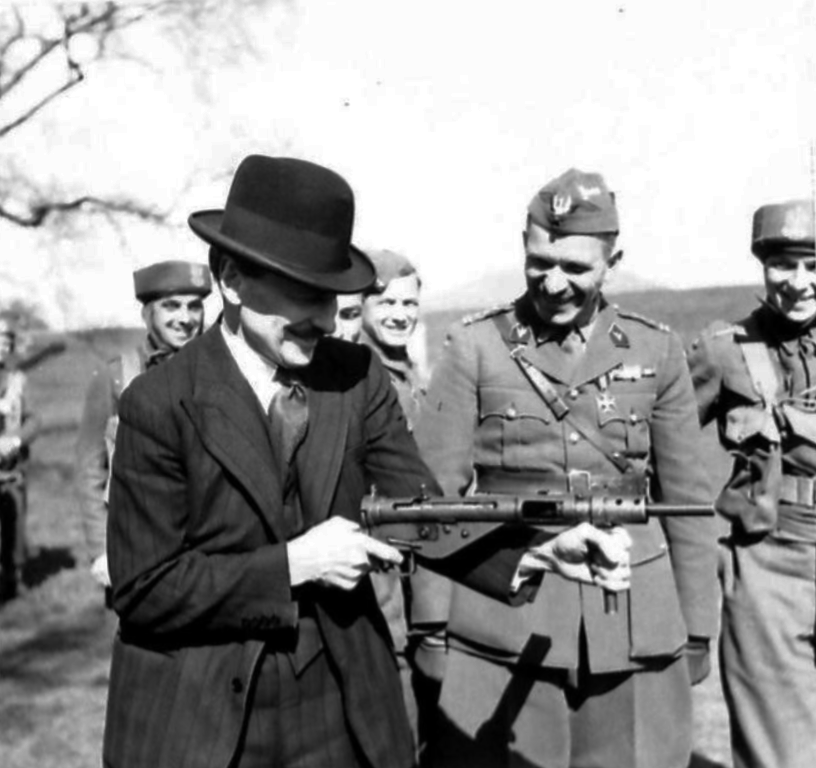
I was recently I was taking a look through the Imperial War Museums’ online image collection when I found a pair of very interesting photographs taken in Scotland in April 1942. They show Deputy Prime Minister Clement Attlee handling a STEN MkII submachine gun while visiting Polish troops. Most interestingly though is the folding front grip which has been added to the Sten!

Clement Attlee with STEN MkII (Imperial War Museum)

The MkII, introduced in August 1941, did not have a folding front grip as standard. The earlier MkI had had a front folding grip, but the MkI*, introduced in October 1942, had eliminated this to speed up production. The original caption of this photo reads:

“Mr Attlee tries the weight and feel of the Sten Sub-machine gun used by the Paratroops.”

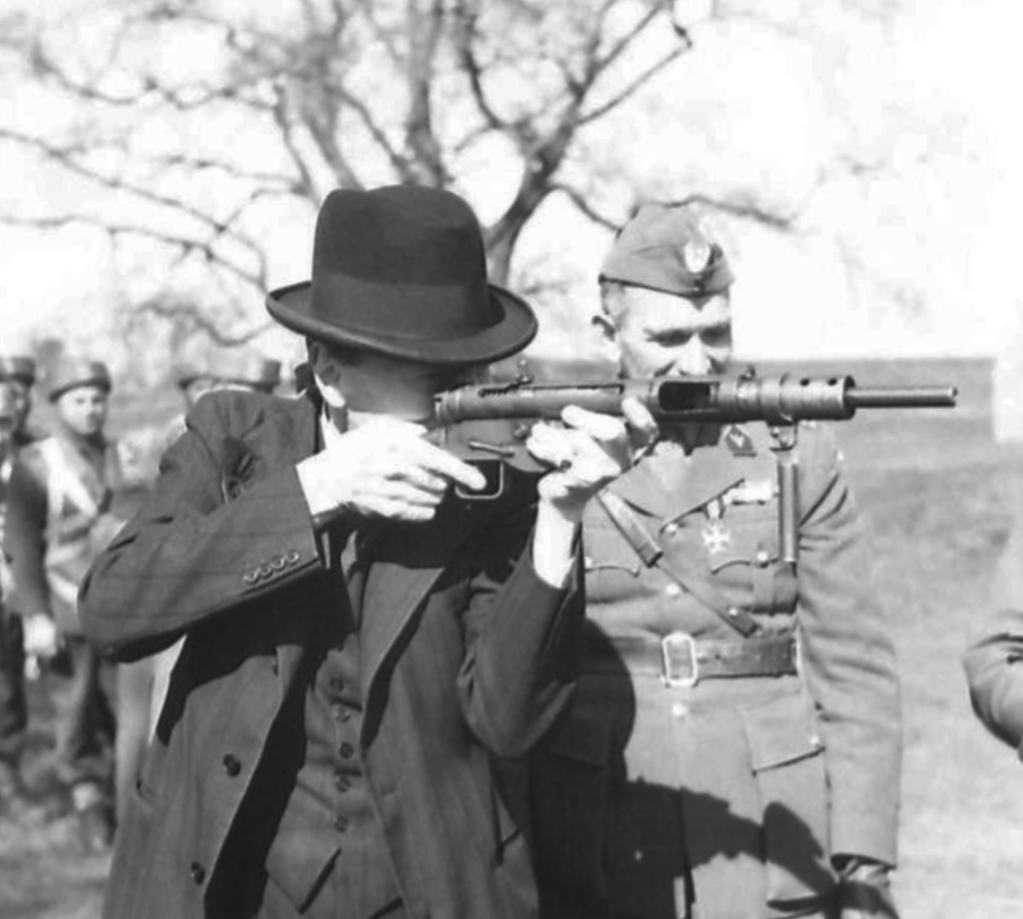
Attlee was visiting the 1st Polish Independent Parachute Brigade during a visit to the 1st Polish Corps) at Cupar in Scotland. In the photos he’s accompanied by Colonel Stanisław Sosabowski, the commander of the brigade. In this second photograph, Attlee is holding the Sten by its trigger mechanism cover and we can see the folding grip more clearly.

Clement Attlee with STEN MkII (Imperial War Museum)

It appears to be made up of a band of steel which slid onto the barrel nut housing – much like the later MkV foregrip. The grip appears to possibly pivot on a rivet and the grip itself appears to be tubular metal. Sadly the photos are fairly low resolution so we can’t see too much more detail.

These were the only two photos of the grip I could find and I haven’t yet been able to find any documentary references to them. It may be that the grip was experimental and provided to the Polish paratroops for testing or it was an adaptation unique to the unit – perhaps something the unit’s armourer made. I’ll need to do more research in the future to try and find out more about the curious STEN accessory!

For more on the STEN check out our video on the origins of the STEN and it’s name below:

Bibliography:

The Polish Army In Britain, 1940-1947 series, Imperial War Museum, H 18884 & H 18883


If you enjoyed this video and article please consider supporting our work here. We have some great perks available for Patreon Supporters. You can also support us via one-time donations here. Thank you for your support!

Unpacking 60 Years of Military History

Today we have a bit of an interesting unpacking/unwrapping video. I’ve saved up a few parcels with some new additions to the TAB reference collection and I thought I’d bring you along for the ride. The manuals we’ll be taking a look at span about 60 years of British Army doctrine and weapons. The materials range from a Hotchkiss machine gun manual from 1917 to an AFV identification handbook from the late 60s. There’s some quite interesting and rare stuff here including a 1951 provisional manual for the 3.5in rocket launcher.

These manuals and this sort of primary material is really important because we can learn how the weapons were actually intended to be used. It’s support from our Patreon supporters that enables us to pick up items like these to share in videos. So if you’d like to support our work, check out the TAB Patreon page here.

A Hill In Korea & the 70th Anniversary of the Battle of The Imjin River

This week marks the 70th anniversary of the Battle of the Imjin River, the Korean War battle perhaps most closely associated with the UK’s involvement in the conflict. Sadly, Korea remains a largely forgotten war and only one film has ever been made about the British Army’s experience 1956’s ‘A Hill In Korea‘. In this video we’ll discuss the battle, the super bazooka and the classic war film!

The film follows a fighting patrol which is cut off behind enemy lines and forced to fight a desperate last stand. The film borrows elements from the battle of Imjin River and the war as a whole. Today it is best known for its strong cast including Stanley Baker, Robert Shaw, Harry Andrews and George Baker and for being Michael Caine’s first film credit. Interestingly, Caine was a veteran of the war, having served with the Royal Fusiliers during his National Service. 

We recently covered the film in an episode of our Fighting On Film podcast and a scene featuring a 3.5in Rocket Launcher stood out. The patrol uses the rocket launcher against a Chinese tank, which appears to be a captured British Cromwell. The film shows the bazooka being assembled and its team moving closer, stating that to be sure of a hit they want to be just 80 yards away. This is comparatively close for a 3.5in rocket launcher, which had an effective range of 300 yards.

The Bazooka team take on the Chinese Cromwell

The 3.5in was a brand new weapon in 1951. It had been developed in the US before the start of the war and facing communist T34/85s it was rolled out to most of the UN ground forces in the theatre (alongside recoilless rifles and smaller M9A1 rocket launchers). Better known as the M20 Super Bazooka in US service urgent operational requirements saw the 3.5in R.L. replace the PIAT as the British infantry’s platoon anti-tank weapon. In the TAB reference collection we are lucky enough to have an original copy of the provisional manual for the 3.5in R.L. which was compiled during the war in 1951.

The anti-tank team who operate the 3.5in R.L. in the film

The film shows the weapon being fired twice, successfully knocking out the tank. It’s perhaps the only depiction of British troops using the 3.5in rocket launcher and certainly one of the better depictions of it in film. We don’t get to see the rocket being loaded but we do see the No.2 attaching the contact wires at the rear of the tube. The first round hits the tank’s hull while the second strikes the track and the tank rolls backwards and explodes! Once the rocket launcher team get back to the main defensive position we even see the No.1 breaking the weapon down into its too parts.

During the battle of Imjin River itself, the bazooka was put to good use by a number of units including the Gloucestershire Regiment, the Royal Ulster Rifles and the Belgian battalion. Using the weapons to knock out Chinese machine gun positions and break up the human wave assaults. During an attack on Gloster positions in the early hours of the 22nd April, Lance-Corporal Joe Farrell recalled how the Glosters blasted Chinese troops using some boulders as cover. After three days desperate fighting the 29th Infantry Brigade had lost almost a quarter of its strength, suffering over 1,000 casualties. The rest managed to fight their way out.

 Royal Northumberland Fusiliers advancing to positions on the Imjin River, April 1951, (IWM)

I felt it was important to discuss the battle on its 70th anniversary as it sadly continues to be largely forgotten. The Glosters and the men of 29th British Independent Infantry Brigade Group fought a very hard battle against massively overwhelming odds, I would definitely urge you to read more about the battle and the war itself. I would also recommend seeking out A Hill In Korea, it is a fascinating film.


If you enjoyed this video and article please consider supporting our work here. We have some great perks available for Patreon Supporters. You can also support us via one-time donations here. Thank you for your support!

British Army Thompson Submachine Gun Manual

It’s essential for soldiers to know how to use and maintain their weapons properly. We’ve been collecting training manuals, pamphlets and handbooks (as part of the TAB reference collection) to give us a wider understanding of how troops were trained and how they used their weapons.

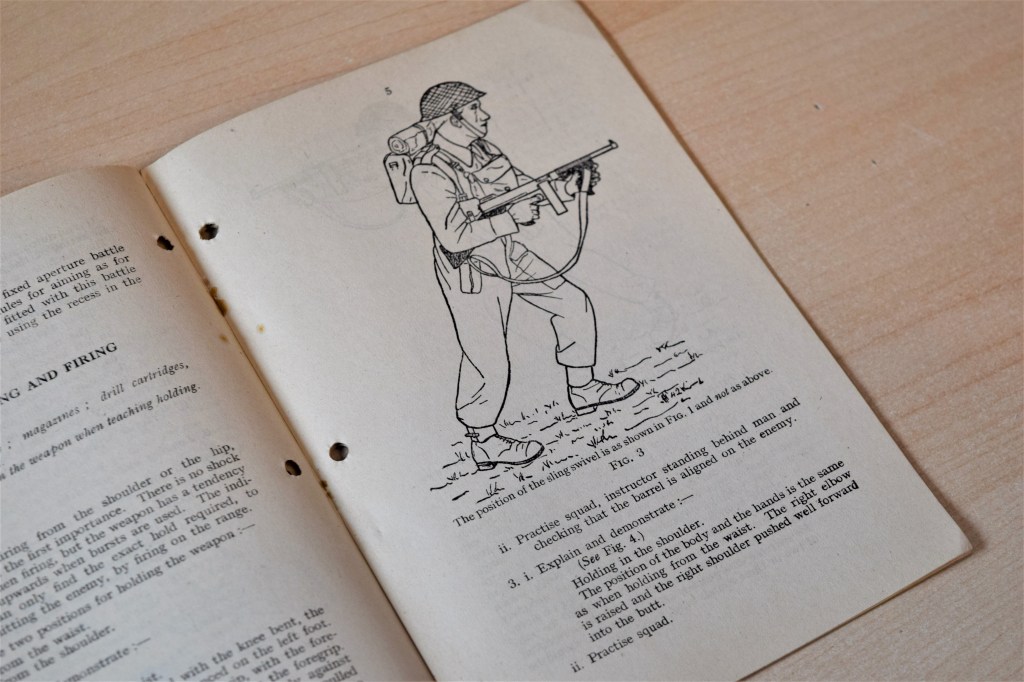
In this video we take a look at the British Army’s 1942 small arms training pamphlet for the ‘Thompson Machine carbine’.

Diagram showing firing the hip (Matthew Moss)

The pamphlet, issued in July 1944, is written for instructors to train troops how to handle, maintain and use the Thompson. The pamphlet was eventually superseded by one covering both the STEN and Thompson.

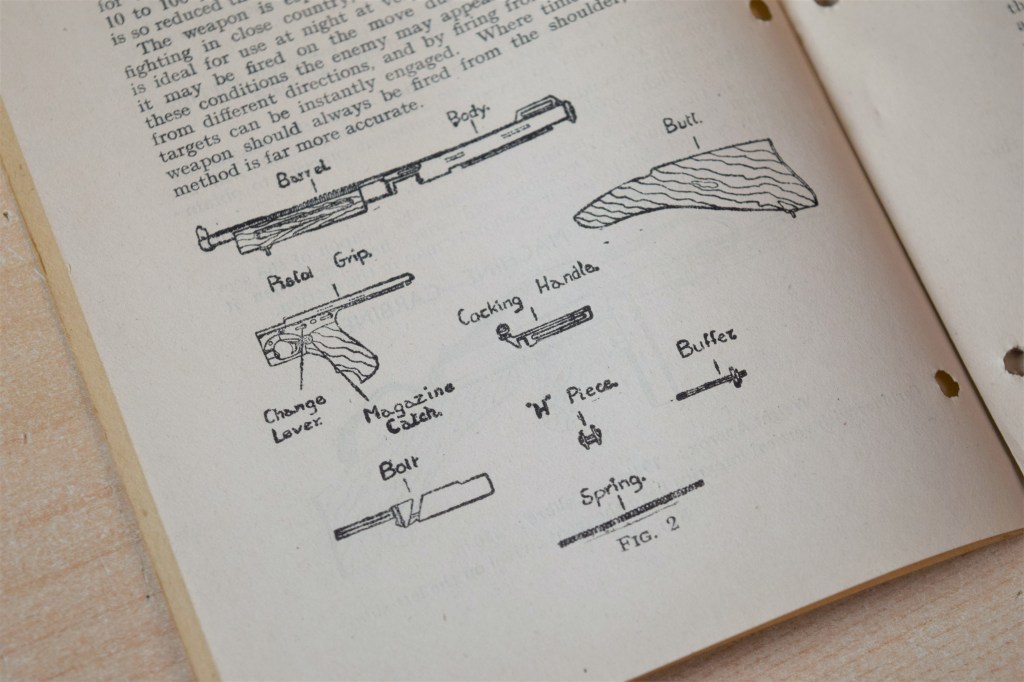
Diagram showing the Thompson Machine Carbine disassembled (Matthew Moss)

The pamphlet is just 12 pages long but includes some interesting insights and an appendix looking at the ‘spotlight projector’ training instrument.


If you enjoyed these videos and this article please consider supporting our work here. We have some great perks available for Patreon Supporters. You can also support us via one-time donations here. Thank you for your support!

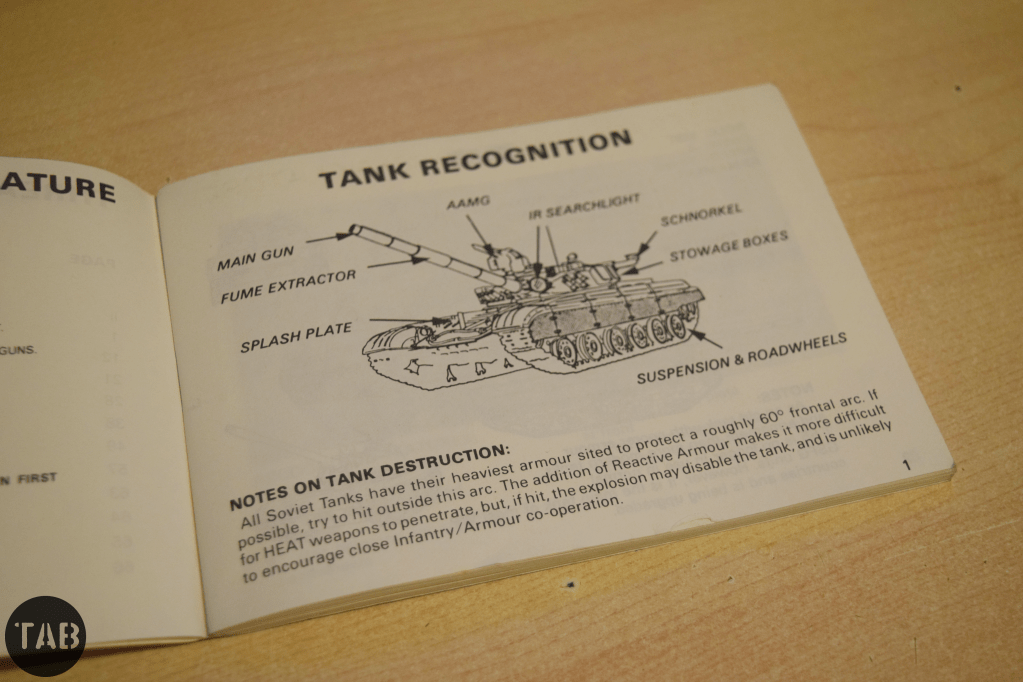
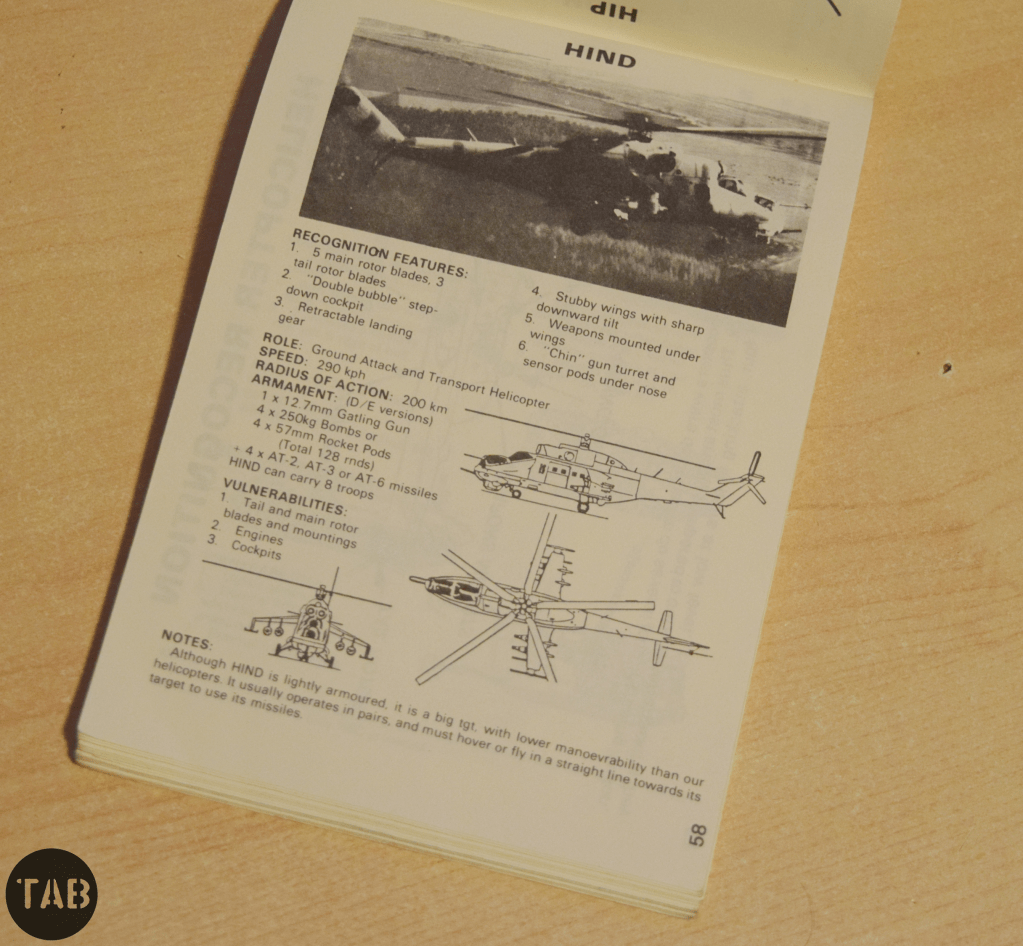
Cold War British Army Threat Recognition Guide

It’s the 1980s and the British Army Of the Rhine is still stationed in West Germany facing down the USSR’s forces. The Cold War has gotten hot and the 3rd Shock Army is approaching your dugout but how do you differentiate a BTR from a BMP? This handy British Army THREAT Recognition Guide booklet gives you everything you need to know about the Soviet armour, infantry and aircraft you’re facing!

Continuing on from our earlier look at a British Army threat Recognition Guide to Iraqi Ground Forces issued during the Gulf War, we dig into the TAB reference collection again and take a look at this Threat Recognition Guide looking at Soviet air and ground forces facing the British Army of the Rhine in the 1980s.

The Group of Soviet Forces in Germany (GSFG) in East Germany throughout the Cold War were an ever present threat to West Germany and NATO. This recognition guide covers all of the USSR’s main battle tanks, armoured personnel carriers, and infantry fighting vehicles, as well as artillery systems and some of the close support aircraft which would have accompanied the attacking Soviet forces.

The pages of the recognition guide include photographs, diagrams, basic specs and recognisable features of the various enemy vehicles. It was put together by the Intelligence Directorate of BAOR’s 1 Corps.


If you enjoyed these videos and this article please consider supporting our work here. We have some great perks available for Patreon Supporters. You can also support us via one-time donations here. Thank you for your support!

Bring Up The PIAT Pt.II

So you may have seen our earlier video looking at the portrayal of PIATs in the 1978 classic A Bridge Too Far! If not check it out.

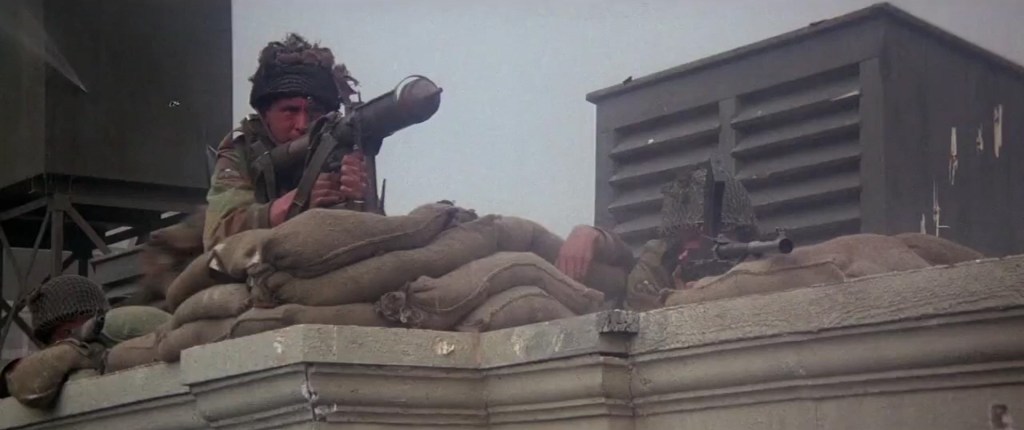
When I think of Richard Attenborough’s all-star war epic telling the story of Operation Market Garden, I immediately think of the iconic ‘BRING UP THE PIAT’ scene where Anthony Hopkins playing Colonel John Frost commanding 2 PARA calls for the Projector, Infantry, Anti-Tank to take out a marauding ‘Panther’.

But this isn’t the only scene from the film depicting the PIAT! In this video we’ll look at a couple of the other scenes showing the PIAT in action.

We first see the PIAT during the scene when the Guards Armoured Division’s spearhead meets heavy german resistance. Michael Caine’s Sherman’s get a pasting from some Pak 40s. The British infantry deploys and we see a cornucopia of kit ranging from Brens to Vickers to an M2 Browning. But blink and you’ll miss them a pair of PIAT teams also ‘bring up the PIAT’. A two man team can be seen moving forward, the No.1 carrying the PIAT and the No.2 carrying a 3 round bomb carrier, sadly killed by enemy fire.

The second scene in which we see the PIAT finally get to work on some German armoured fighting vehicles is during Gräbner’s attack over the bridge. As the PARAs at the Bridge prepare for the attack we see 2 or 3 PIAT positions get ready – loading bombs into their bomb support trays. One PIAT No.1  can be seen slotting the rear of a PIAT bomb into the projectile guide plates to hold the bomb in place – very authentic.

As the column crosses the Bridge Frost orders his men to open fire, Brens, Stens, Rifle No.4s and PIATs open up and the column is stopped in its tracks. During the scene we see a number of PIAT’s fire and knock out SS vehicles. One PIAT No.2 is hit by enemy fire. The first PIAT round fired hits a lead German vehicle causing it to halt, the second flips a Kubelwagen. We then see a No.2 two load a fresh bomb into the bomb support tray – with a tap to make sure its properly in place. We get a great show of the PIAT firing from the front. It’s worth noting that the PIAT doesn’t recock and the spigot is still seen in the bomb tray just before the camera cuts away. Meaning that that PIAT No.1 will have to recock his weapon before he can fire again!

It’s worth remembering without the ‘Bring Up The PIAT’ scene making a point of naming the weapon, most people would never have known what this unusual weapon that dealt so much damage in the earlier scene was! Of course the attack wasn’t stopped by PIATs alone, there were also airborne anti-tank guns, which the film doesn’t show.

Another little titbit of information I learnt since the first ‘Bring Up The PIAT’ video, thanks to my friend Robbie of RM Military History [check out his channel], is that the PIAT was fired in most of these scenes by one of the film’s armourer Bill Aylmore. The information comes from After the Battle – The Battle of Arnhem – War Film: A Bridge Too Far which describes him as formerly a sergeant with the 50th Regt. – which might be a reference to the Queen’s Own Royal West Kent Regiment. The book goes on to say that “Aylmore excelled himself during the filming of the battle on the bridge by being the ace shot with the PIAT. During all the various takes he was able to put the bomb exactly where the director wanted it and where it coincided with the special effects explosions.” – Good shooting indeed!

Check out more PIAT scene analysis videos here.


If you enjoyed these videos and this article please consider supporting our work here. We have some great perks available for Patreon Supporters. You can also support us via one-time donations here. Thank you for your support!

Gulf War: Operation Granby Iraqi Weapons Recognition Guide

In this video we’ll be launching a brand new series where we’ll look at period small arms and light weapons manuals and other ephemera like infantry tactics handbooks and recognition guides.

This month marks the 30th anniversary of what the British Army called Operation Granby, better known as Desert Storm or the Gulf War.  So I thought taking a look at a Recognition Guide to Iraqi Ground Forces issued during Granby would be a good place to start!

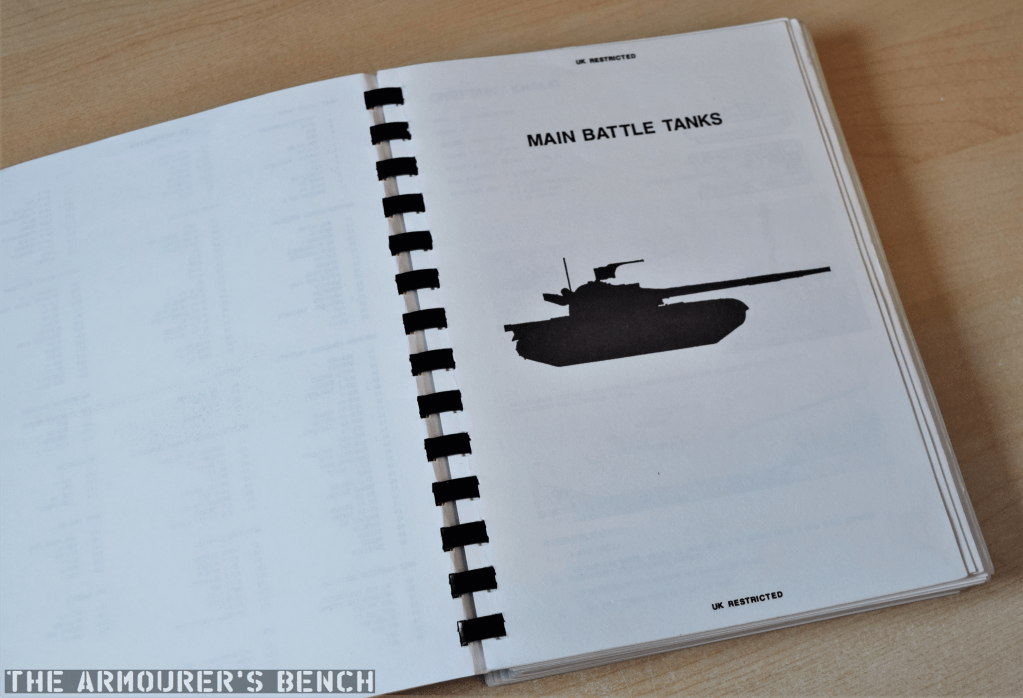
Chapter page for Main Battle Tanks (Matthew Moss)

Britain deployed more than 53,000 personnel during the operation, which began in August 1990, just after the invasion of Kuwait, with the arrival of 2 squadrons of Tornados in theatre. The first ground forces, elements from 7 Armoured Brigade began arriving in October. With no ready reaction force a division strength force was cobbled together from units deployed in Germany and the UK. Huge logistical constraints were overcome to provide a full armoured division, consisting of two brigades, for the liberation of Kuwait.

The guide’s entry for the AMX 155 F3 (Matthew Moss)

During the ground phase of the operation (Operation Desert Sabre), which began on 24th February 1991, British armoured and mechanised forces, part of VII Corps, provided the left-hook of the allied assault. The division’s two armoured brigades leapfrogging one another quickly taking successive objectives and sweeping west through occupied Kuwait, towards the Gulf Sea, neutralising Iraqi positions with relative ease. During less than 100 hours of ground combat British forces travelled 180 miles and destroyed approximately 300 Iraqi vehicles while allied forces as a whole captured an estimated 80,000 Iraqi troops. A total of 47 British troops were killed during Granby. A ceasefire was declared on 28 February with Iraqi forces collapsed and Kuwait liberated.

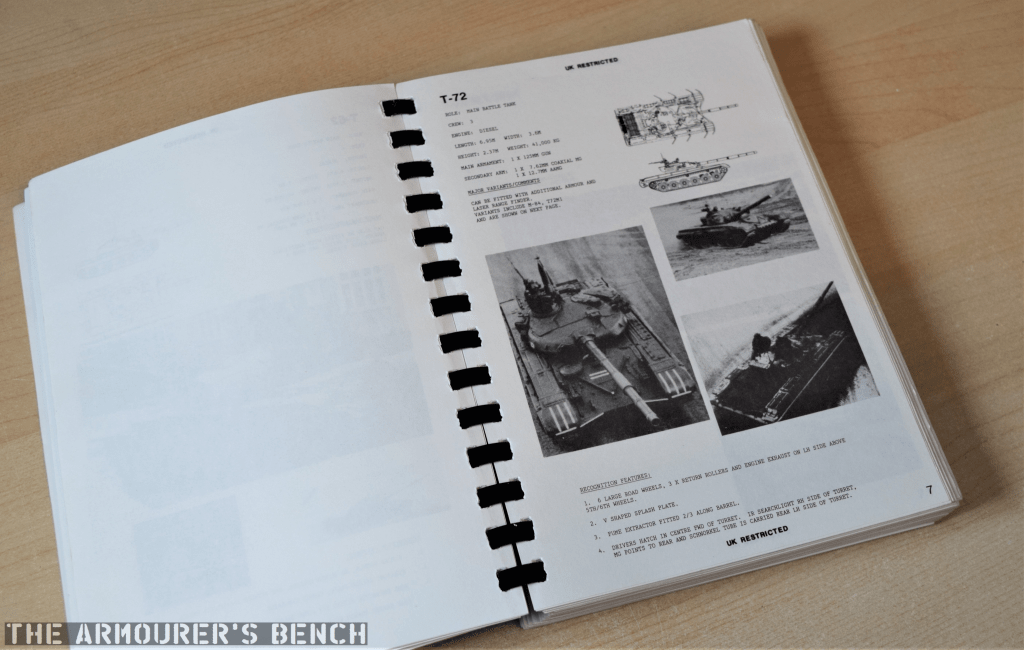
The guide’s entry for the T72 tank (Matthew Moss)

The guide was compiled by the Recognition Materials Cell at the Joint Air Reconnaissance Intelligence Centre (or JARIC). Formed in 1953, from the Central Interpretation Unit and based at RAF Brampton from 1957 to 2013, JARIC was the UK’s strategic imagery intelligence provider – providing analysis of aerial and later satellite photography or enemy assets.

With war with Iraq looking imminent and substantial British forces deployed from the UK and Germany, JARIC were tasked with putting together a recognition guide covering Iraqi and Kuwaiti ground assets captured by Iraq during the invasion of Kuwait.

The infamous SCUD (Matthew Moss)

This included everything from main battle tanks, reconnaissance vehicles and armoured personnel carriers to self-propelled artillery, mortars, artillery and multi-barrelled rocket launchers. It also included anti-tank missiles, surface to air missile systems and anti-aircraft assets as well as engineering equipment. All of which might be encountered during upcoming operations to liberate Kuwait. Let’s take a look.

The guide sadly doesn’t have a scale of issue list so it’s difficult to know how many were printed or  which units received them. But the first page does give us some indication of the material’s sources – noting they are from unclassified and restricted sources – giving the book a restricted classification overall.


If you enjoyed these videos and this article please consider supporting our work here. We have some great perks available for Patreon Supporters. You can also support us via one-time donations here. Thank you for your support!


Bibliography

The Gulf War 1991, A. Finlan (2003)

Hot War, Cold War, C. McInnes, (1996)

‘Joint Air Reconnaissance Intelligence Centre (JARIC)’, National Collection of Aerial Photograph, (source)

‘Unit History: Joint Air Reconnaisance Intelligence Centre’, Forces War Records, (source)