FAMAE PAF Submachine Gun

The 1960s and 70s saw Chile was racked by political turmoil with a military junta, led by General Augusto Pinochet, taking control in September 1973. Pinochet’s Junta took control of the country via a bloody coup, overthrowing President Salvador Allende, and as a result all export of small arms from Britain to Chile ceased. In the early 1970s, before the coup d’etat, The records of the Sterling Armaments Company show Chile purchased an example of the company’s Mk4 submachine guns and no less than 101 suppressed Mk5 Sterling-Patchetts.

With the import of small arms from the UK and other countries banned by an embargo Chile’s government were eager to increase their self-sufficiency.  As a result in the mid-1970s the state-owned firearms manufacturer Fábricas y Maestranzas del Ejército (FAMAE) experimented with copying the Sterling Mk4 in an effort to minimise development costs.

DSC_0162
Left-side view of the PAF with its stock extented (Matthew Moss)

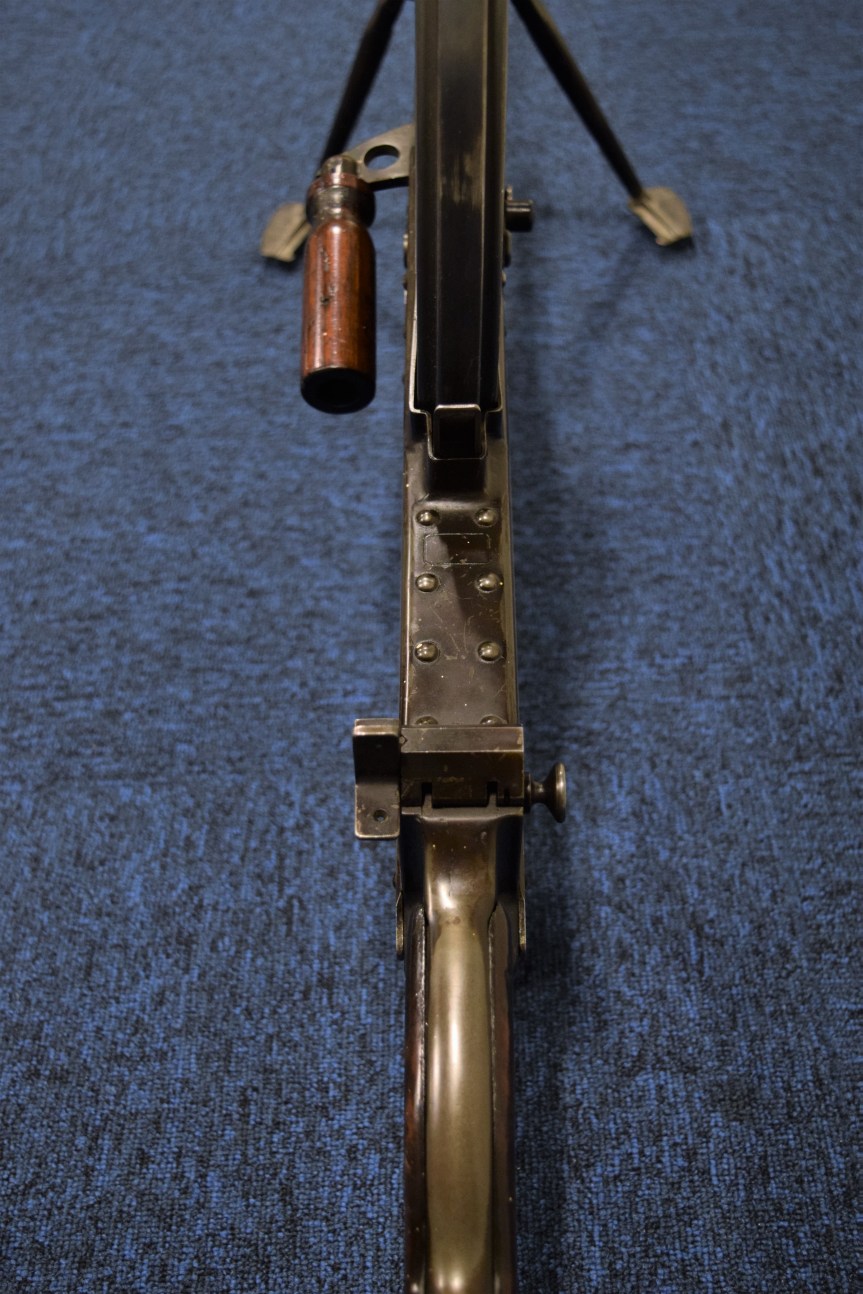
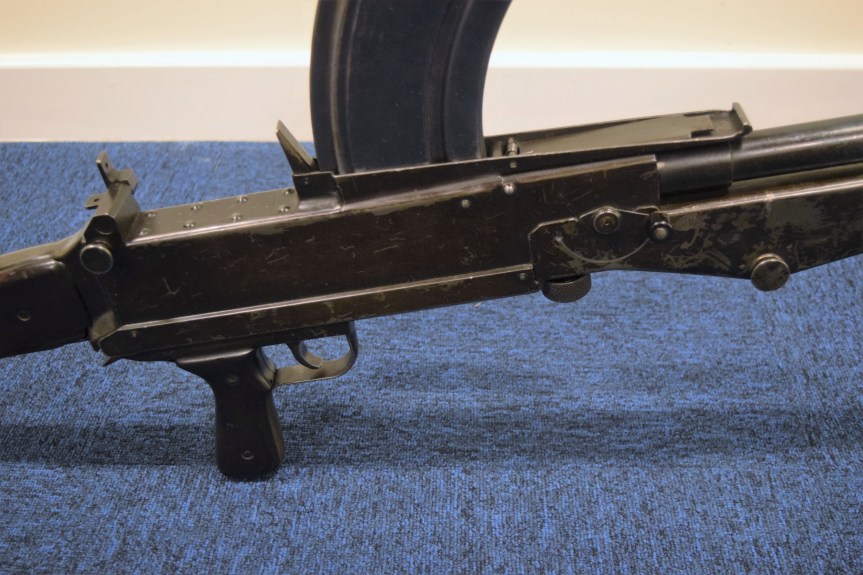
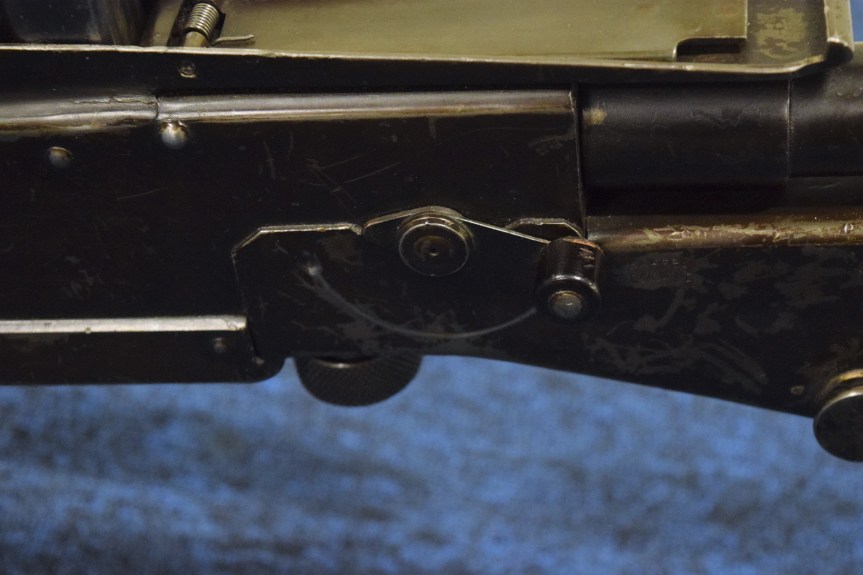
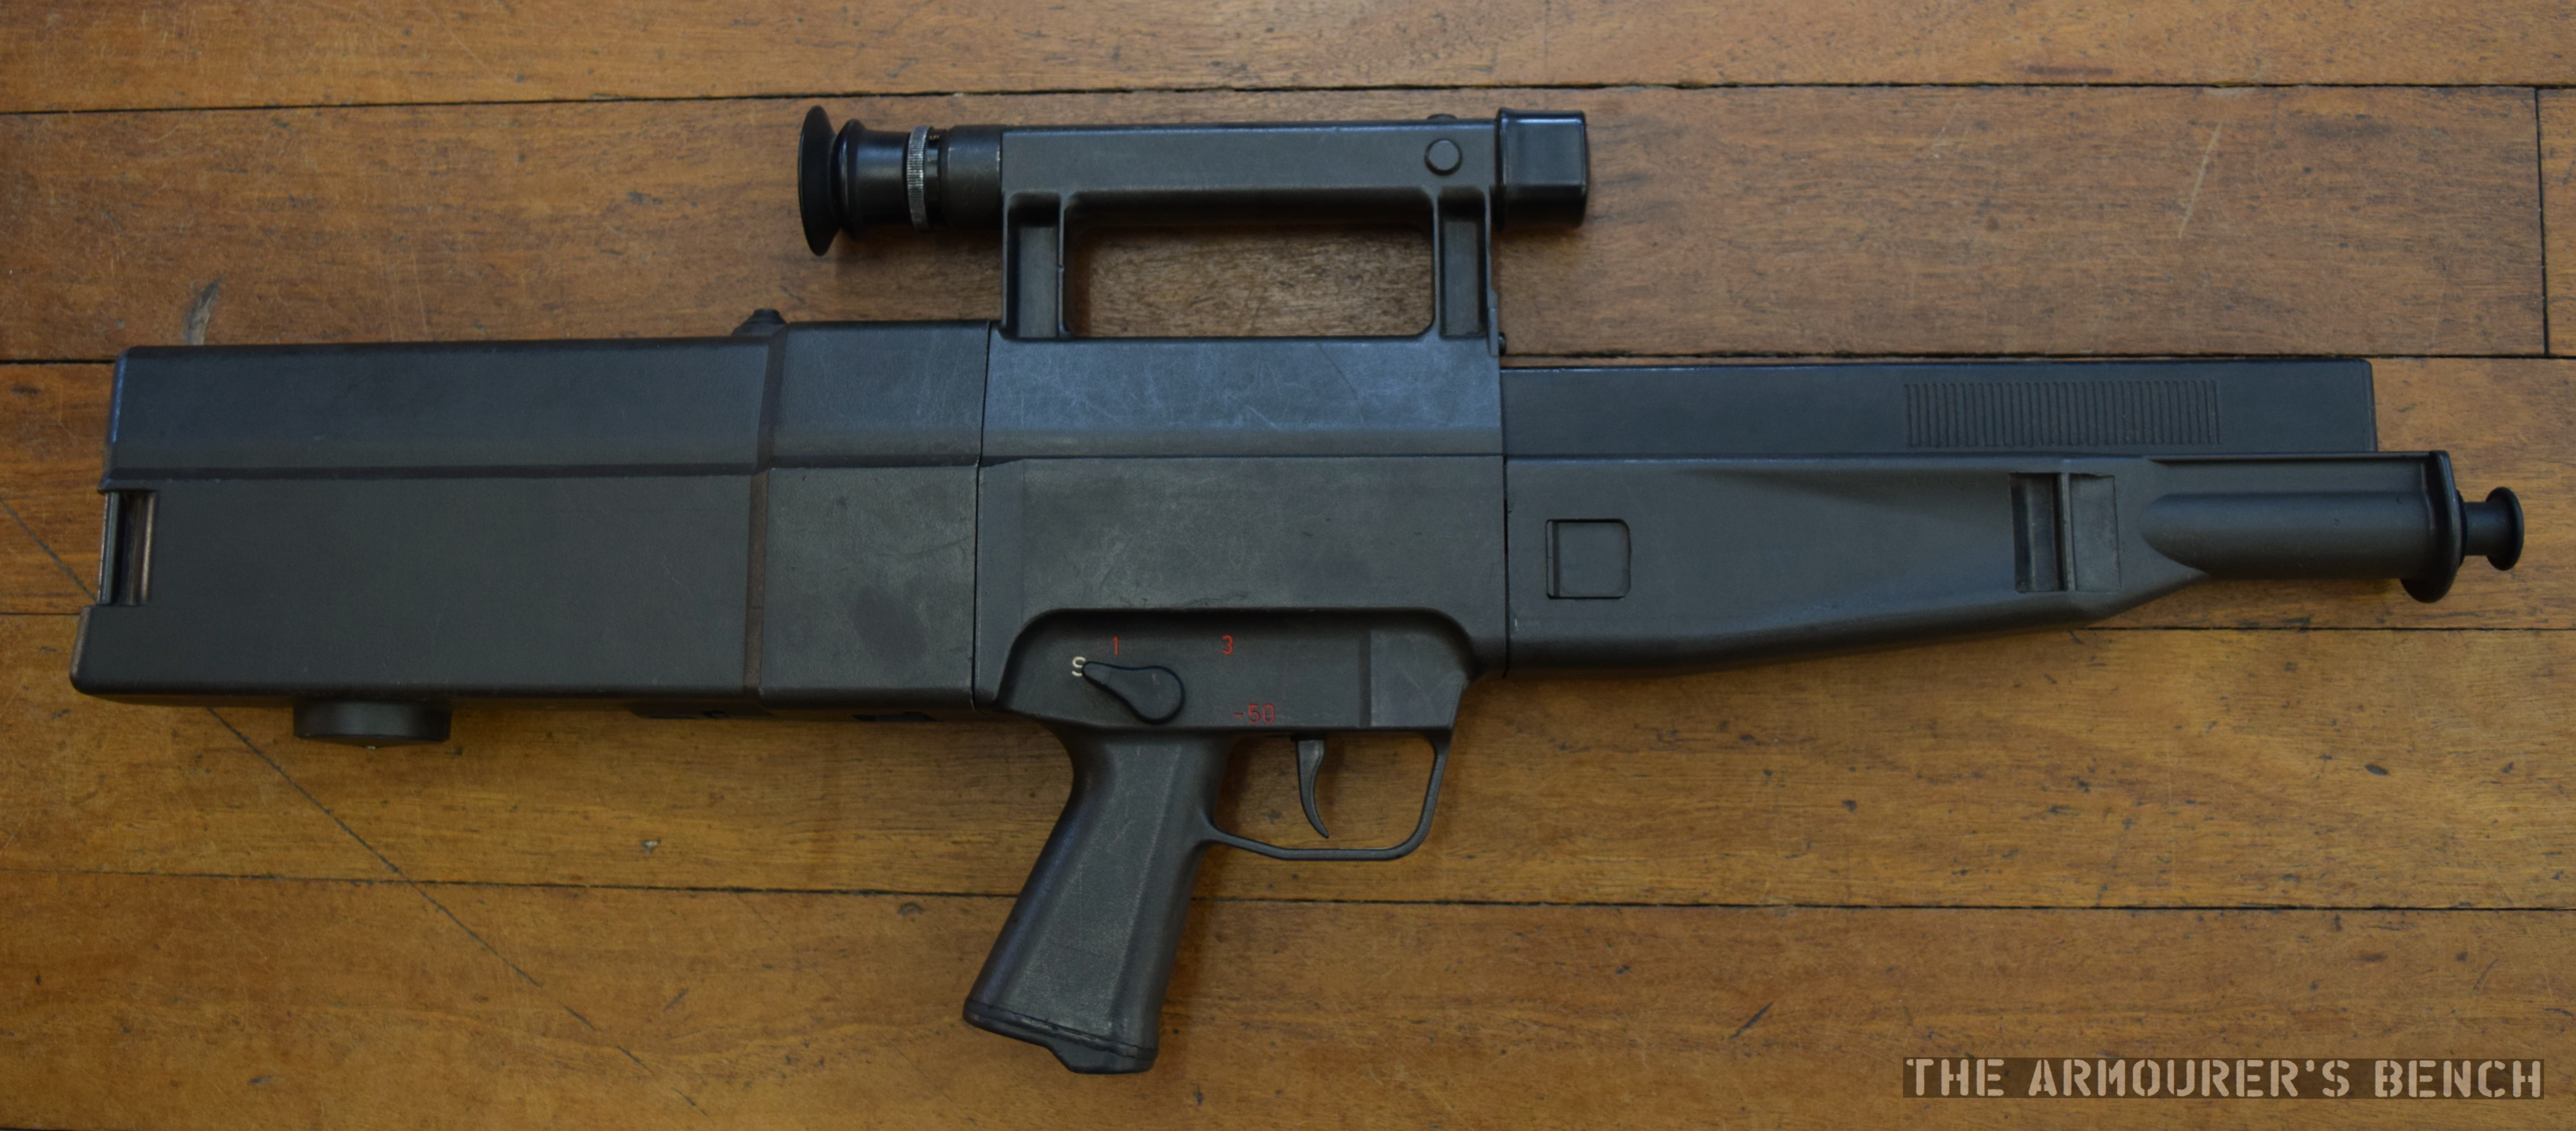
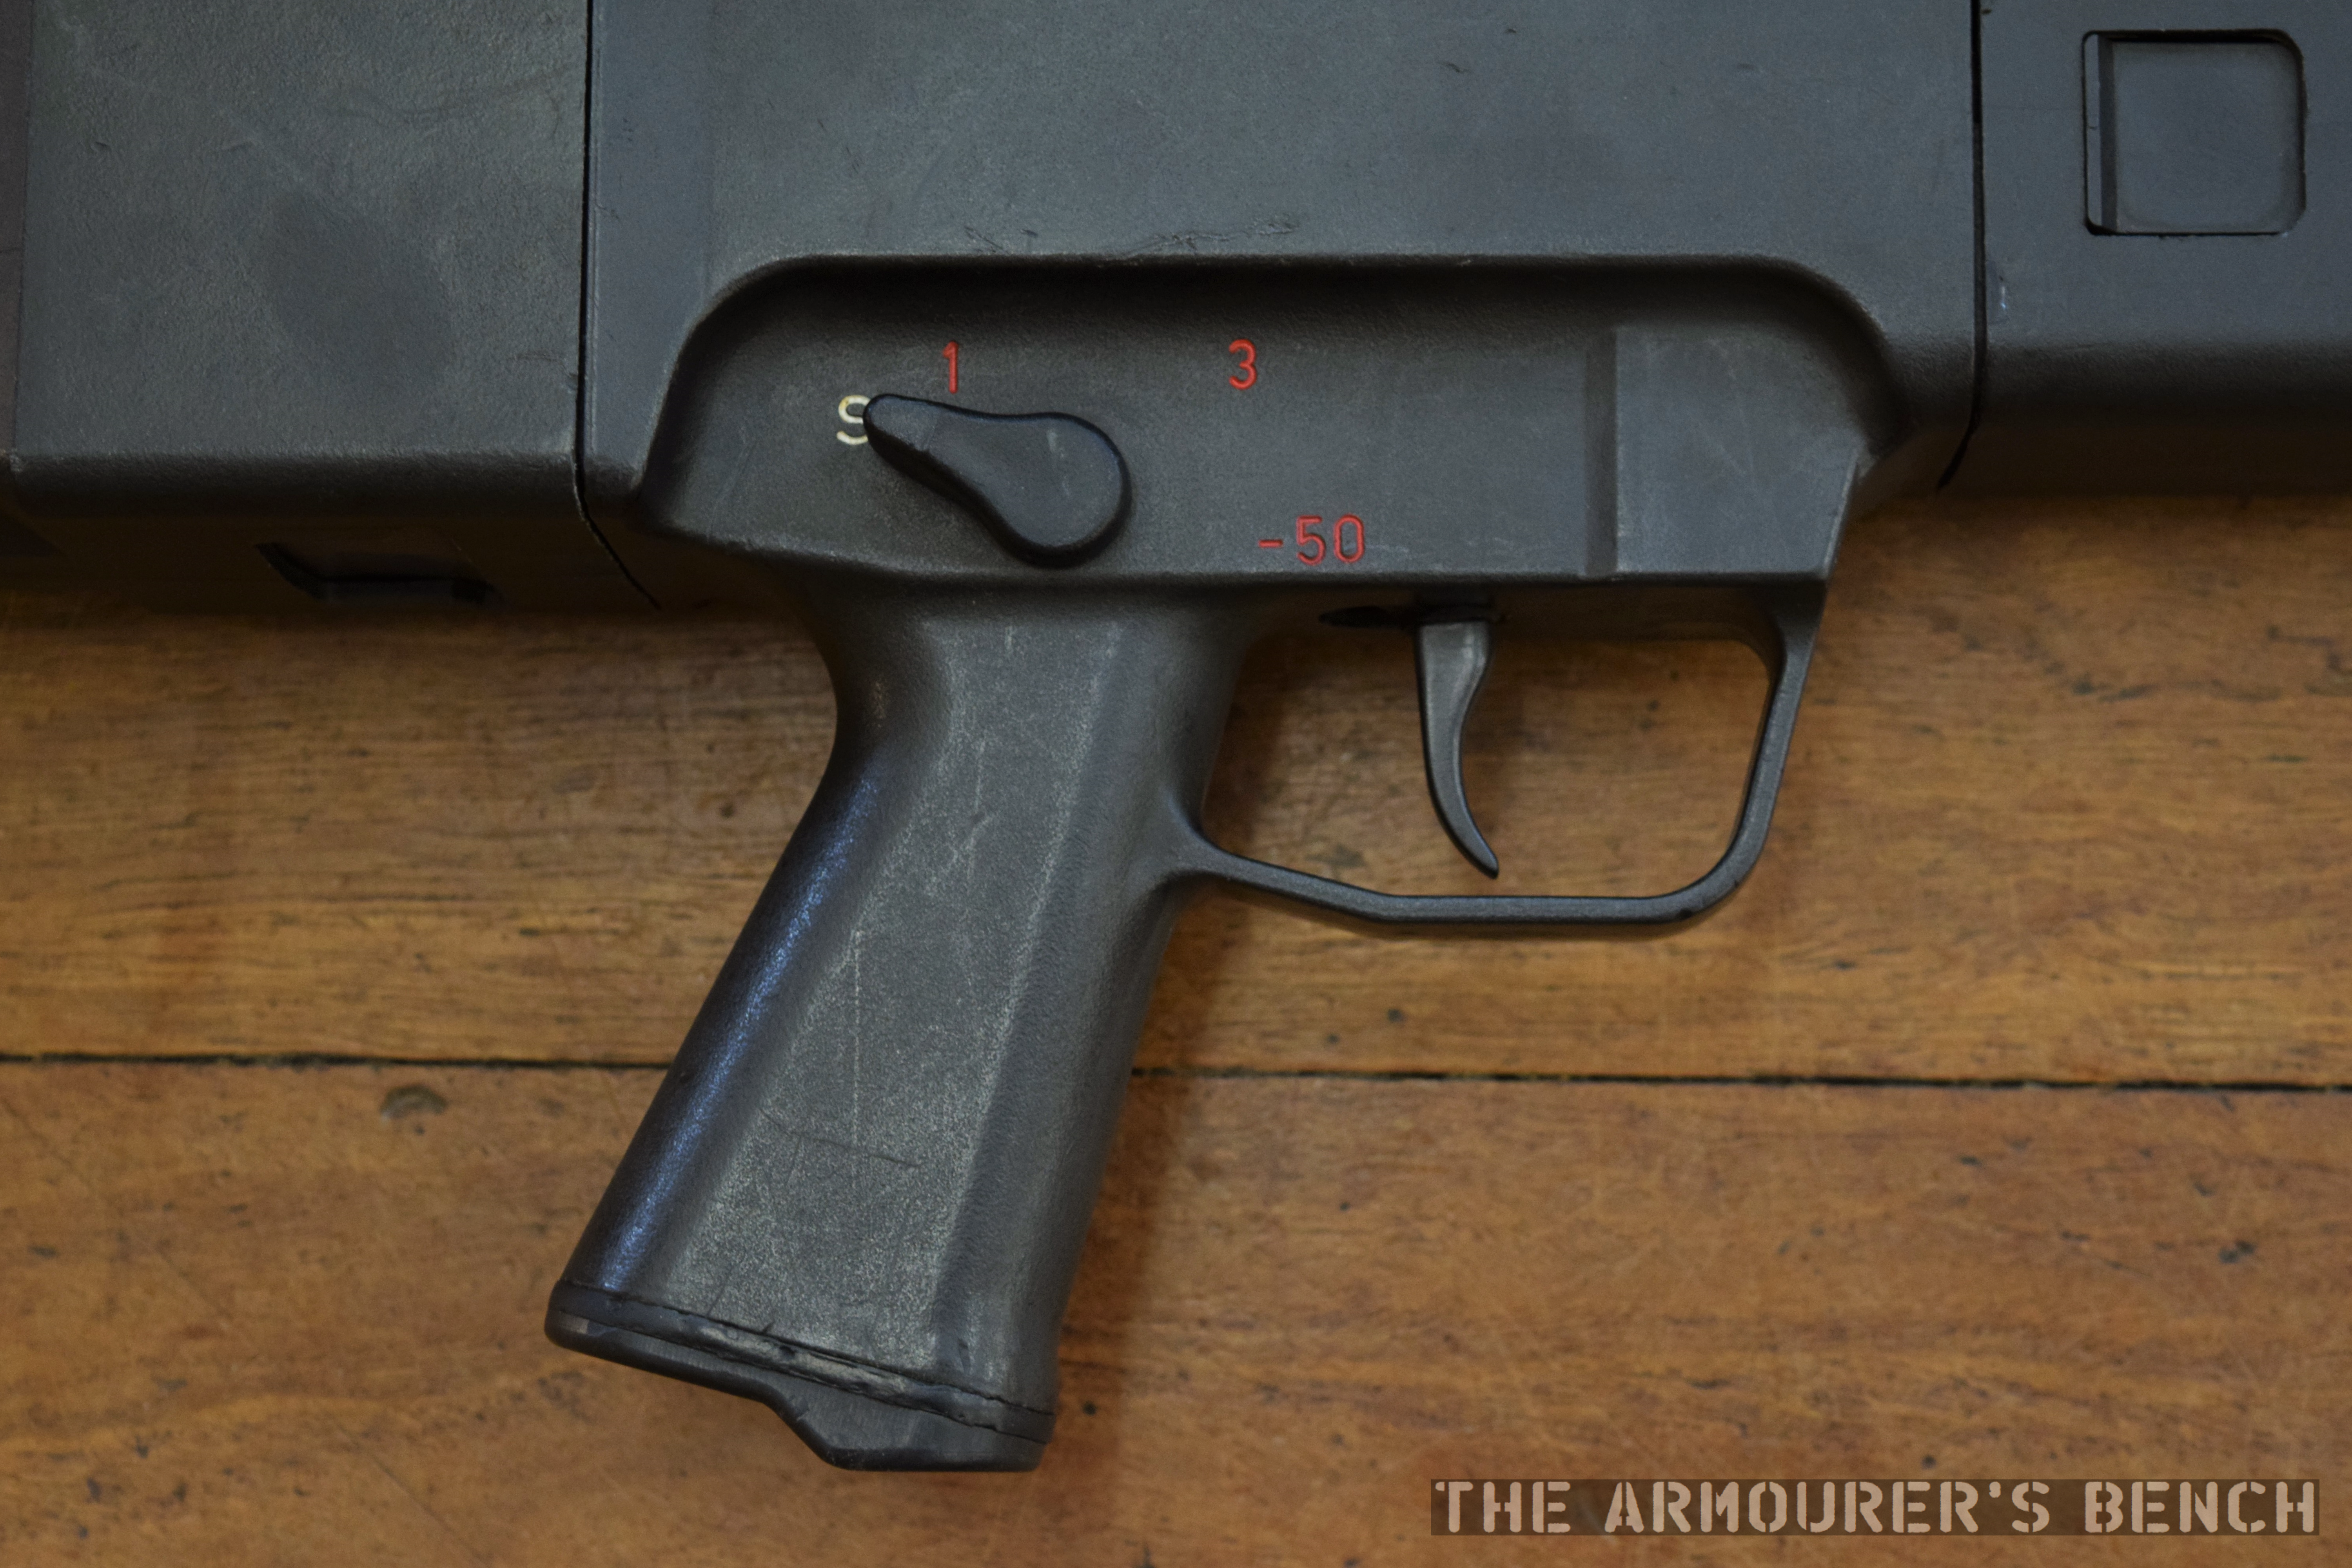
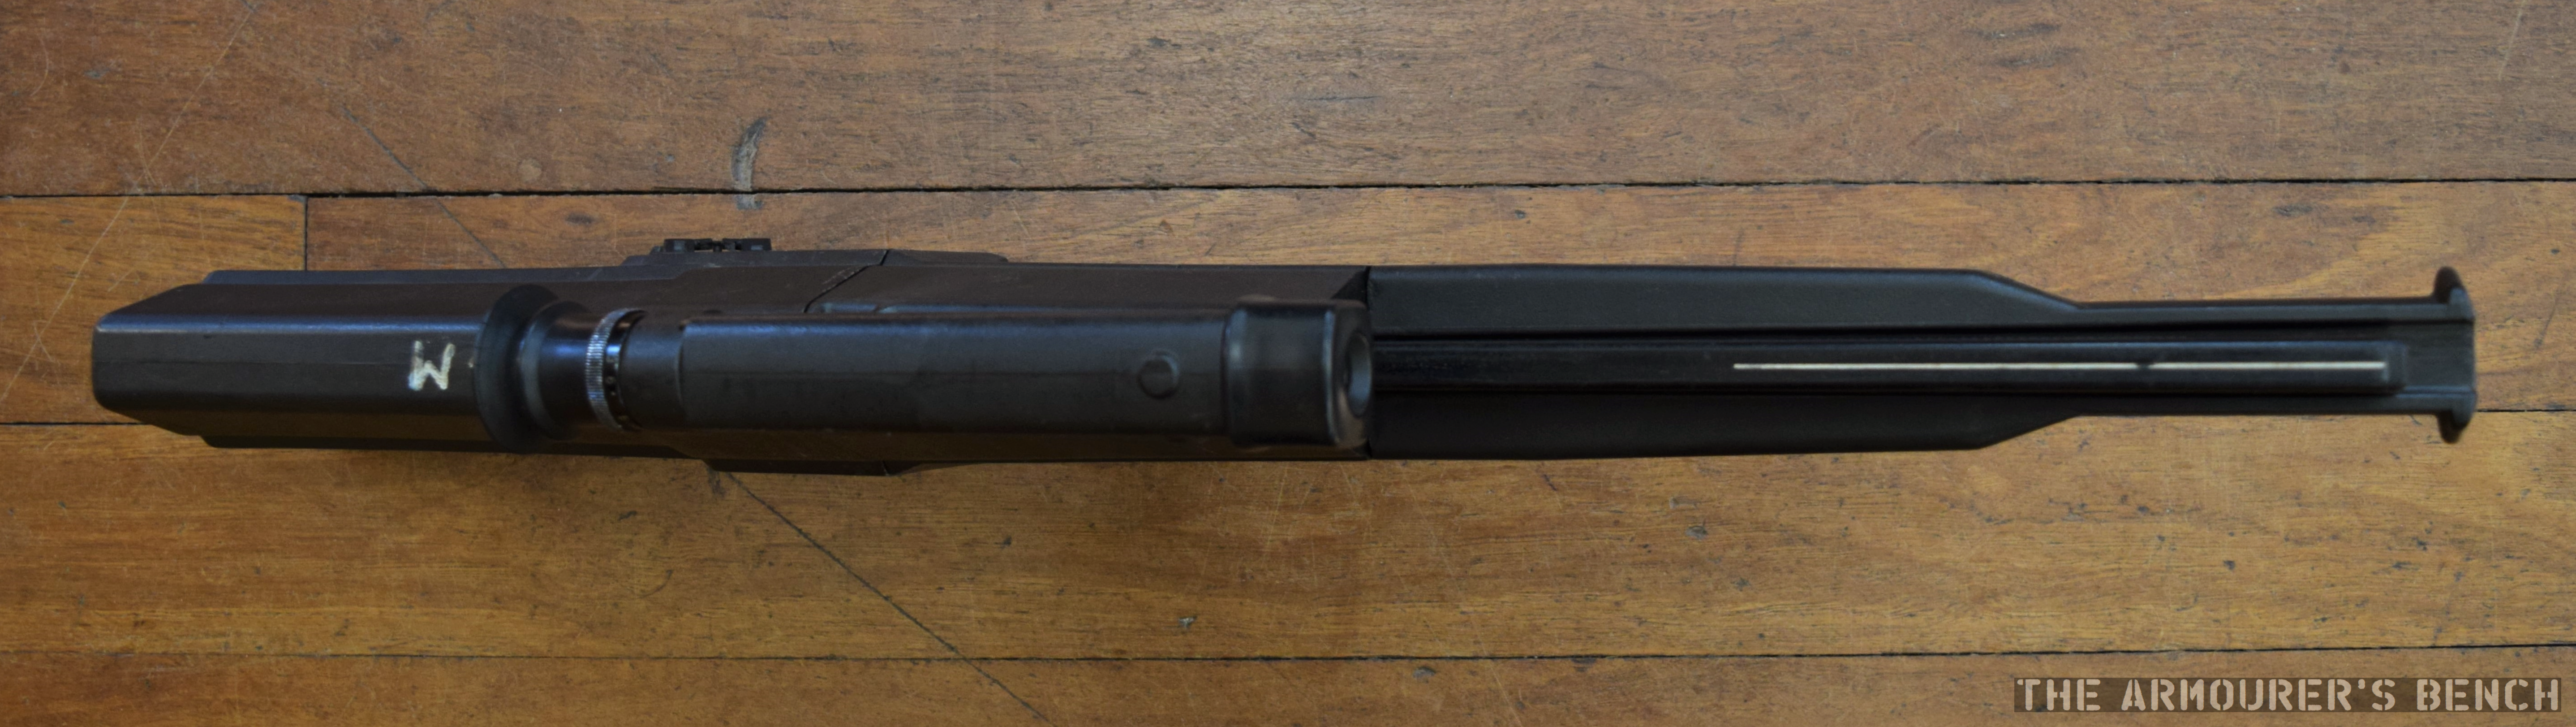
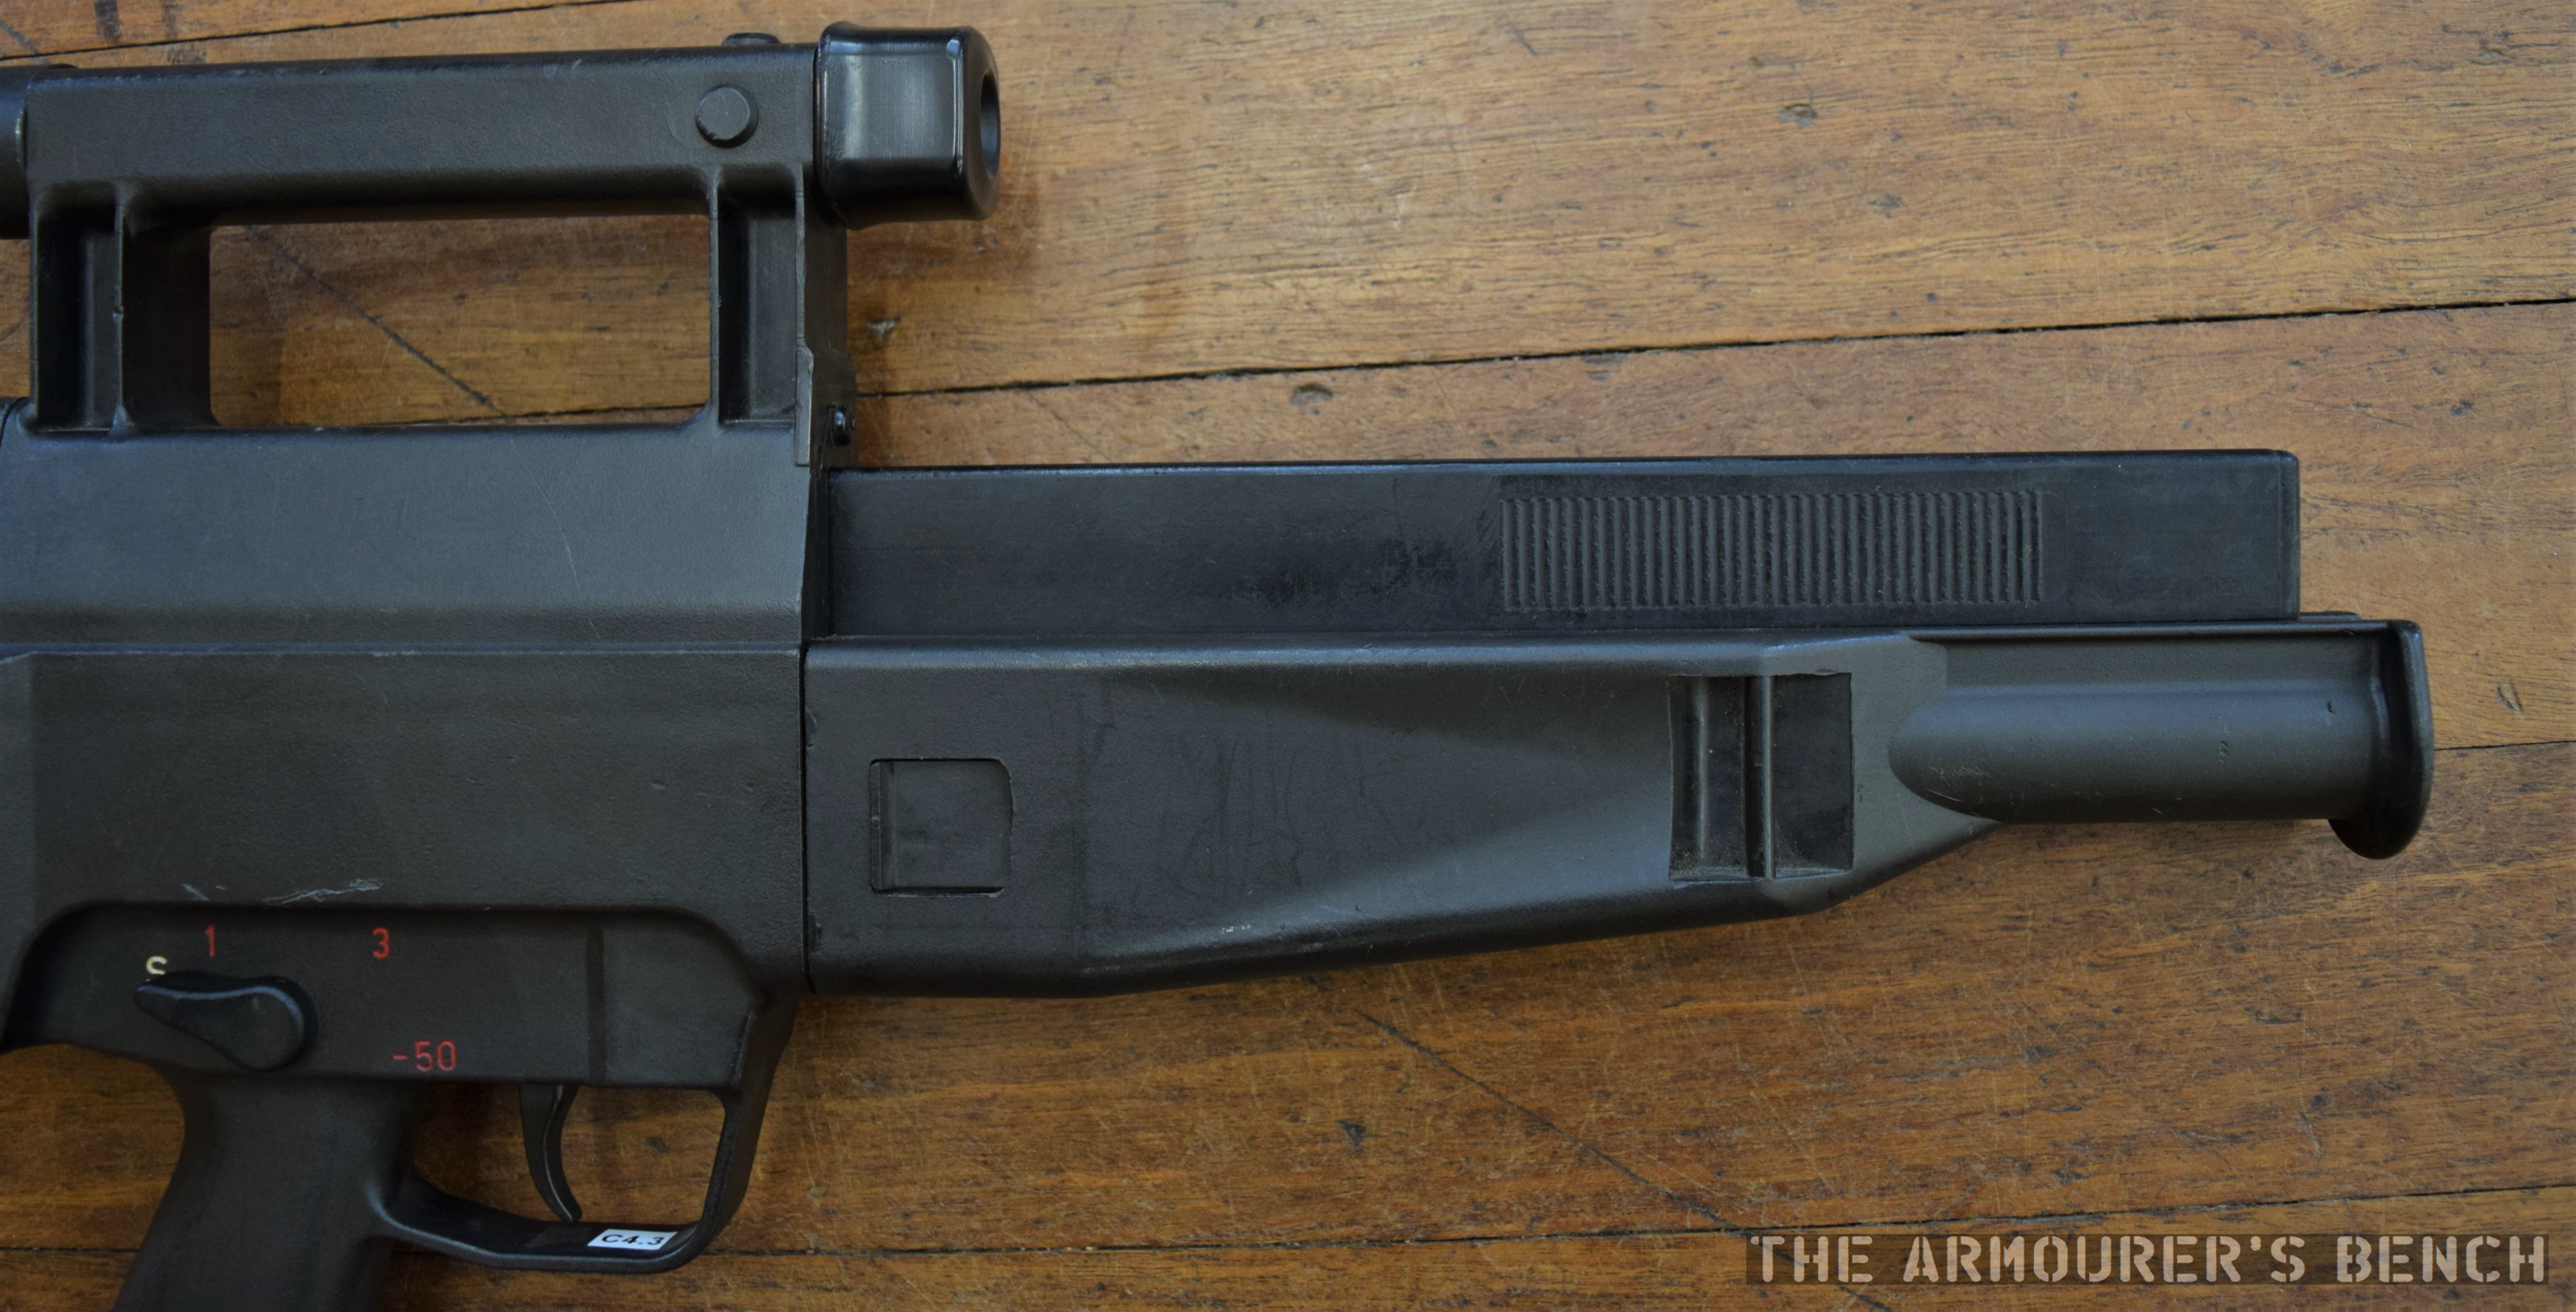
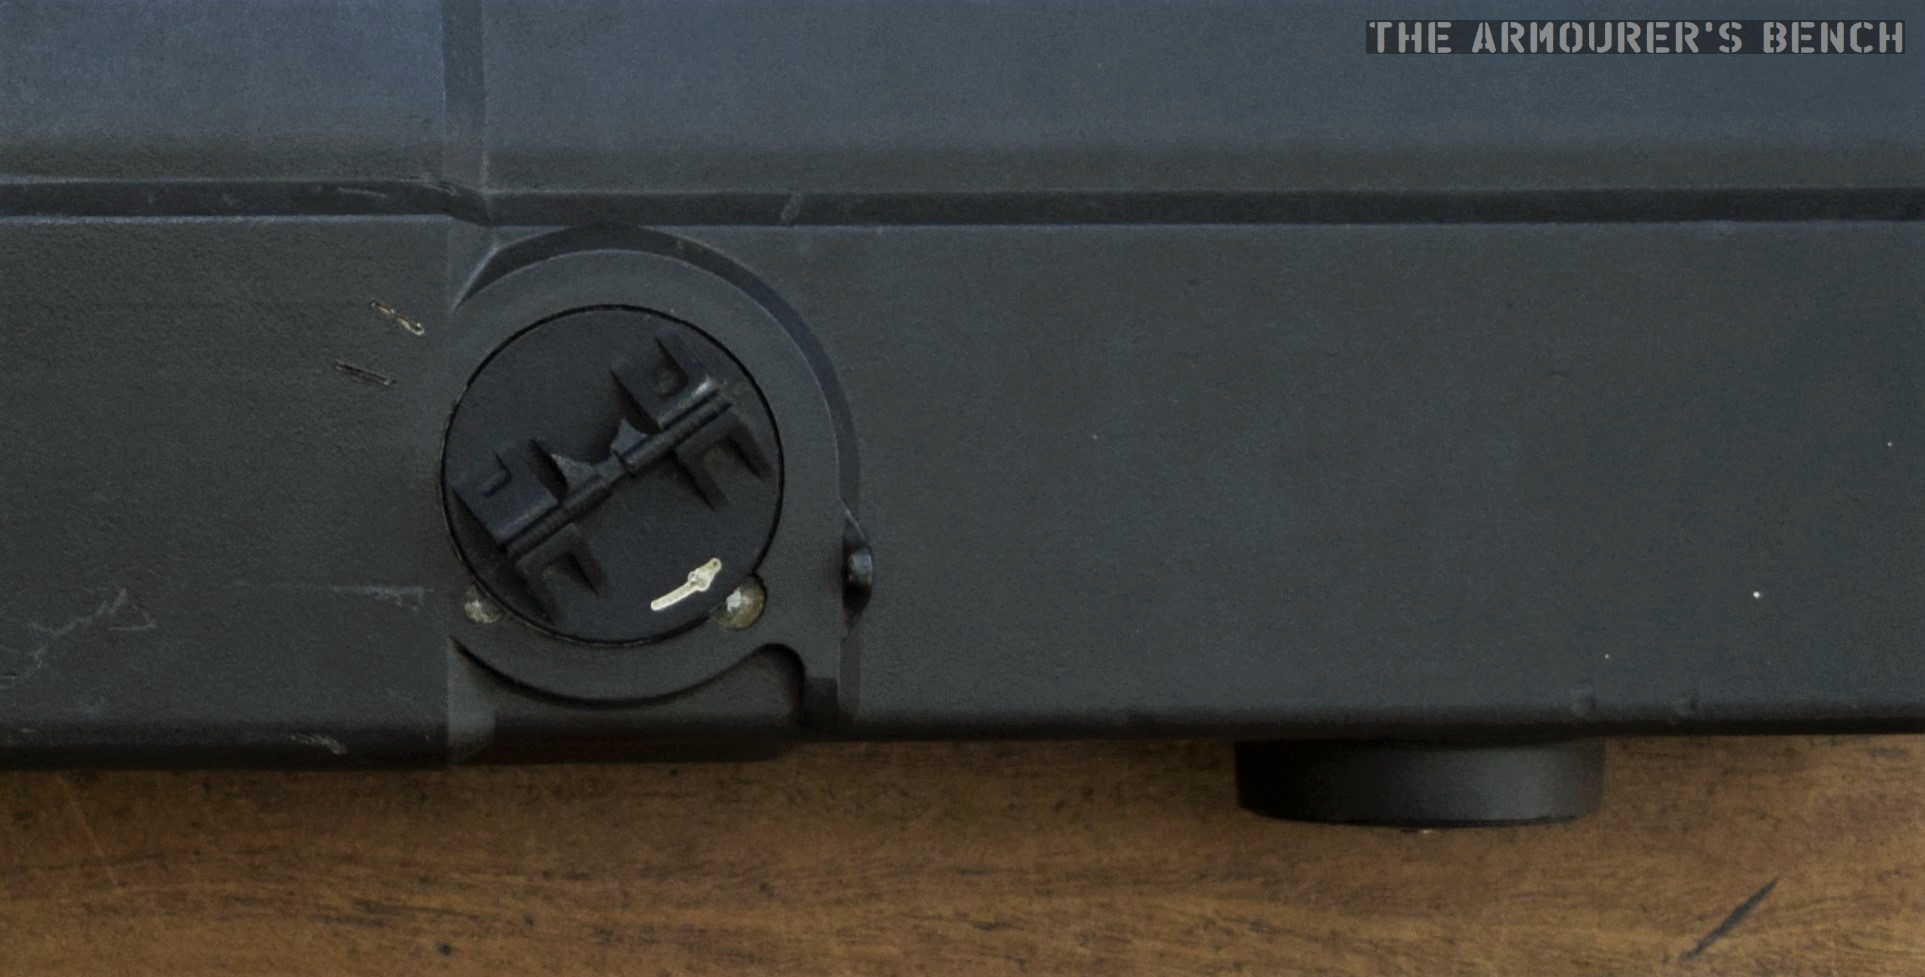
The resulting 9x19mm submachine gun was dubbed the PAF or ‘Pistola Ametralladora FAMAE’. It took the basic Sterling design and simplified it. The PAF lacks the Mk4’s perforated barrel jacket and instead has an exposed barrel, tipped with a rudimentary spoon-shaped compensator. It also lacked the Sterling’s folding stock, instead it had a simple collapsing stock. As a result, the disassembly catch has been moved 90-degrees to the left side of the receiver.

DSC_0163
Right-side view of the PAF (Matthew Moss)

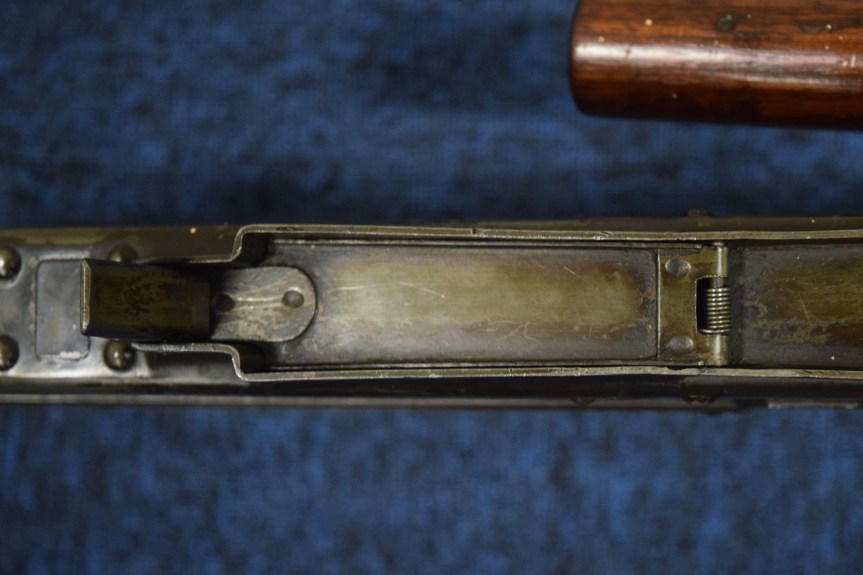
Like the original, the Chilean copy retained the dirt-clearing grooves cut into the weapon’s breech block. The PAF’s plastic charging handle and butt stock shape are reminiscent of the Heckler & Koch MP5 – although much cheaper feeling in quality. The profile of the PAF’s pistol grip is slightly different but the weapon still fed from standard 34-round Sterling magazines. Interestingly, unlike the Sterling’s screwed-in-place barrel, the PAF’s was held in place by a machined barrel nut – in terms of production this is a much simpler system, no doubt borrowed from the Uzi.


The Chilean copy weighs significantly less than the British original, 2.5kg (5.5 lbs) and reportedly has a much higher 800 rounds-per-minute rate of fire. In general the PAF looks much like Sterling’s own later Para Pistol model, the Mk7.

Some sources suggest that only a small number of toolroom prototypes were made, although the relatively high serial number, #00748, of the example we looked at may indicate a limited production run may have been produced. It is clear, however, that the PAF did not go into general production. Instead, FAMAE later focused on weapons derived from Swiss small arms including the SIG SG 510 and SIG SG 540, and the SAF submachine gun introduced in the 1990s.

Note: The PAF was the last weapon we filmed during this particular research trip and we did not have time to film or photograph the PAF’s internals (we filmed a lot of videos that day and were pressed for time). Rest assured if and when we get the opportunity we will update this article with photographs of the weapon disassembled!  

If you enjoyed the video and this article please consider supporting our work here.


Technical Specifications:

Length (with stock collapsed): approximately 44cm (17in)
Weight (unloaded): 2.5kg (5.5lb)
Barrel Length: 17.5cm (6.9in)
Action: blowback, open bolt
Calibre: 9x19mm
Feed: 34-round box magazine
Cyclic Rate: suggested ~800 rpm


Bibliography:

The Guns of Dagenham, P. Laidler & D. Howroyd, (1995)

‘The PAF: Chile’s First Indigenous Submachine Gun’, TFB, R. Olive (source)


Please do not reproduce photographs taken by Matthew Moss without permission or credit. ©The Armourer’s Bench 2018.

Photos: Heckler & Koch G11 ACR

Here are a selection of external photographs showing the H&K G11 submitted to the US Army’s Advanced Combat Rifle trials in the mid-1980s. You can watch our introductory video featuring two G11s here.

Note: While this collection of images covers only the externals of the G11, rest assured that if and when we get the opportunity we will follow this up with hi-res photographs of the weapon disassembled!  UPDATE – We disassembled a G11!

1
Right side view of the G11, note the muzzle plug inserted into the barrel (Matthew Moss)
2
Left side view of the G11, note the small window in the magazine showing the follower spring (Matthew Moss)
3
Close up of the right side of the G11’s fire selector (safe – semi – hyperburst – full auto), trigger and grip which enclosed a ‘control brush’ used to check the chamber was empty and in cleaning (Matthew Moss)
4
Left side close up of the G11’s selector, trigger and pistol grip – note also the rifle’s designation,  serial number, presumably manufacturing date and calibre moulded into the weapon’s casing (Matthew Moss)
5
A view of the G11 from above – note the alignment of the magazine and the lack of later additional channels for spare magazines seen in some G11K2s (Matthew Moss)
6
Close up of the G11’s foregrip and sling loop and an empty magazine loaded into the weapon  (Matthew Moss)
7
Close up of the weapon’s rotating ‘cocking handle’and pressure valve, note the white arrow indicating the direction to twist the handle to cock the weapon – the plastic folding handle on this example has sadly broken off, a common issue with G11s (Matthew Moss)
8
Close up of the left side of the G11’s ‘central part’, as HK described it, into which the barrel and breech assembly slide (Matthew Moss)

Many thanks to the collection, which wishes to remain anonymous, that holds this example of the G11 for the opportunity to examine, photograph and film it.

If you enjoyed the video and this article please consider supporting our work here.


Please do not reproduce photographs taken by Matthew Moss without permission or credit. ©The Armourer’s Bench 2018.

Photographs: Durs Egg Breech-Loading Carbine

Matt was recently lucky enough to examine a 1785 Pattern Durs Egg Breech-loading cavalry carbine. Based upon Giuseppe Crespi’s breech-loading system, the Egg carbines were tested by British cavalry regiments in the late 1780s. You can check out our full-length article on the weapon here and our video here.

Below are a some photographs I took of the carbine showing some of the details of its design:

DSC_0844
A right-side view of the length of the carbine
DSC_0857
The carbine with its breech fully open from the right-hand, lock side
DSC_0853
Detail photo of the carbine’s lock and breech handle
DSC_0848
An overhead view of the Egg Carbine’s open breech showing the chamber into which powder and ball were placed
DSC_0849
A closer overhead view of the carbine’s breech
DSC_0850
A close up of the carbine’s spear point bayonet showing the extension of the brass trigger guard into which the bayonet point sits
DSC_0856
With the carbine’s breech partially open its possible to see the small touch hole into the breech block, just above the frizzen and pan, which allows the flash from the fan to ignite the powder charge
DSC_0851
The carbine and its bayonet

Our thanks to the collection that holds this example of the Durs Egg Carbine, whom wish to remain anonymous, which was kind enough to allow us access to their impressive array of small arms.

If you enjoyed the video and this article please consider supporting our work here.


All photographs taken by Matthew Moss. Please do not reproduce these images without permission or credit. © The Armourer’s Bench 2018.

Photographs: BESAL

We were recently lucky enough to examine a 3rd Pattern BESAL light machine gun dating from c.1942.  You can check out our full-length article on the BESAL here and our video here.

Below are a some photographs I took of the BESAL showing some of the details of its design as well as its stamped and spot welded constriction:

DSC_0828
Left-side profile of the BESAL, note the shape of the butt is very similar to that of the earlier Lewis Gun
DSC_0829
BESAL with magazine removed, the weapon appears to use a standard MkII Bren non-adjustable bipod
DSC_0830
Like the Bren, the BESAL has a universal magazine adaptor to allow it to feed from both box and drum Bren magazines

Some close ups of the BESAL

DSC_0831
Top-down view of the BESAL note the offset sights
DSC_0832
Rivet reinforcement of the bolt’s locking recess in the top of the receiver
DSC_0833
Right side – The butt-retention pin can be seen just below the rear sight assembly, this pin is captive and once pulled allows the butt to come off, the bolt and pistol grip can then be removed from the weapon
DSC_0834
Close up of the BESAL’s barrel removal catch – rotate to the rear to remove the barrel
DSC_0835
BESAL’s spring-loaded magazine dust cover closed, note the magazine catch on the left
DSC_0838
A shot from behind the BESAL showing the rear sight and the enclosed front sight, both off set to the left


Our thanks to the collection that holds the BESAL, whom wish to remain anonymous, which was kind enough to allow us access to their impressive array of small arms.


All photographs taken by Matthew Moss. Please do not reproduce these images without permission or credit. © The Armourer’s Bench 2018.