During the Cold War the British Army on the Rhine was deployed in West German. In anticipation of a conflict with the Soviet Union detailed recognition guides were written for British troops to identify and familiarise themselves with enemy weapons and equipment. A substantial series of these were written covering everything from small arms to artillery to vehicles and aircraft.
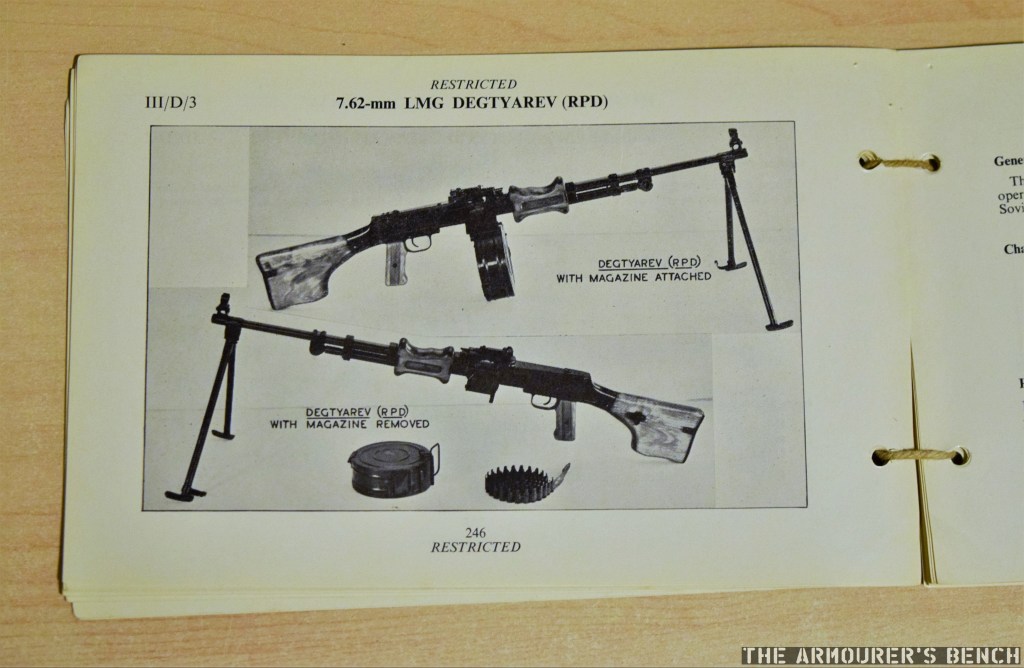
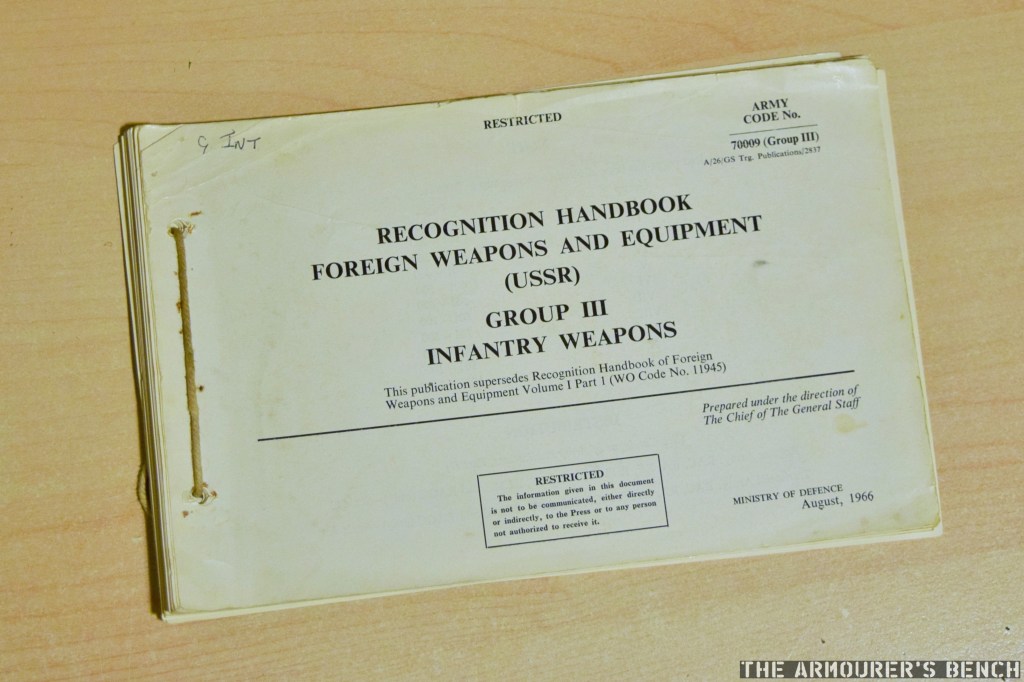
In this video and article we will examine ‘Recognition Handbook Foreign Weapons and Equipment (USSR) Group III Infantry Weapons’ originally published in August 1966. It covers pistols, carbines, rifles, light, medium and heavy machine guns, grenades and some infantry anti-tank weapons like the RPG-2.
RPD (Matthew Moss)
The Recognition Handbook is about 100 pages long while the wider series encompasses 12 booklets at approximately 1,200 pages. Each entry in the handbook includes general description of the weapon, its characteristics and recognition features to help identify it. The Handbooks are more detailed version of the smaller Threat Recognition Guide booklets which we have looked at previously.
Below is the two page entry covering the ‘7.62mm Assault Rifle Kalashnikov (AK-47)’ with a general description, characteristic and some recognition features.
AK-pattern rifle (Matthew Moss)
Sources:
‘Recognition Handbook Foreign Weapons and Equipment (USSR) Group III Infantry Weapons’, British Army, 1966 Warsaw Pact Small Arms’, British Army, 1986, (source)
If you enjoyed this video and article please consider supporting our work here. We have some great perks available for Patreon Supporters. Thank you for your support!
In August I had the opportunity to visit the National Army Museum in London and take a look around some of their current exhibitions. One of these was one titled “West Indian Soldier” which ran from 19 May through to 31 October. The museum described it as a special exhibition to explore the role of West Indian Soldiers in the British Army over the past 300 or so years.
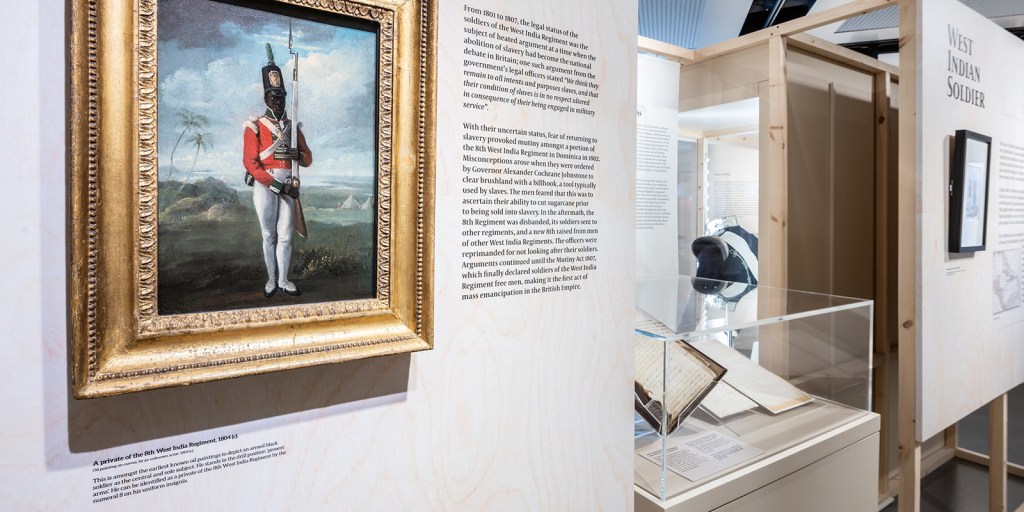
The exhibition was much smaller than I had expected, comprising of just one smallish room but nevertheless efforts had been made to combine items artefacts, art work and videos in an engaging way.
It covered the origins and creation of the various West India Regiments that have historically been a part of the British Army and looks at the West Indies contribution in conflicts ranging from the Napoleonic Wars through to the Great War and the Second World War as well as looking at the continuing service of personnel from the West Indies today with some video interviews with former and serving personnel rounding out the exhibition. The exhibition looked at the experiences of both black and white West Indians who served in both the West India regiments and the wider British army as a whole.
Inside the exhibition (National Army Museum)
The exhibition explains that the West Indian Regiments were formally a part of the British Army and not a colonial unit or militia. It does not side step slavery’s role in the West Indian regiments‘ history with various letters from the 1760s through to the 1800s illustrating how slaves were bought to fill the regiment’s ranks. Some 13,000 newly enslaved men were bought over 50 years up until 1807 and the British abolition of slavery.
The West Indian Regiments took various forms over the years and the exhibition did a good job of explaining this and some of the key parts of their role and history. The exhibition has a number of highlights including a number of Victoria crosses including that of Lt. Frank de Pass. De Pass was of West Indian decent and was posthumously awarded the VC in late 1914. The colours of the 4th West India Regiment are also on display along with uniforms, correspondence and a striking portrait of a private from the 8th West India Regiment, painted in 1803.
Notably the exhibition also outlines how during both world wars the War Office did not make use of the West Indies regiments as combat troops in several theatres, instead often using them a labourers. Often as on the Western Front where they were tasked with dangerous work in ammunition dumps.
I would have preferred to have seen an exhibition with a slightly larger scope but despite its small size the exhibition outlined the regiments’ history and the important, interesting and often under-appreciated role the West Indian’s soldiers played in the history of the British Army. Perhaps this is something that can be revisited approaching the West India Regiments’ 230th anniversary in 2025.
Additional Reading:
‘West Indian Soldier Exhibition’, National Army Museum, (source)
West Indian Soldier Exhibition Virtual Tour, National Army Museum, (source)
‘West India regiments: the story of slavery in the Army’, Forces News, (source)
‘The West India Regiments’ , National Army Museum, (source)
‘The West Indian Soldier’, The West India Committee, (source)
‘The Story of the British West Indies Regiment in the First World War, Imperial War Museum, (source)
‘West Indian Soldier: Interactive Timeline’, National Army Museum, (source)
If you enjoyed this video and article please consider supporting our work here. We have some great perks available for Patreon Supporters. Thank you for your support!
Earlier this year I had the pleasure of filming some segments on small arms for the new documentary on the Rhineland Campaign – ‘Rhineland 45‘. Not all of the segments I filmed discussing weapons could be included in the finished documentary – I filmed quite a few – so I’m pleased to share a couple here. This short video examines the Rifle No.4 (Lee-Enfield) used by British and Canadian troops during Operations Veritable and Varsity. This video was filmed at the Vickers MG Collection and Research Association.
Check out the first video of this series on the use of the PIAT here and our video on the Panzerfaust & Panzerschreck in the Rhineland here and our video on the STENs used in the Rhineland.
If you enjoyed this video and article please consider supporting our work here. We have some great perks available for Patreon Supporters. Thank you for your support!
Earlier this year I had the pleasure of filming some segments on small arms for the new documentary on the Rhineland Campaign – ‘Rhineland 45‘. Not all of the segments I filmed discussing weapons could be included in the finished documentary – I filmed quite a few – so I’m pleased to share a couple here. This video examines the various marks of STEN gun used during Operations Veritable and Varsity. This video was filmed at the Vickers MG Collection and Research Association.
Check out the first video of this series on the use of the PIAT here and our video on the Panzerfaust & Panzerschreck in the Rhineland here.
If you enjoyed this video and article please consider supporting our work here. We have some great perks available for Patreon Supporters. Thank you for your support!
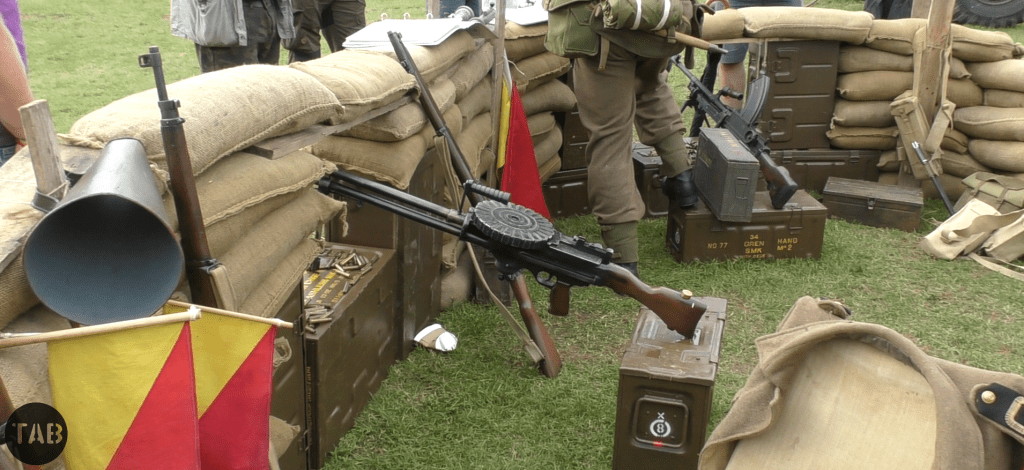
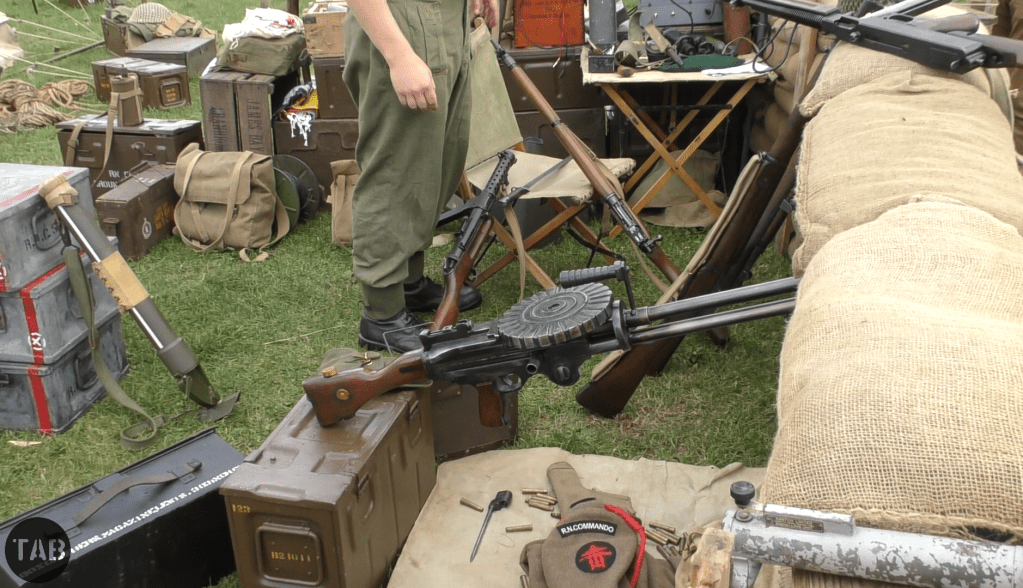
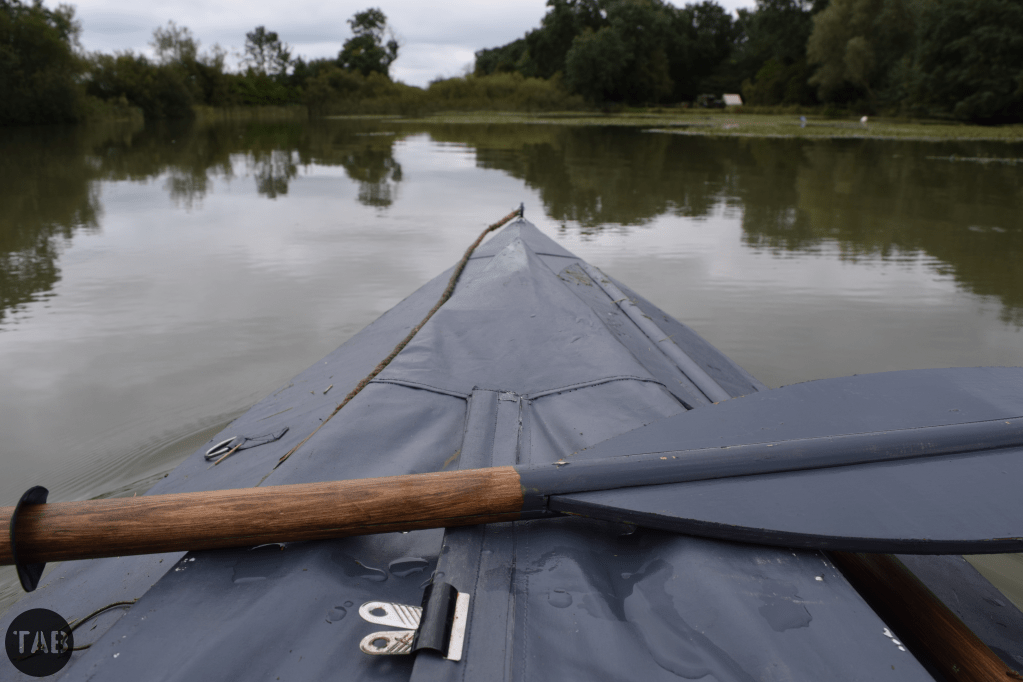
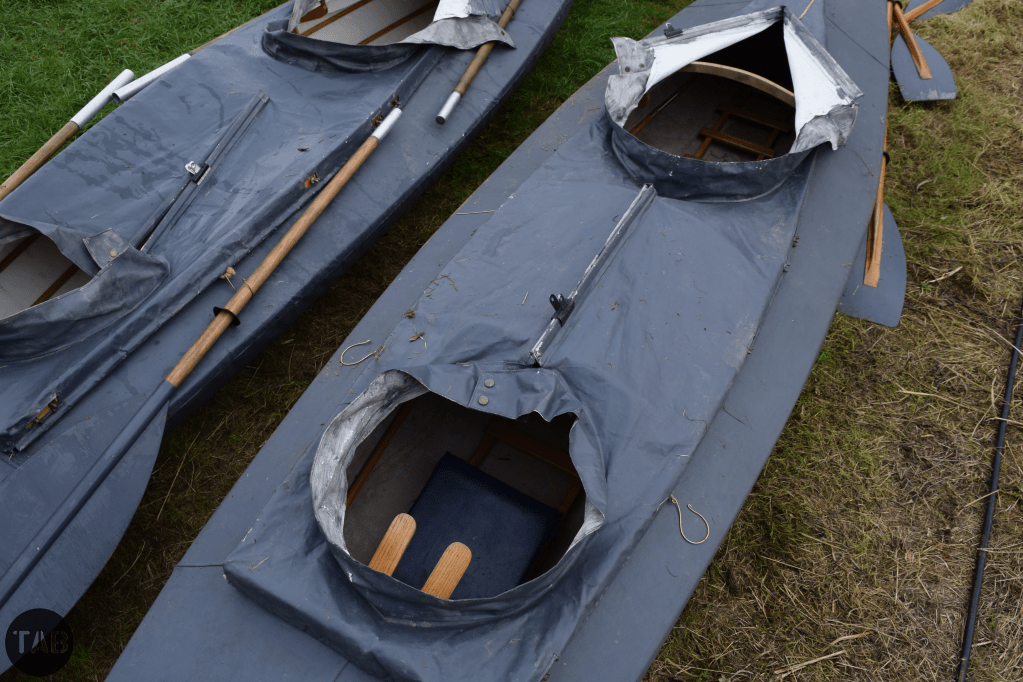
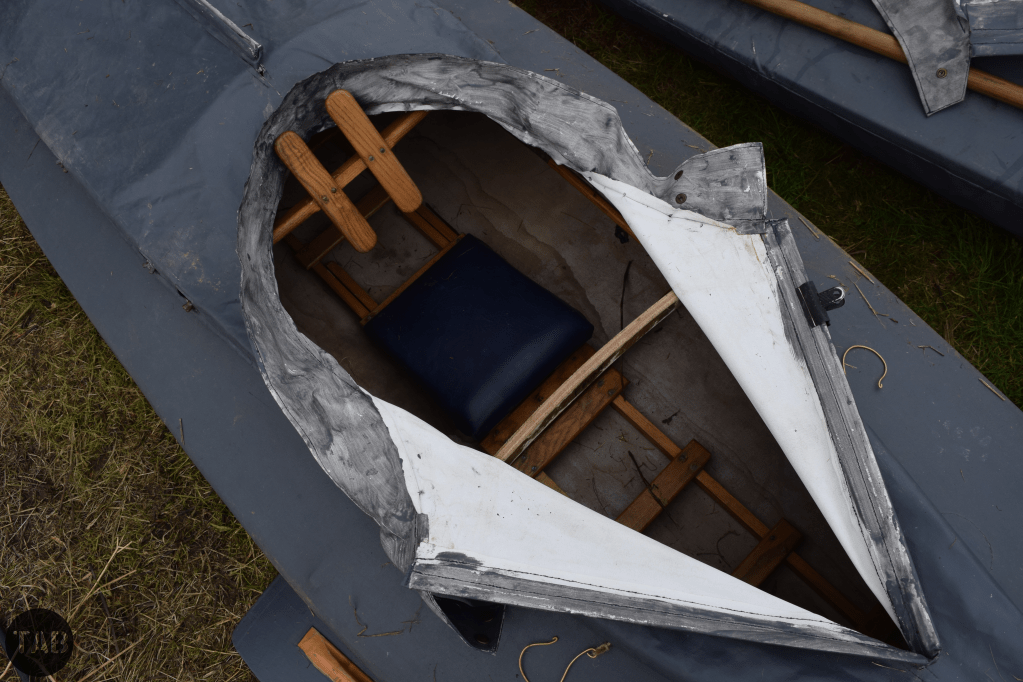
A few weeks ago at the We Have Ways podcast’s history festival (WarFest) I had a chance to chat with the chaps from the Royal Navy Beachhead Commando Reenactors, a group portraying a unique Second World War British Commando unit. And I got to have a paddle in a Mk1** canoe!
The Royal Navy Commandos were tasked with reconiotring the beaches before landings and once the landing began they were first onto the beach. The Royal Navy Commando beachhead parties and beachmasters would then direct the landing of troops and materials.
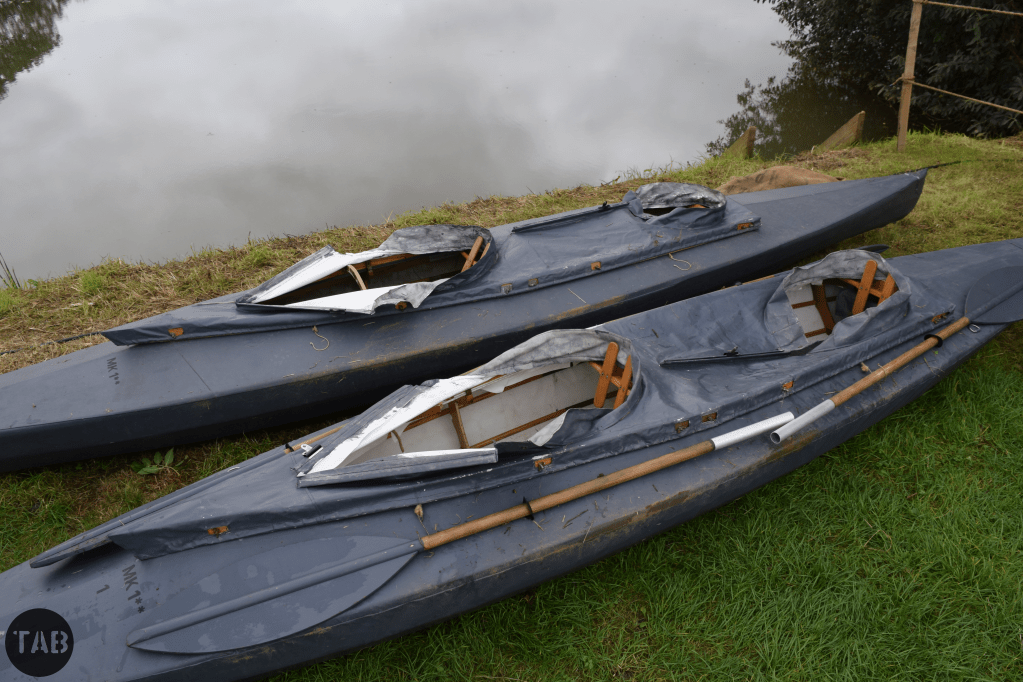
Below are a few photos from the groups camp and of the Mk1** Commando canoes used by the SBS and Combined Operations Pilotage Parties (COPP):
If you enjoyed this video and article please consider supporting our work here. We have some great perks available for Patreon Supporters. You can pick up a ‘Bring Up The PIAT’ shirt here. Thank you for your support!
If you’re familiar with the film Siege of Jadotville you will remember a scene in which the Irish company’s sniper takes on a long range shot… with a Bren. The sniper exchanges his Rifle No.4(T) for a Bren (MkII – in reality, according to contemporary photographs of Irish troops in the Congo, it would have been a MkIII) and single loads a round with the magazine removed.
Following discussion of how plausible this scene is during an episode of the Fighting on Film podcast we teamed up with Richard Fisher, of the Vickers MG Collection and Research Association, to test out the plausibility of the scene. In the film the sniper is seen to be highly proficient with his Rifle No.4(T), barely missing a shot. When tasked with shooting a target which appears to be approximately 400 yards away he sets down his No.4(T), with its No.32 3.5X telescopic sight, and takes a Bren, sets the sights, loads a single cartridge into the breech and takes the shot. The shot strikes and kills the target, a man in a white suit who was directing an attack on the Irish/UN positions.
This scene raises a number of questions:
Why does the sniper do this?
Is the Bren more accurate than a Rifle No.4(T)?
Can you easily single-load a Bren?
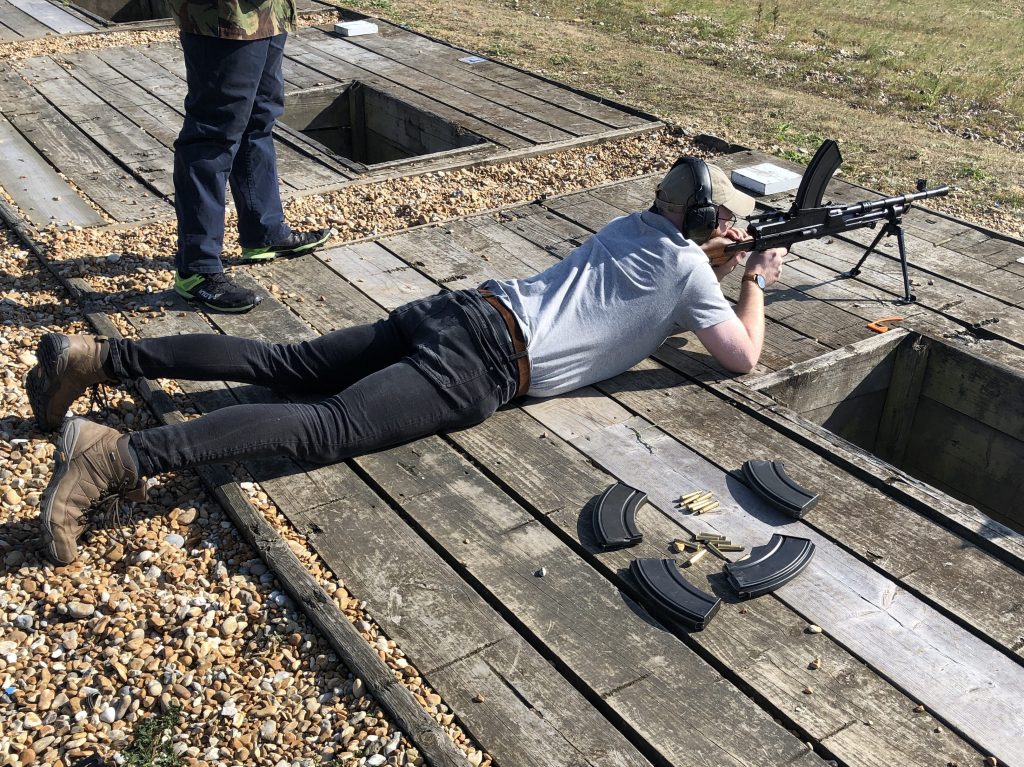
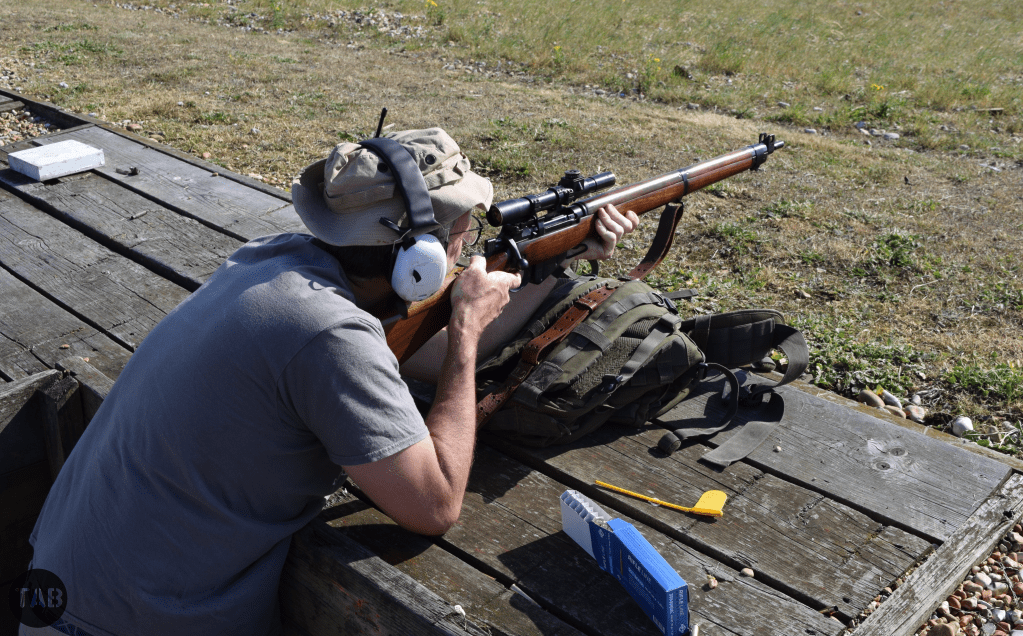
At the range, behind a Bren MkI with a MkIII barrel (Rich Fisher)
The video above explains our methodology for trying to answer some of these questions. We gathered a group of shooters to fire both a Rifle No.4(T) and a Bren MkIII (in our case a MkI Bren fitted with the shorter barrel of a MkIII). The shooters come from a range of experiences ranging from successful competition shooters to myself (who hasn’t shot a long range competition in 18 months) and Rich (who hasn’t fired a rifle at significant ranges in over a decade). We fired at two ranges 100 yards and 400 yards, with the latter representing the scene from the film, at representatively sized targets. We used 174gr PPU .303 ammunition in all weapons except the 7.62x51mm L4 (which does not directly factor into the results of this experiment).
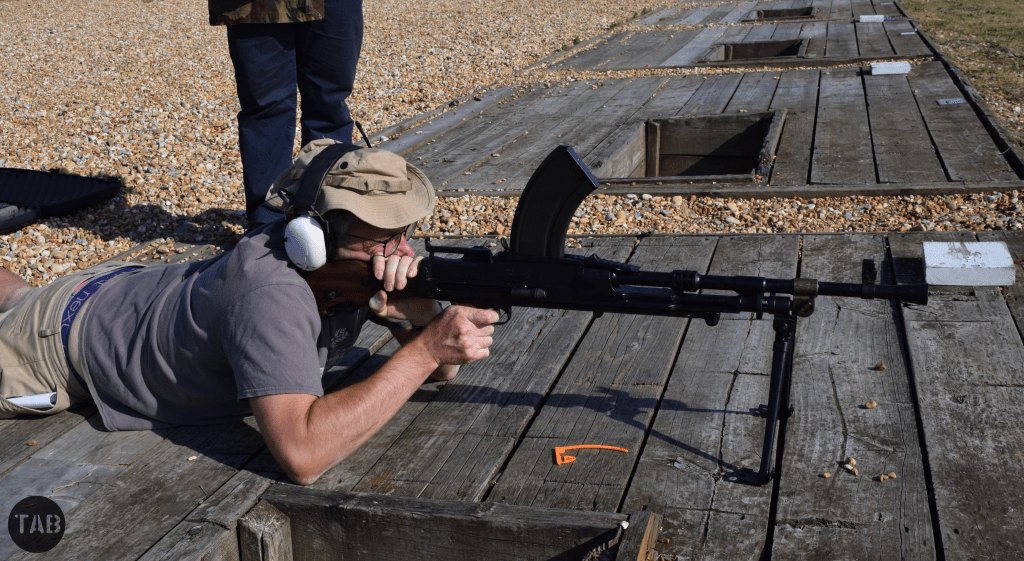
Can You Easily Single-Load A Bren
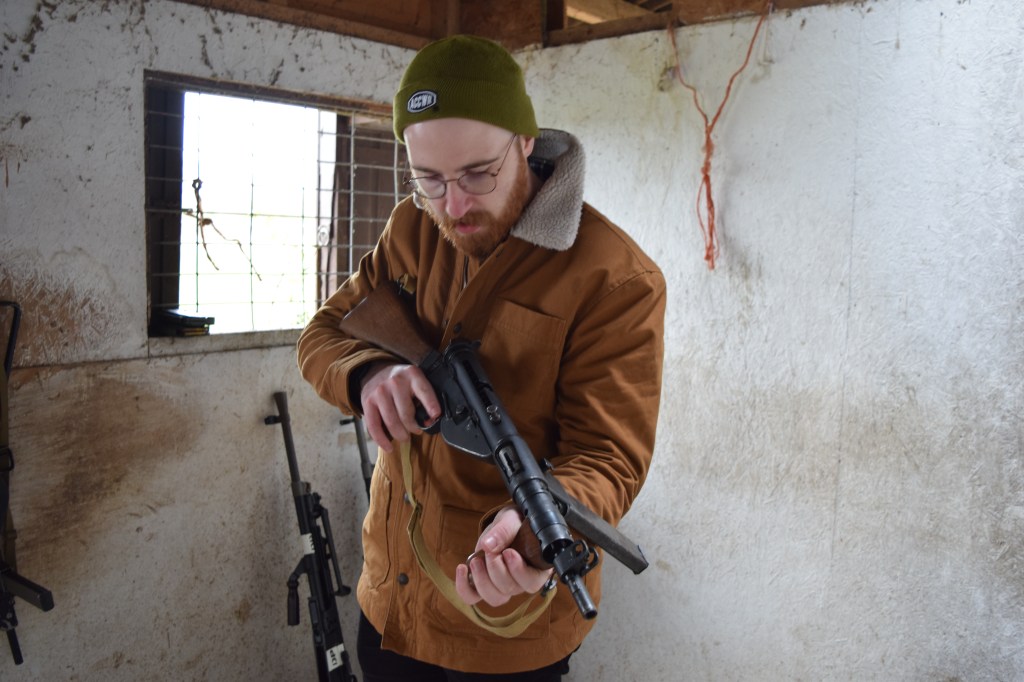
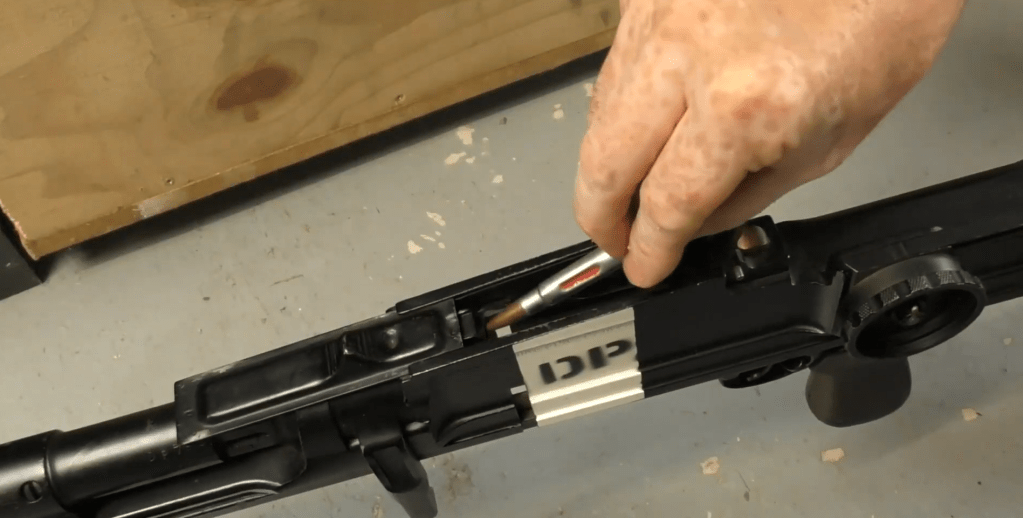
In the morning before the shoot the group of shooters carried out familiarisation of the handling and Normal Safety Precautions (NSPs) for the Bren. It was then that we discussed the part of the scene where the sniper single-loads a round into the chamber. It was decided to test this question using a L54A1 Drill Purpose Bren held by the Vickers MG Collection and Research Association’s collection.
Rich demonstrates single-loading a cartridge into the Bren’s breech with an L54A1 Drill Purpose Bren
In the video you will see that this was possible but it was easily fumbled. It was possible to accidentally nose the round into the gas piston or to drop it though the action, out of the ejection port. It is imaginable that in the stress of combat it might prove difficult – but it is certainly possible to single-load the Bren in this way.
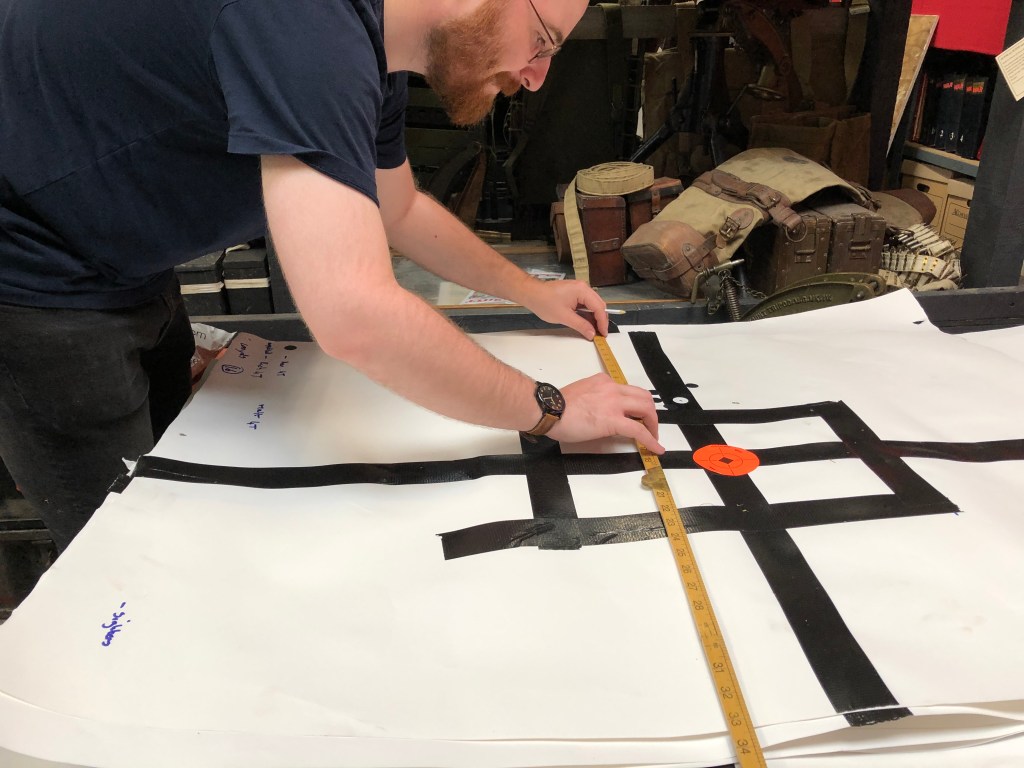
Measuring up: working out the Figure of Merit (Rich Fisher)
Is the Bren More Accurate Than a Rifle No.4(T)?
In short, no. We found that the average figure of merit value showed that the No.4(T) was more accurate at both 100 and 400 yards than the Bren. The caveat to this is that our data set for 400 yards was incomplete with some misses and off paper hits meaning only partial groups were recorded.
At the range
In terms of measuring the accuracy of the weapons we worked out individual shooter and group average Figure of Merit values. We explain how this was done in the video (with reference to this video from Rob of BritishMuzzleLoaders). The raw data can be seen below:
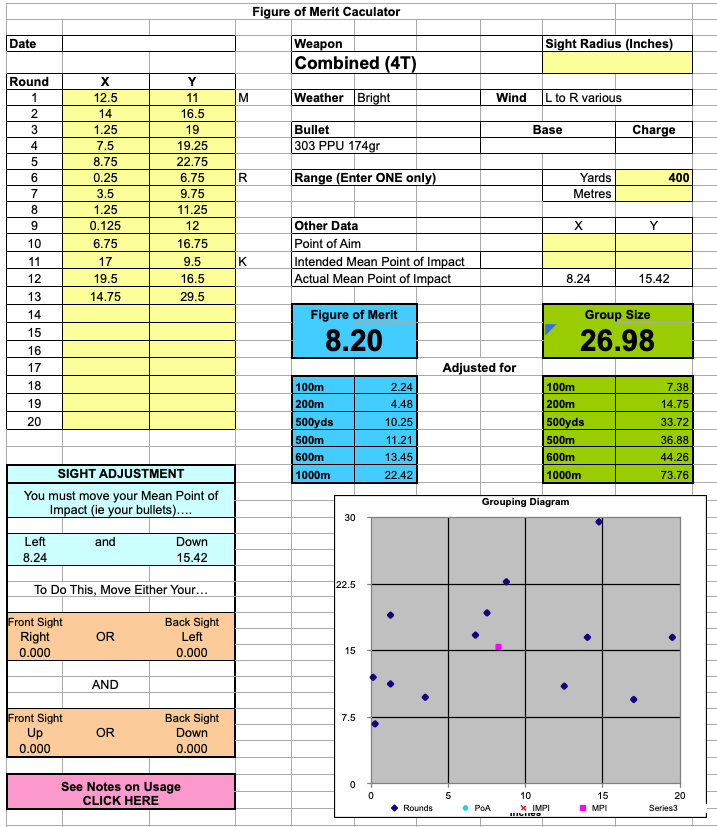
First we have the the raw data for the Rifle No.4(T) at 400 yards for all shooters combined input into the Figure of Merit (FoM) spreadsheet which calculated the FoM and group size and generated a grouping diagram:
Rifle No.4(T) at 400 yards
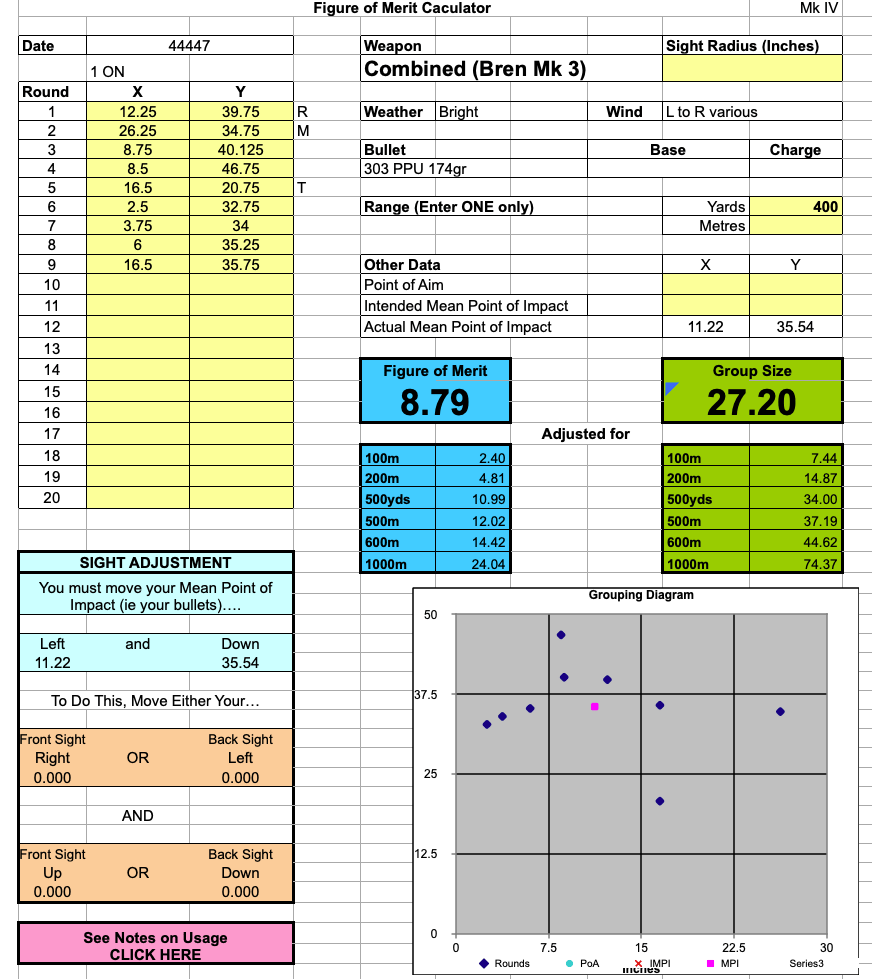
Below is the raw data for the Bren Mk3 at 400 yards for all shooters combined input into the Figure of Merit (FoM) spreadsheet which calculated the FoM and group size and generated a grouping diagram:
Bren MkIII at 400 yards
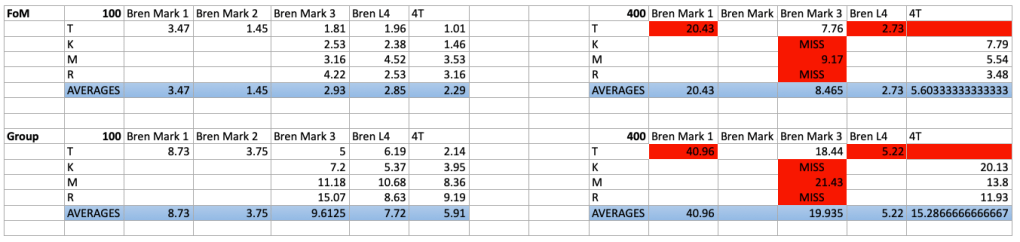
Below is a summary of the FoM and group data for each shooter with the various weapons as well as an averaged value:
Summary of the data showing individual shooters and averages
Tom’s group for the No.4(T) at 400 yards was off paper and not recorded, the data for Kev, Matt and Rich on the MkIII was partial due to misses and shots off paper – this is perhaps somewhat indicative of the advantage the No.4(T)’s scope gave over the Bren’s iron sights at 400 yards.
What would we do differently if we have the chance to repeat the experiment?
It would be useful to replicate the firing of the No.4(T) and Bren again to rectify the partial data we recorded at 400 yards. It would also be useful to fire the Bren mounted on a tripod rather than off the bipod. This would provide a useful control comparison with human factors effecting the weapon minimised. We had hoped to do this on the day but did not have the time. It may also be beneficial to enable each shooter to have 5-10 rounds to get on target and compensate for wind etc. and then shoot their representative five round group.
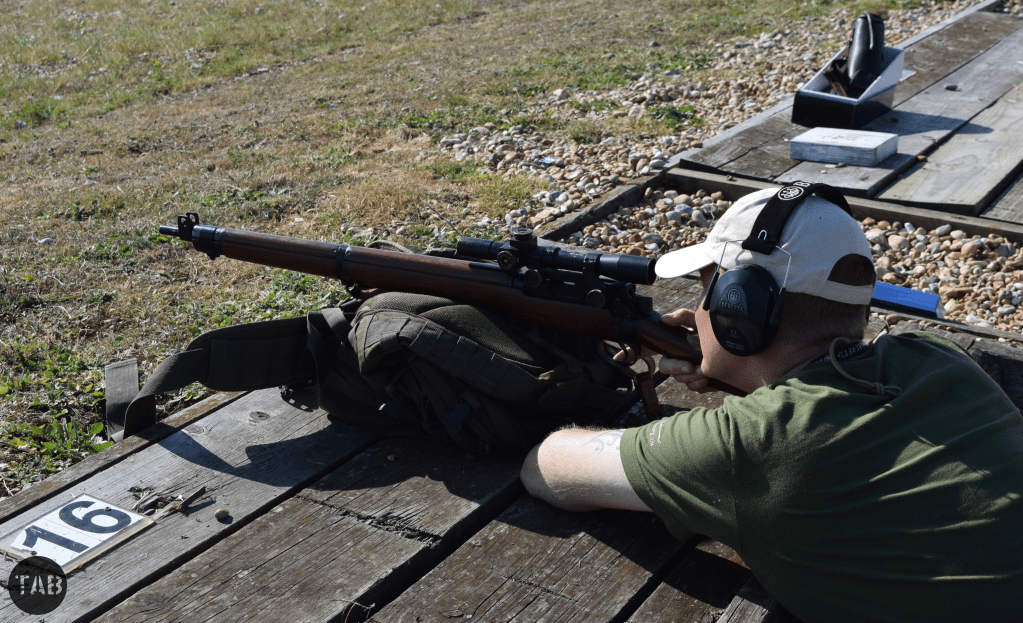
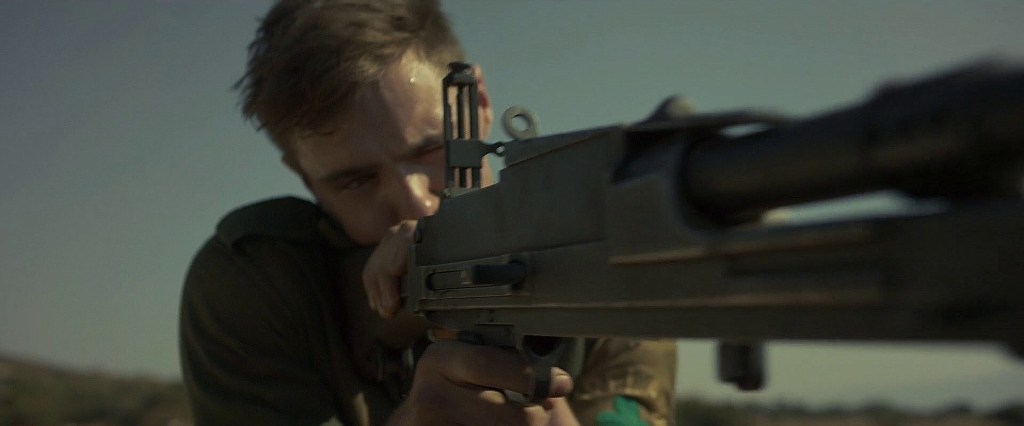
Sniper Bren: the sniper takes aim with ‘the Bren on single shot’
Why Does the Sniper Do This?
So why does the sniper do this in the film? Firing from the bipod would theoretically provide a more stable shooting platform than an unsupported rifle. There was, however, plenty of sandbags for him to take a supported shot with the No.4(T). There has been some suggestion that it was believed that the Bren was a more accurate weapon but data from service trials and our experiment show that it was not superior to a scoped, accurised rifle. The scene was probably a result of cinematic license, the sniper had previously been shown to be able to hit anything he had thus far aimed at so having him swap to “the Bren on single shot” gives an added weight to the scene and the action of single-loading rather than firing from the magazine adds to the technical theatricality of the scene depicting the sniper as a capable expert.
If you enjoyed this video and article please consider supporting our work here. We have some great perks available for Patreon Supporters. Thank you for your support!
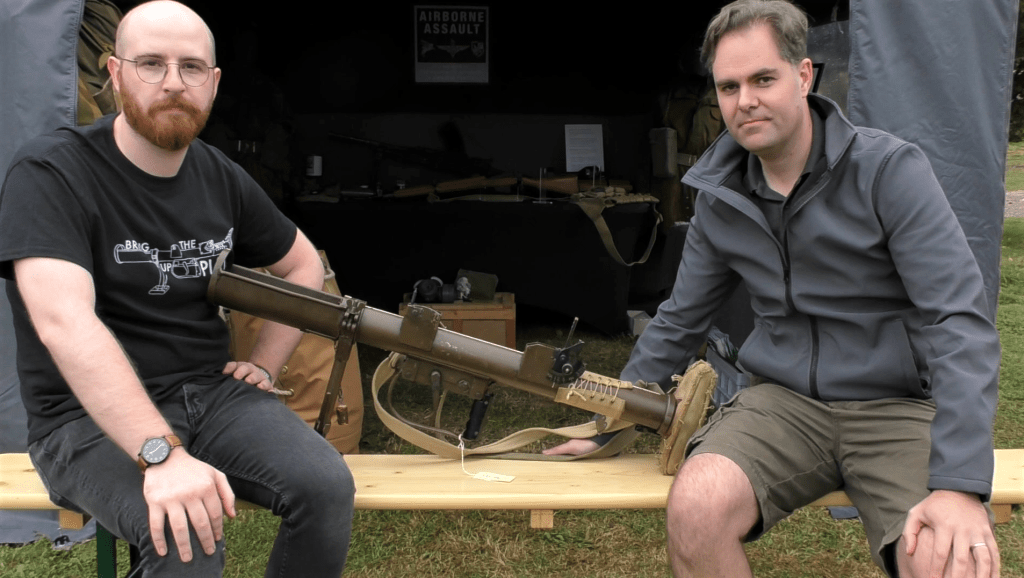
Last weekend at the We Have Ways podcast’s history festival the Airborne Assault Museum brought along a very interesting piece of history – a PIAT with Arnhem provenance. The PIAT had allegedly been dropped during Operation Market Garden but not used. At some point after the battle it was discovered by locals and handed into the Doorwerth Castle Museum, the original airborne museum before it moved to the Hartenstein, and was subsequently gifted the the UK’s Airborne Assault Museum in the 1950s.
Discussing the PIAT with Ramsay of the Airborne Assault Museum (Matthew Moss)
The museum believes the PIAT has much of its original paint and in general the weapon is in excellent shape. It has the earlier rear sight with two apertures for 70 and 100 yards, the later design had three – with a maximum range of 110 yards. This PIAT’s monopod could still be raised and lowered, to elevate the weapon upto 40-degrees for indirect firing.
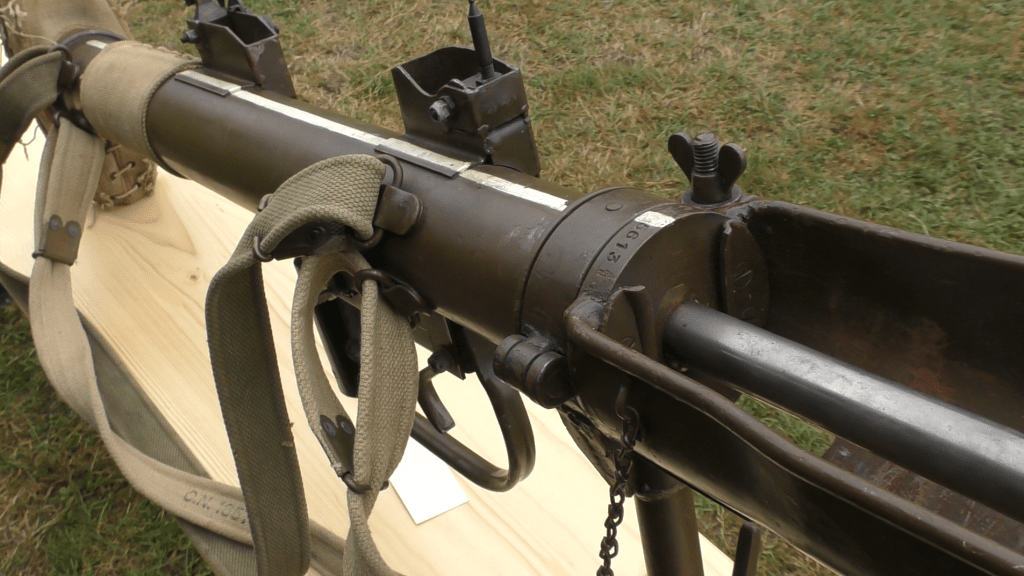
A close up of the PIAT (Mattthew Moss)
The indirect fire quadrant sight is in good condition – complete with its spirit level. The weapon also appears to have its original white indirect fire aiming line along the top of its body and almost pristine webbing – though the butt cover is frayed which isn’t uncommon. Sadly the weapon has been deactivated so we couldn’t open up the action or cock the weapon. It seems to have been welded at the front and rear of the body.
The PIAT is in great shape, albeit deactivated, and it was a pleasure to take a look at a weapon which could be traced back to the battle. Thank you to Ramsay, Ben and Allen of the Airborne Assault Museum for allowing me to examine and film the PIAT, check out the museum’s website here.
If you enjoyed this video and article please consider supporting our work here. We have some great perks available for Patreon Supporters. You can pick up a ‘Bring Up The PIAT’ shirt here. Thank you for your support!
In this video we dive into another item from the TAB Reference Collection. An article taken from a 1955 edition of the Illustrated London News which looks at the British Army’s newest anti-tank weapon – The B.A.T Gun! The L2 B.A.T Gun was a recoilless rifle developed to replace the heavier 17pdr Anti-Tank guns then in service. The B.A.T and its successors remained in service throughout the Cold War.
Today we would consider the illustration an ‘infographic’, it was drawn up with the Ministry of Defence’s assistance by Illustrated London News‘ special artist George Horace Davis who had illustrated hundreds of similar articles including one for the PIAT.
The article, titled ‘Britain’s Latest and Most Powerful Anti-Tank Weapon’, explains not juse the operation of the new gun but also provides some data on weight and comparisons of the new 120mm HESH ammunition with that of previous conventional anti-tank weapons. Check out our video on the 2pdr anti-tank gun and the 6pdr anti-tank gun.
We have many more videos on important and interesting primary source materials in the works. If you enjoy our work please consider supporting us via Patreon for just a $1. Find out more here.
Check out videos on items from our reference collection here.
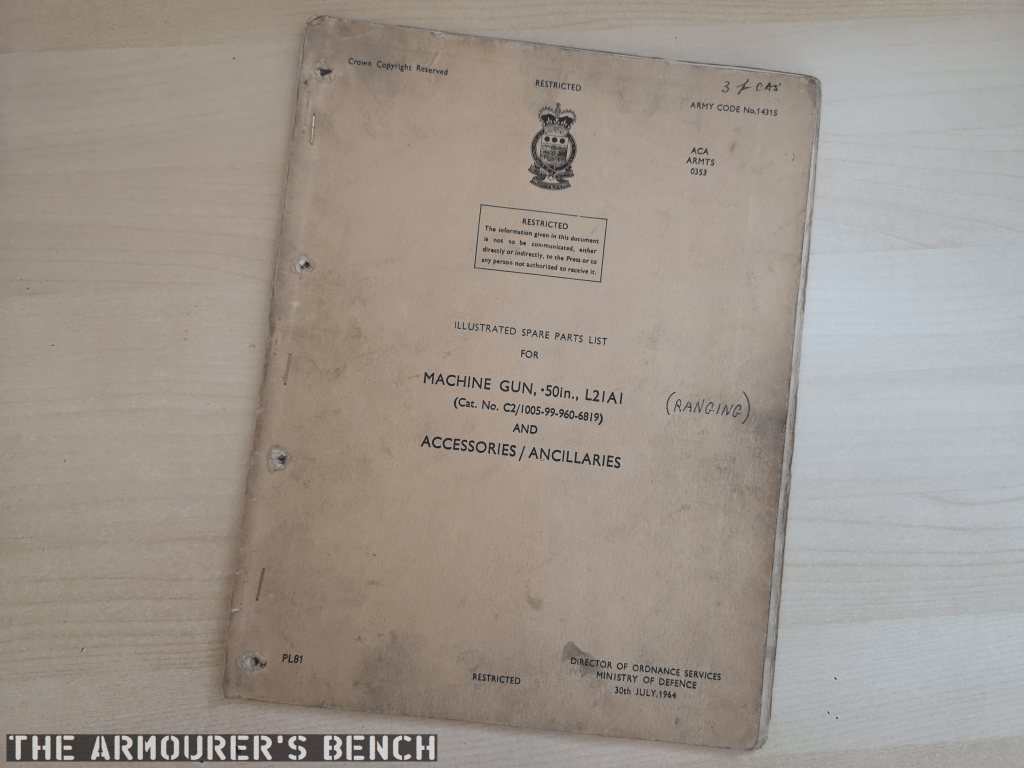
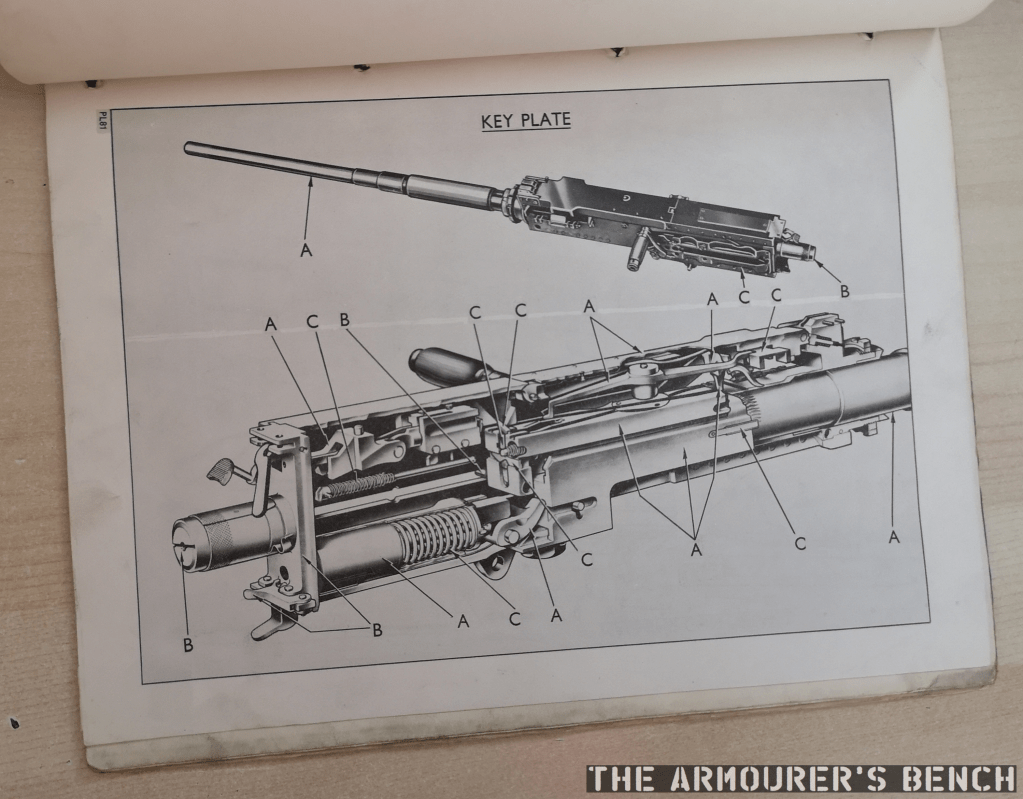
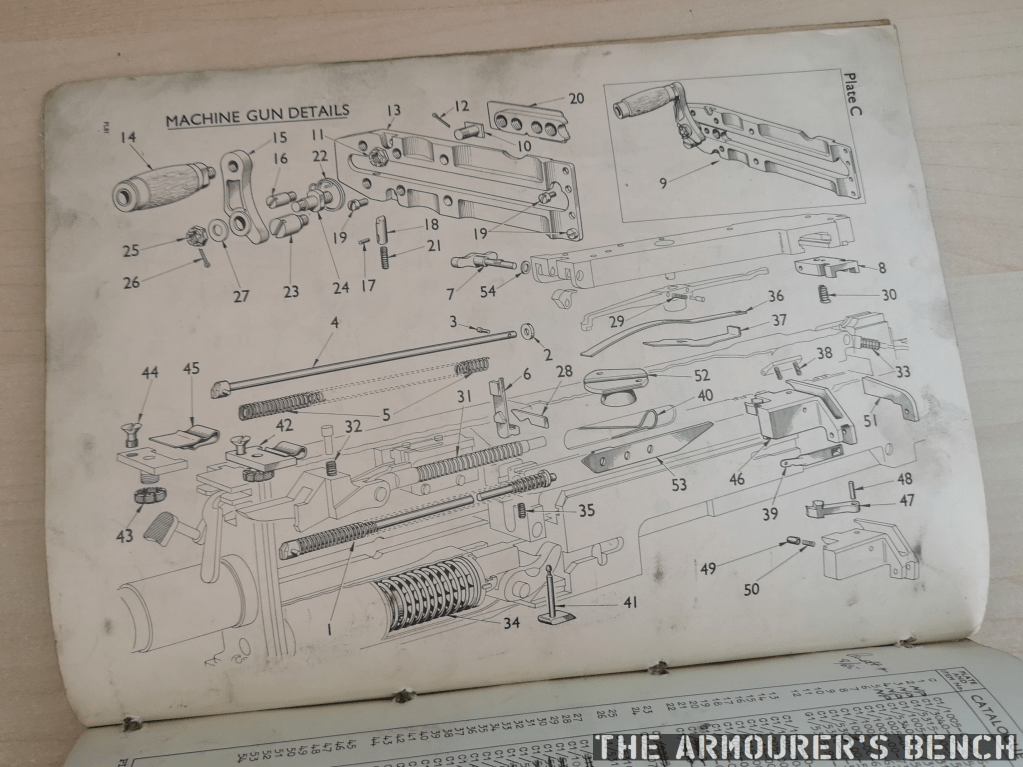
We’re back with another video looking at an item from the TAB reference collection – an illustrated spare parts list for the L21A1. L21A1 is the British designation for the American Browning M2 .50 cal (12.7×99mm) machine gun. A past owner has written ‘Ranging’ on the cover, perhaps suggesting this booklet specifically covered the guns used by the UK’s Royal Armoured Corps in its Centurion and Chieftain tanks.
We have many more videos on important and interesting primary source materials in the works. If you enjoy our work please consider supporting us via Patreon for just a $1. Find out more here.
Check out videos on items from our reference collection here.
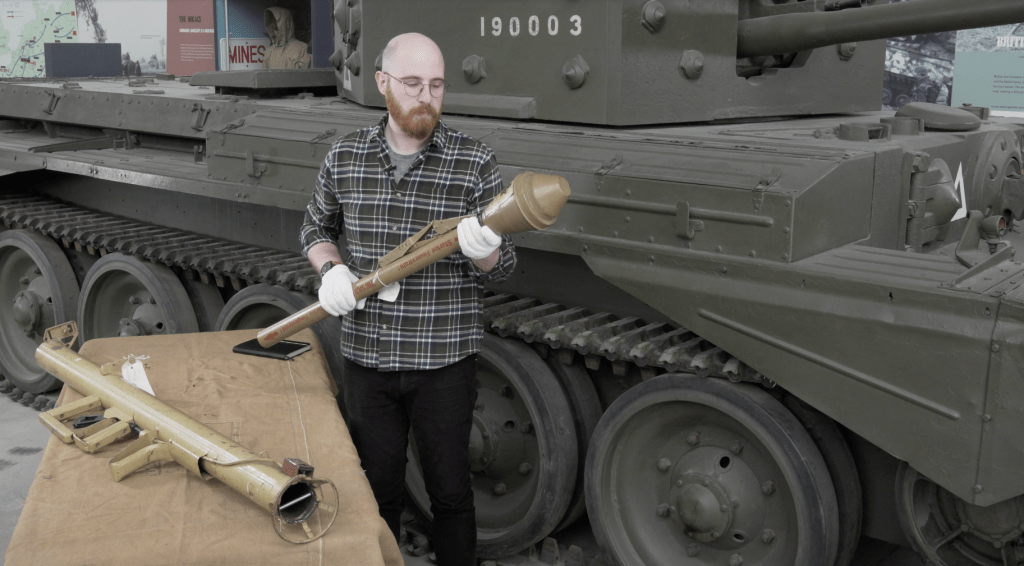
Earlier this year I had the pleasure of travelling to The Tank Museum in Bovington to film some segments for the new documentary on the Rhineland Campaign – ‘Rhineland 45‘. Not all of the segments I filmed discussing weapons could be included in the finished documentary – I filmed quite a few – so I’m pleased to share a couple here. This one looks at German infantry anti-tank weapons: the Panzerfaust and Panzerschreck. Thanks again to Realtime History for inviting me to take part, check out the documentary here.
Check out the first video of this series on the use of the PIAT during the Rhineland campaign here.
If you enjoyed this video and article please consider supporting our work here. We have some great perks available for Patreon Supporters. Thank you for your support!